
Frosting these types of cakes can be stressful because they are usually made for an important type of event that only celebrating with a multi-layer cake can provide. While yes, it is true that you can achieve the same general function with a butter knife and a plate because in essence “how to frost a layer cake” translates to slathering frosting between layers of baked butter and flour but there are a few tricks that will make your cake look super fancy for super little effort. Let’s get started!
How To Frost A Layer Cake!
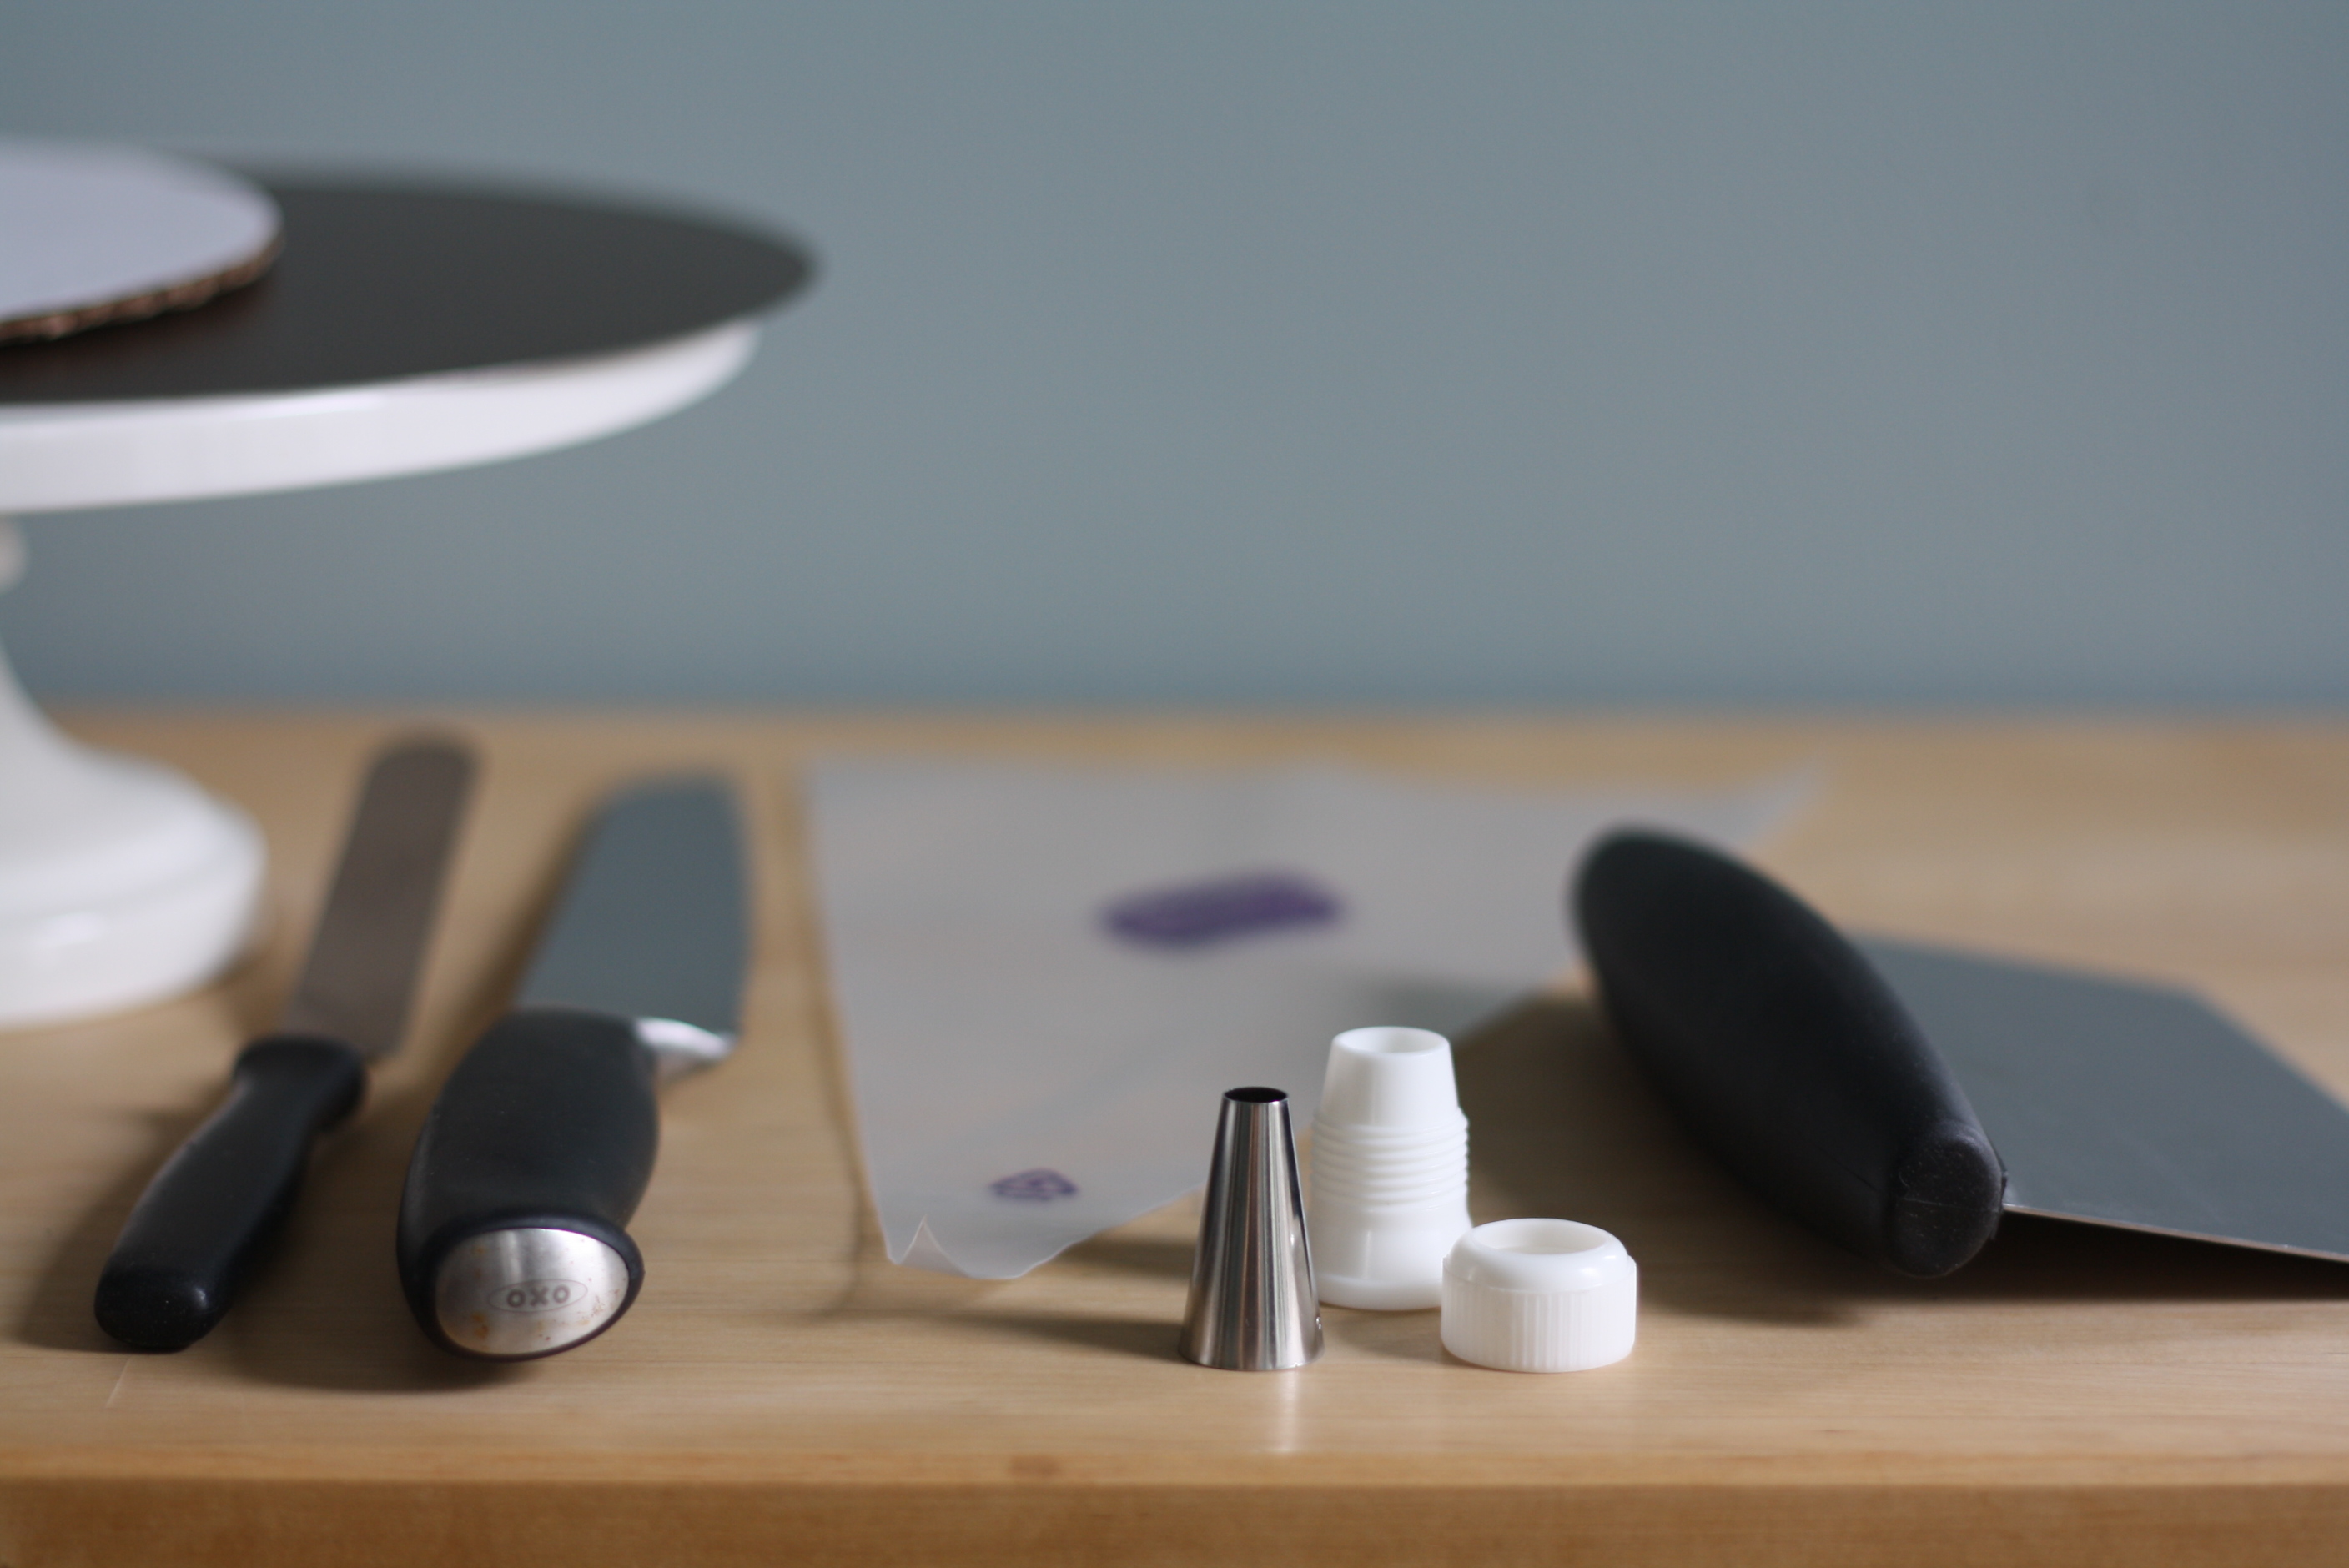
Select your tools. As any building contractor will tell you, the final outcome of your project is greatly enhanced with the correct tool. Same goes with cake decorating. These are the objects that I find the most helpful and essential in the process of layer cake-decorating: a cardboard cake round, the bottom of a removable tart pan, a cake stand, an offset spatula, a sharp serrated knife, a pastry bag fitted with a #12 tip, and a pastry scraper.
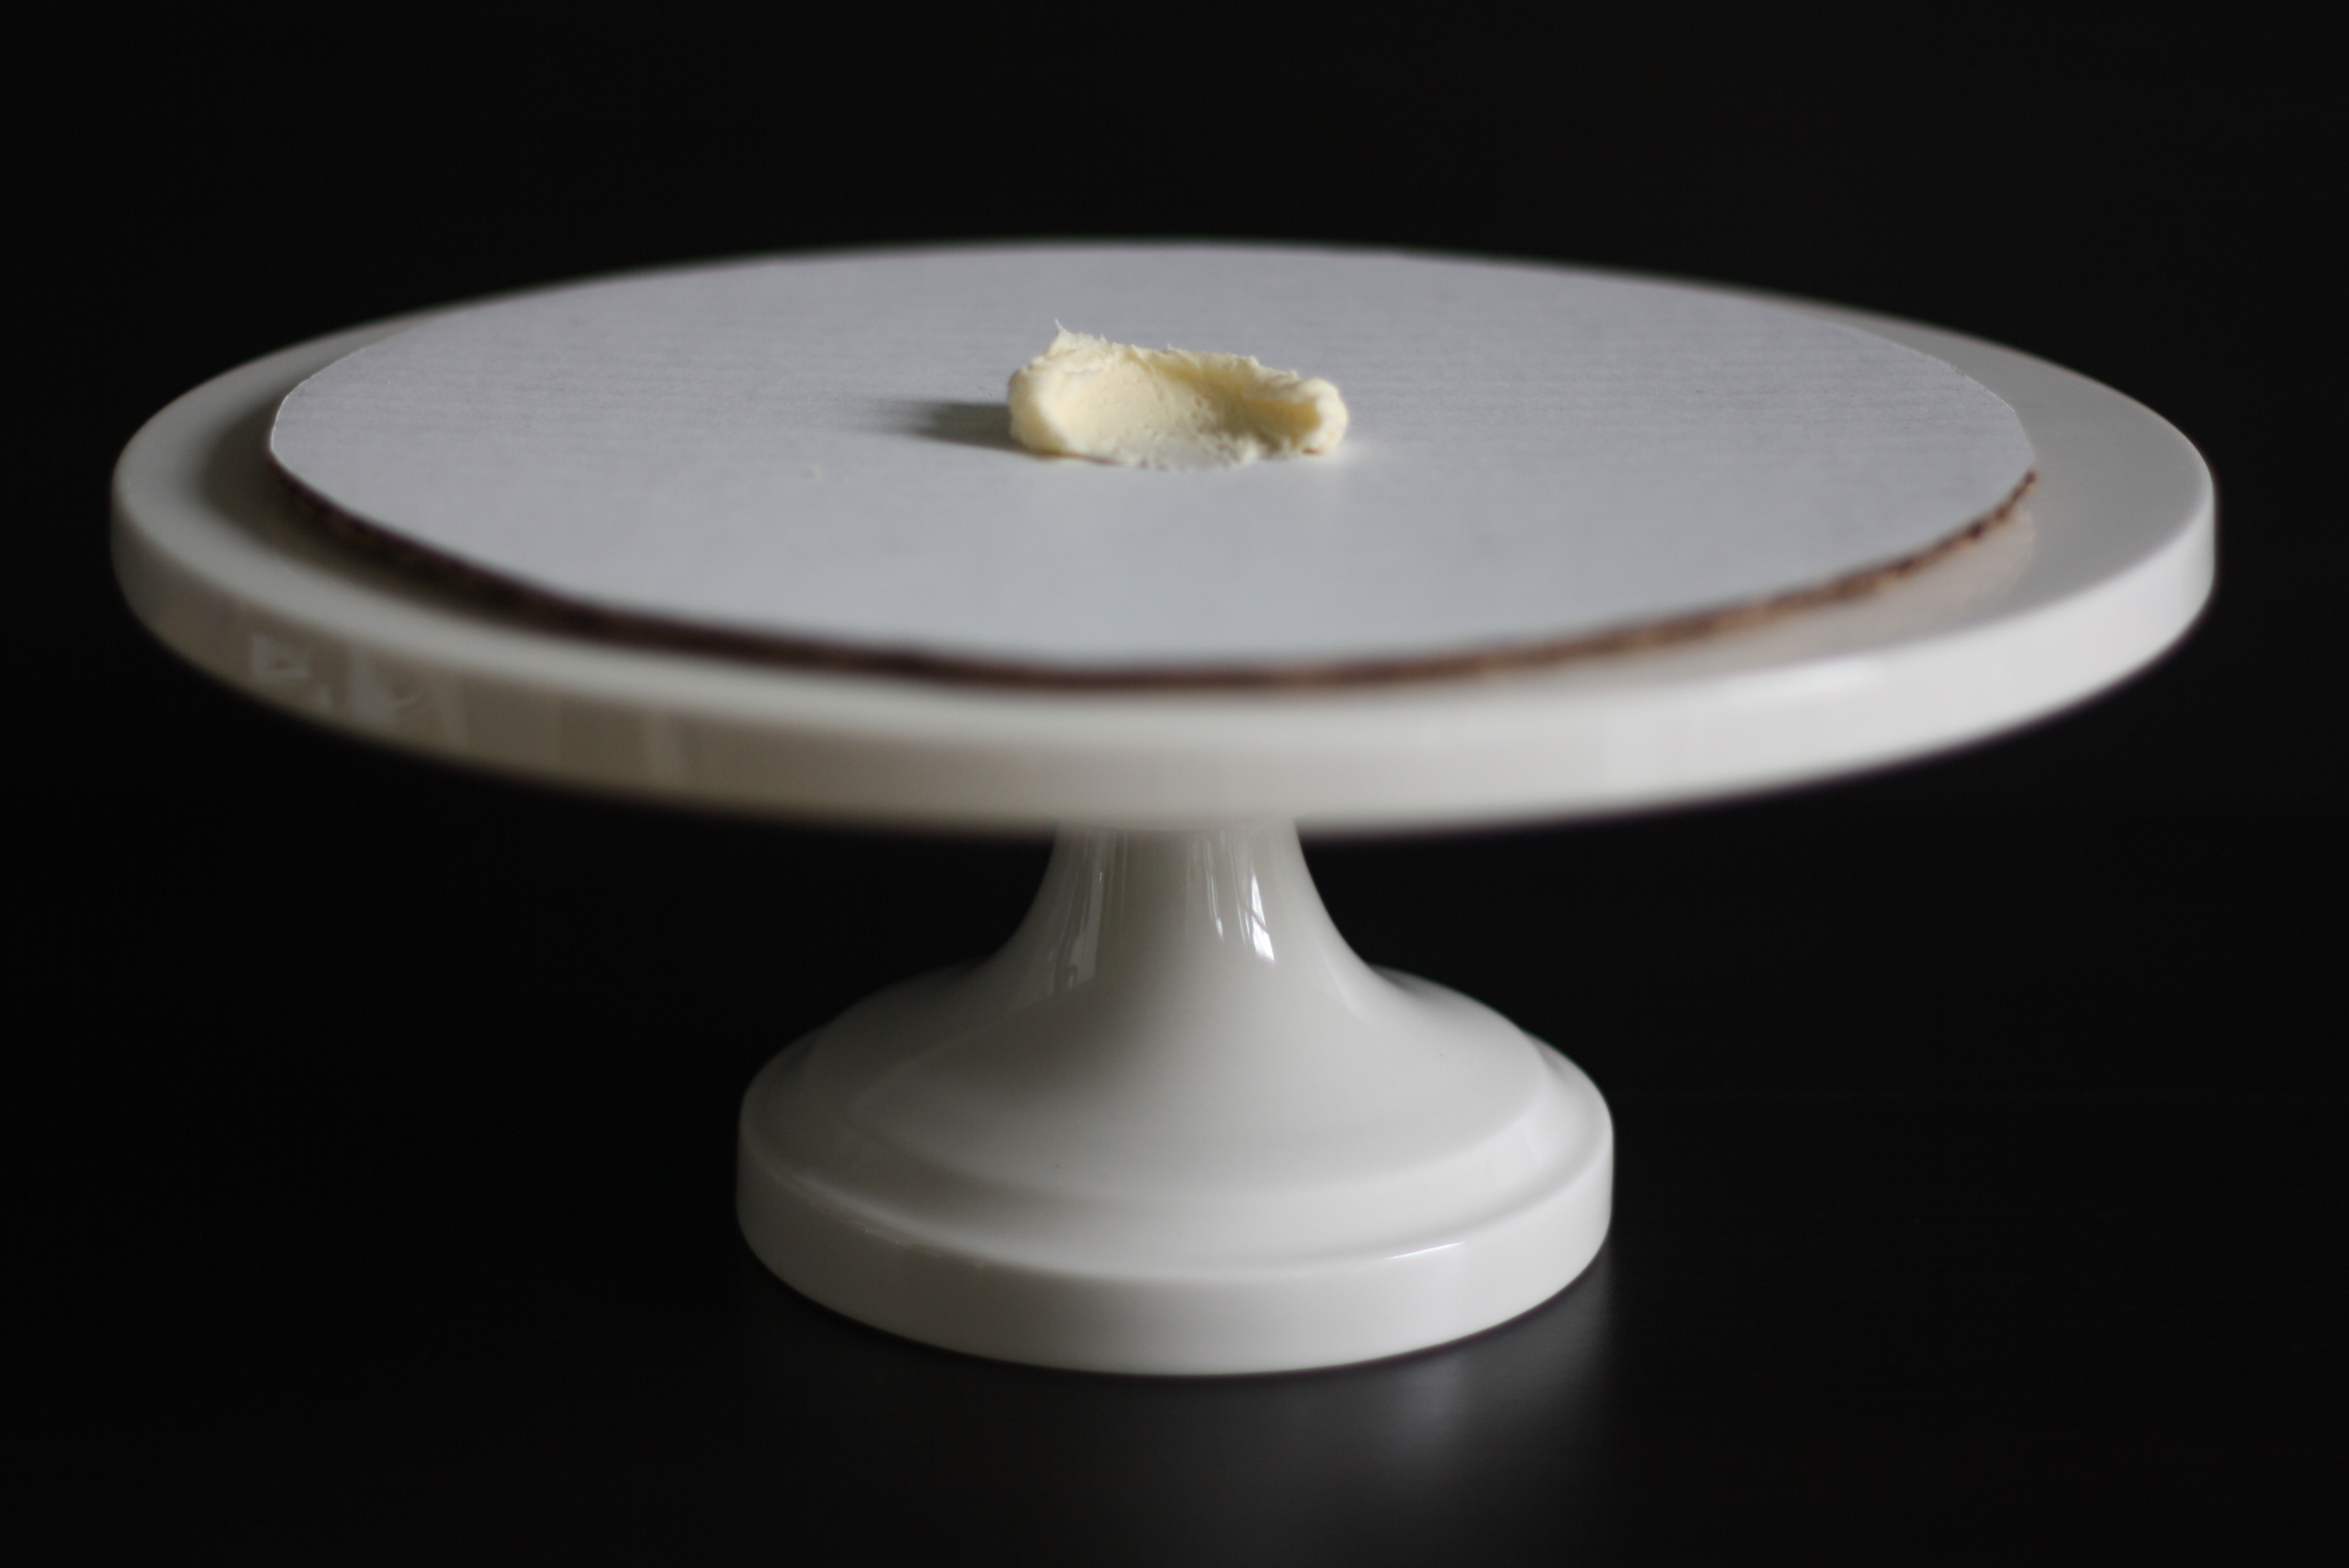
Prepare your base. This cake stand is where we are going to build our cake. I cut my cake board the exact same size as my cake so that it would not show. If you aren’t transporting your cake, you don’t really need a board but it helps to give the cake a base if you happen to need to move it, or if your cake won’t fit into your fridge on the stand. Begin by making a few tape loops and securing the cardboard base to the stand, then put a small dab of frosting on the board (or cake stand base) which makes sure that your cake won’t slip around. Cut a few strips of parchment or waxed paper and place them underneath the cake board. This will make sure that your cake plate stays clean!

Cut your cake. It is easiest if you begin with cake that has been fully chilled because it makes the cake easier to work with. Do not try to frost a warm cake. This will end in a disaster. I’m not trying to be dramatic but it is the truth. A chilled cake also helps in terms of timing. I baked my cake the night before, wrapped it well in plastic then chilled the layers in the fridge overnight. If your cake baked up with a domed-shaped top then this is the time to trim off any “dome-age” to make sure that you will have even, flat layers of cake in each slice. Mine ended up pretty flat so I didn’t bother trimming the tops. In this tutorial we are making a four layer cake. To cut each layer in half, hold the top of cake with one hand and with the other hand rotate the cake while gently using a serrated knife to cut each cake round into two layers. In the end you should have four thin layers of cake. Next use the bottom of a removable tart pan to transfer the first layer to the cake plate. You want to put this layer on the cake stand cut-side down.
Frost the first layer. I used about a third of a cup of frosting between each layer. I like a cake on the thinly-frosted side but use as much as your heart desires. The only important thing is that you use the same amount of frosting between each layer so that you end up with an evenly frosted cake in the end. Use your offset spatula to spread your frosting all the way to the edges of the cake. Another trick: designate a spatula and a spoon for your bowl of frosting and use them to transfer frosting from the bowl to the cake. You don’t want to use your offset spatula in the bowl of clean frosting because you will inevitably get crumbs in it and our goal with this task is to have crumb-free frosting.
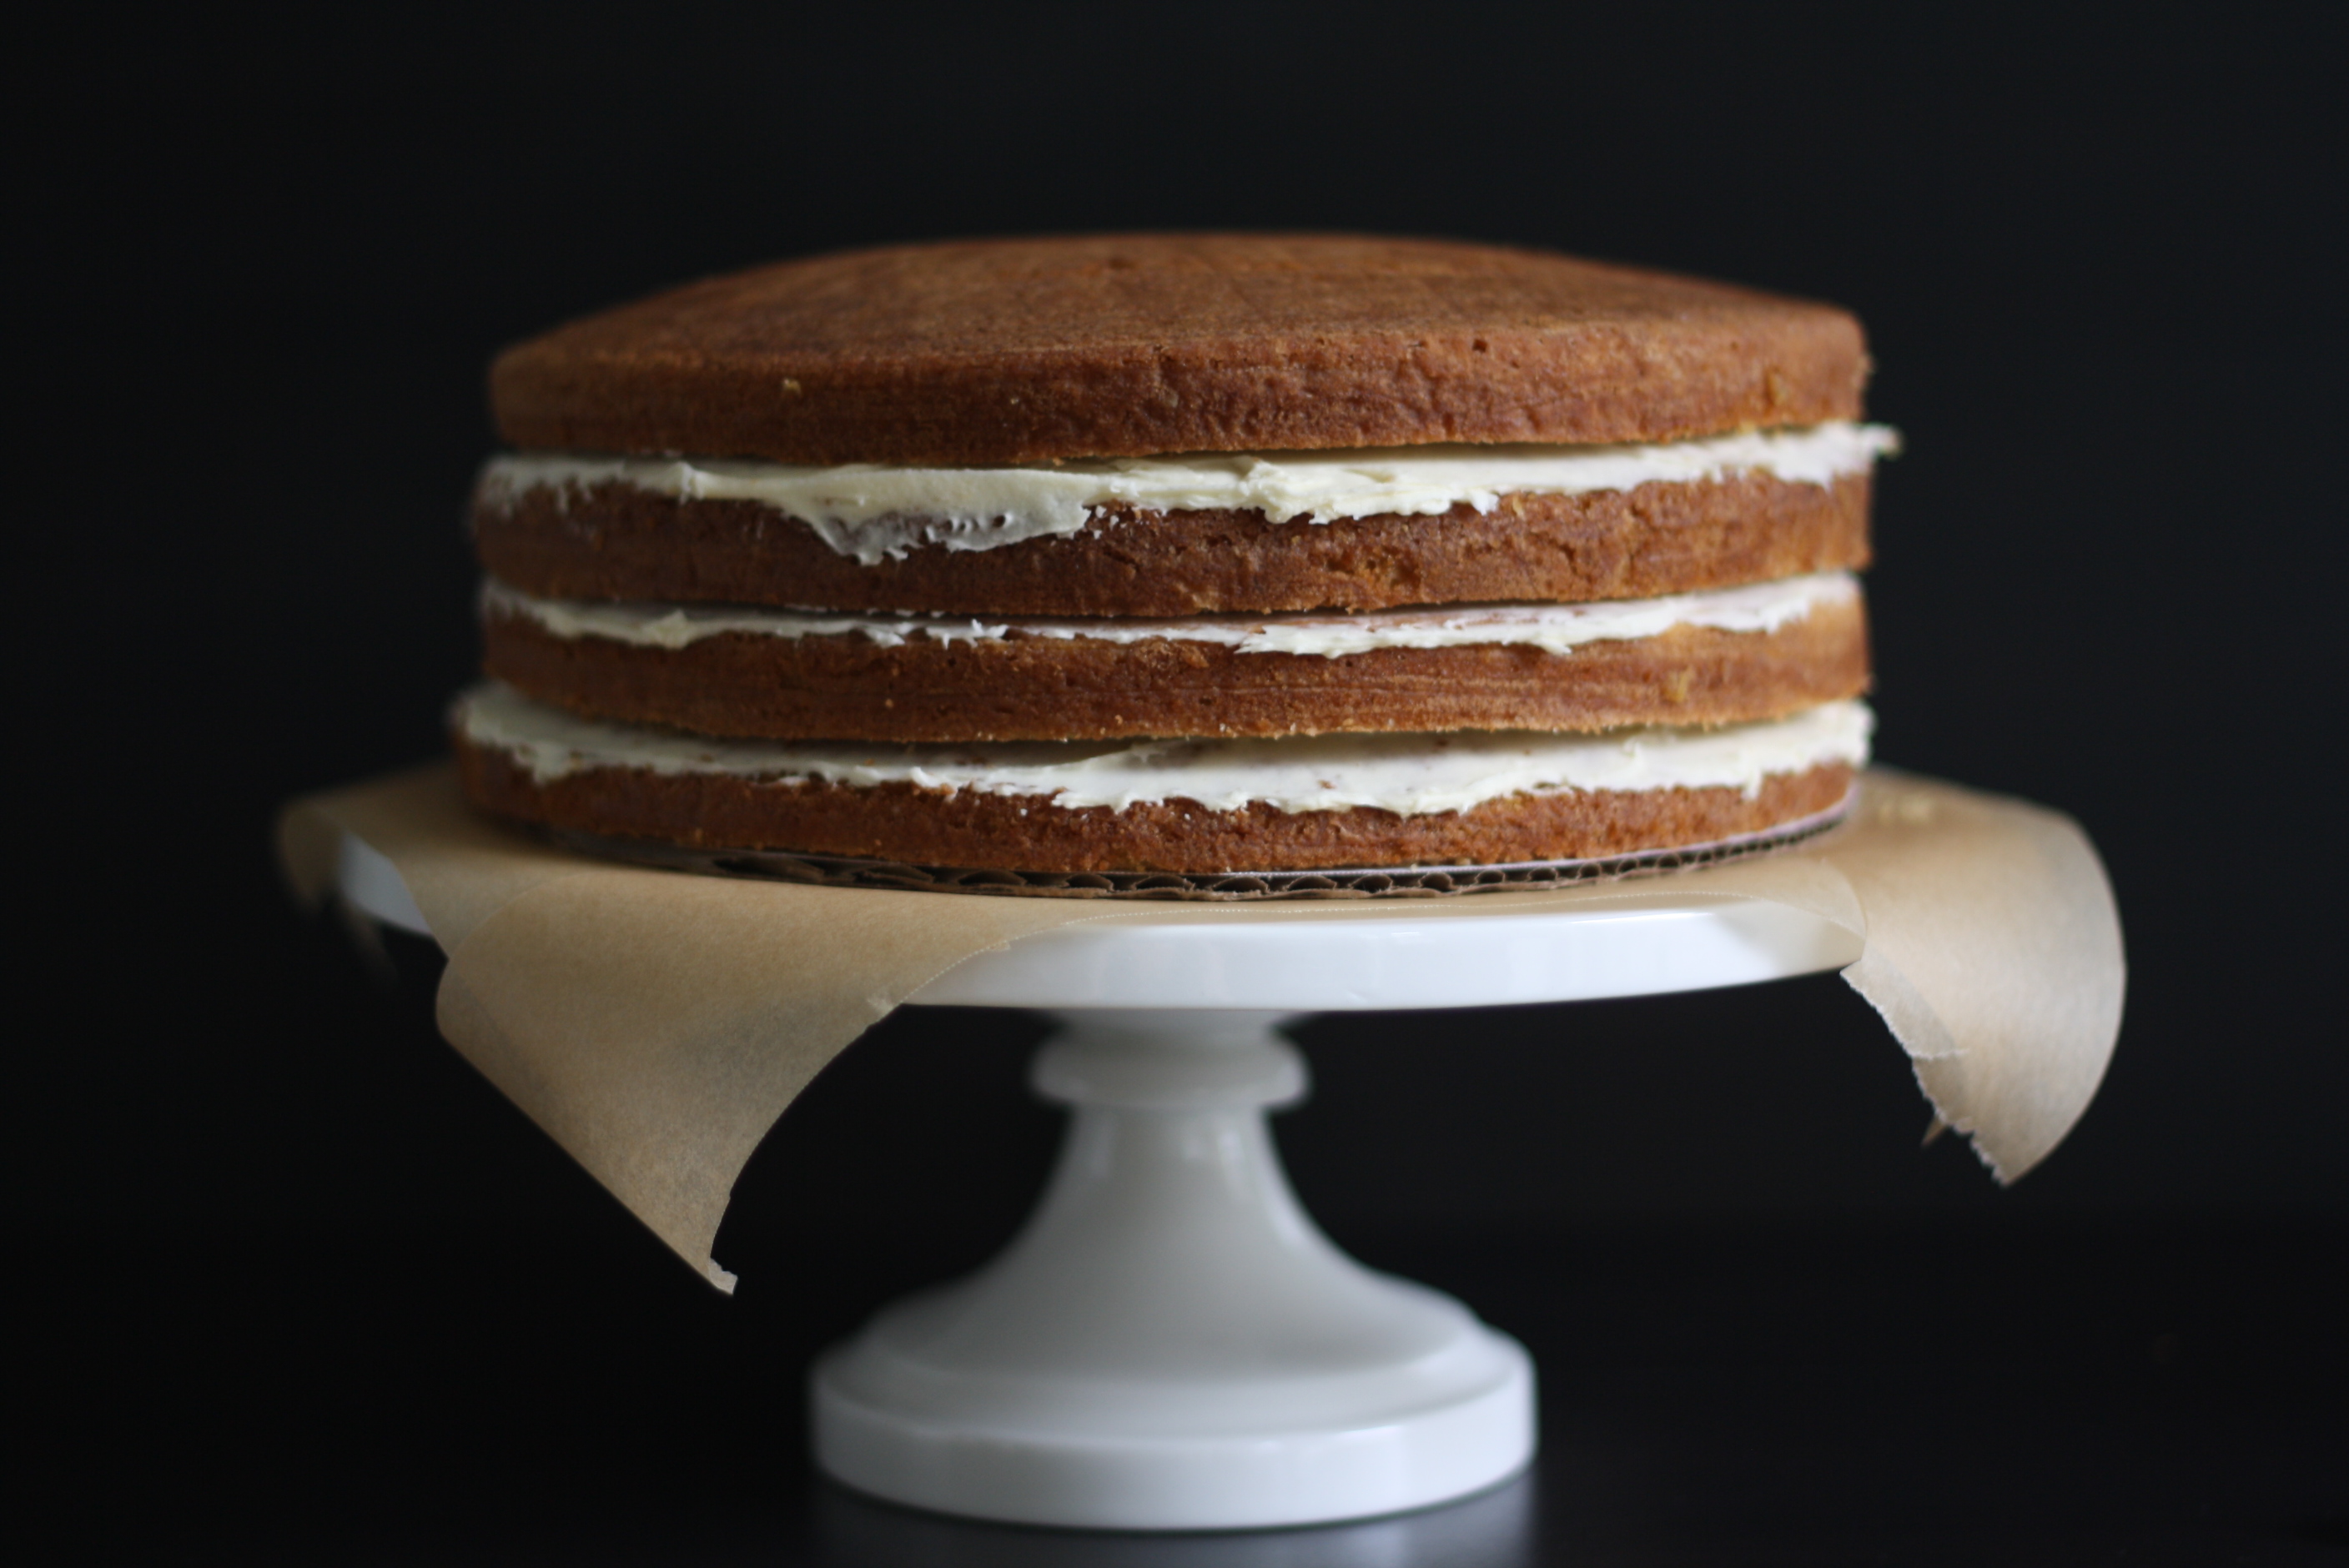
Repeat with remaining layers. Cake, frosting, cake, frosting. You know the drill. Just be sure that the cut-side down of cake goes on top of the frosting and that your last layer has the bottom facing upwards. This makes sure that – you guessed it – there are as little crumbs as possible and the top of the cake is as smooth of a surface as possible.
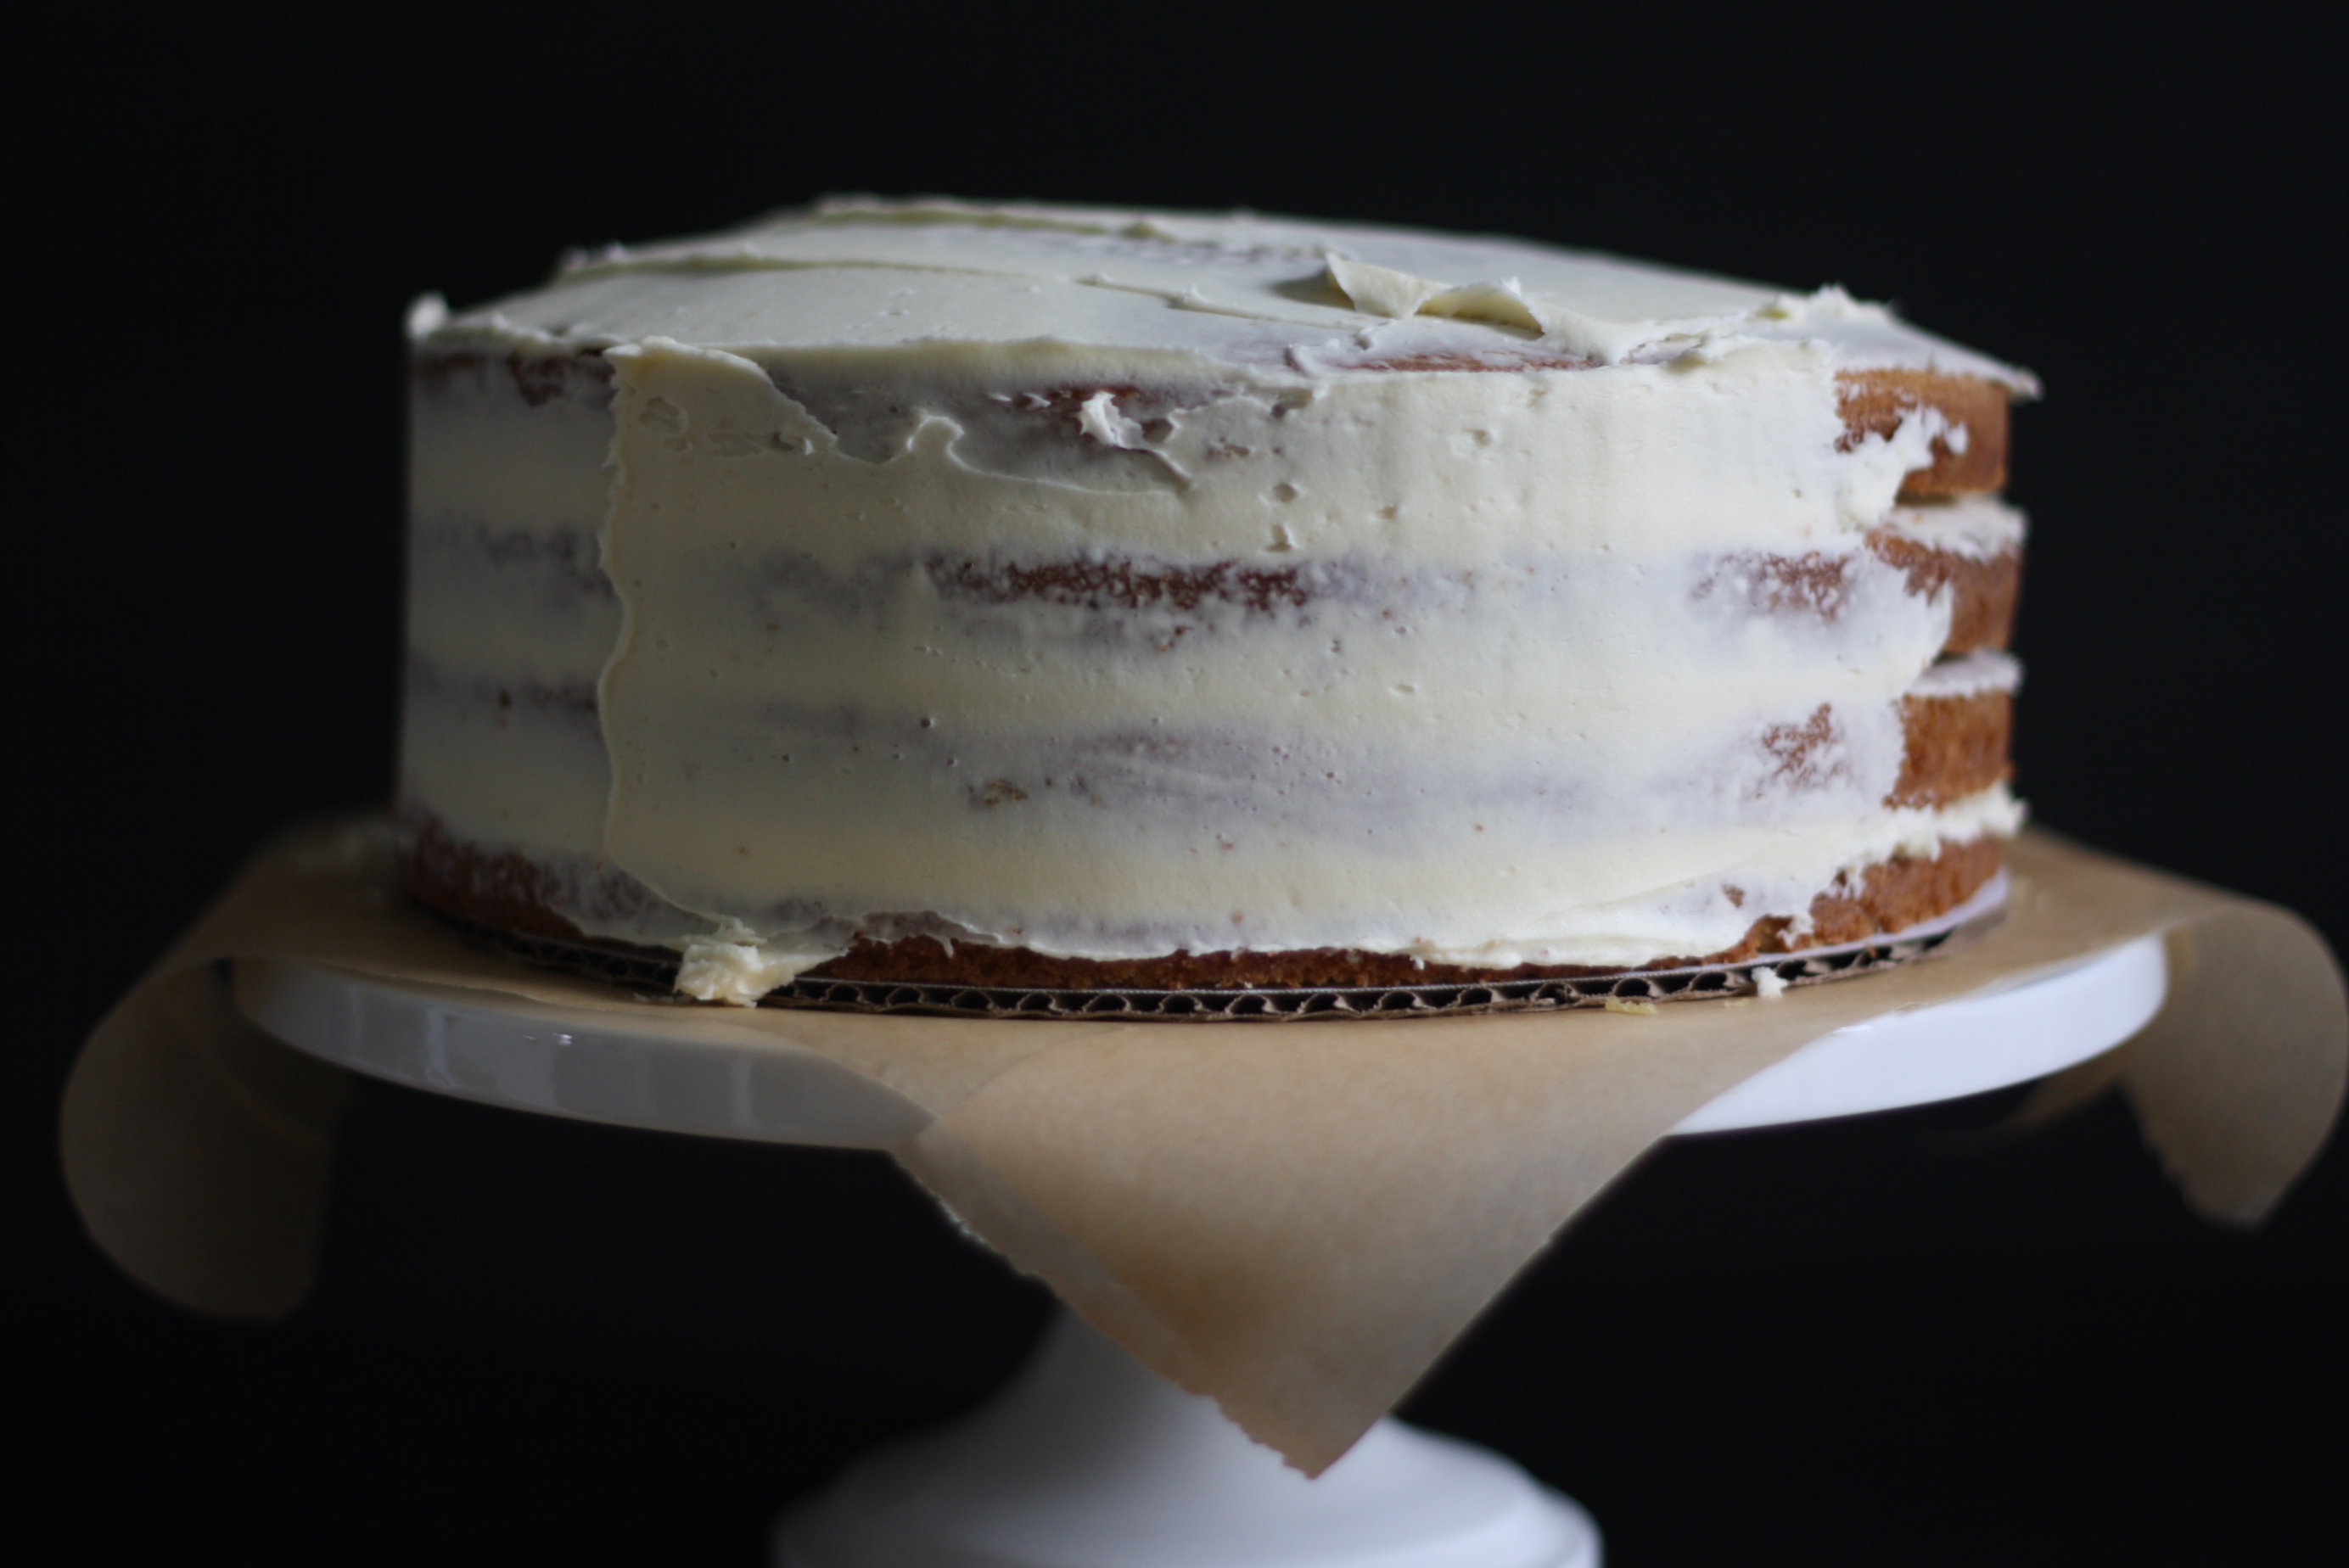
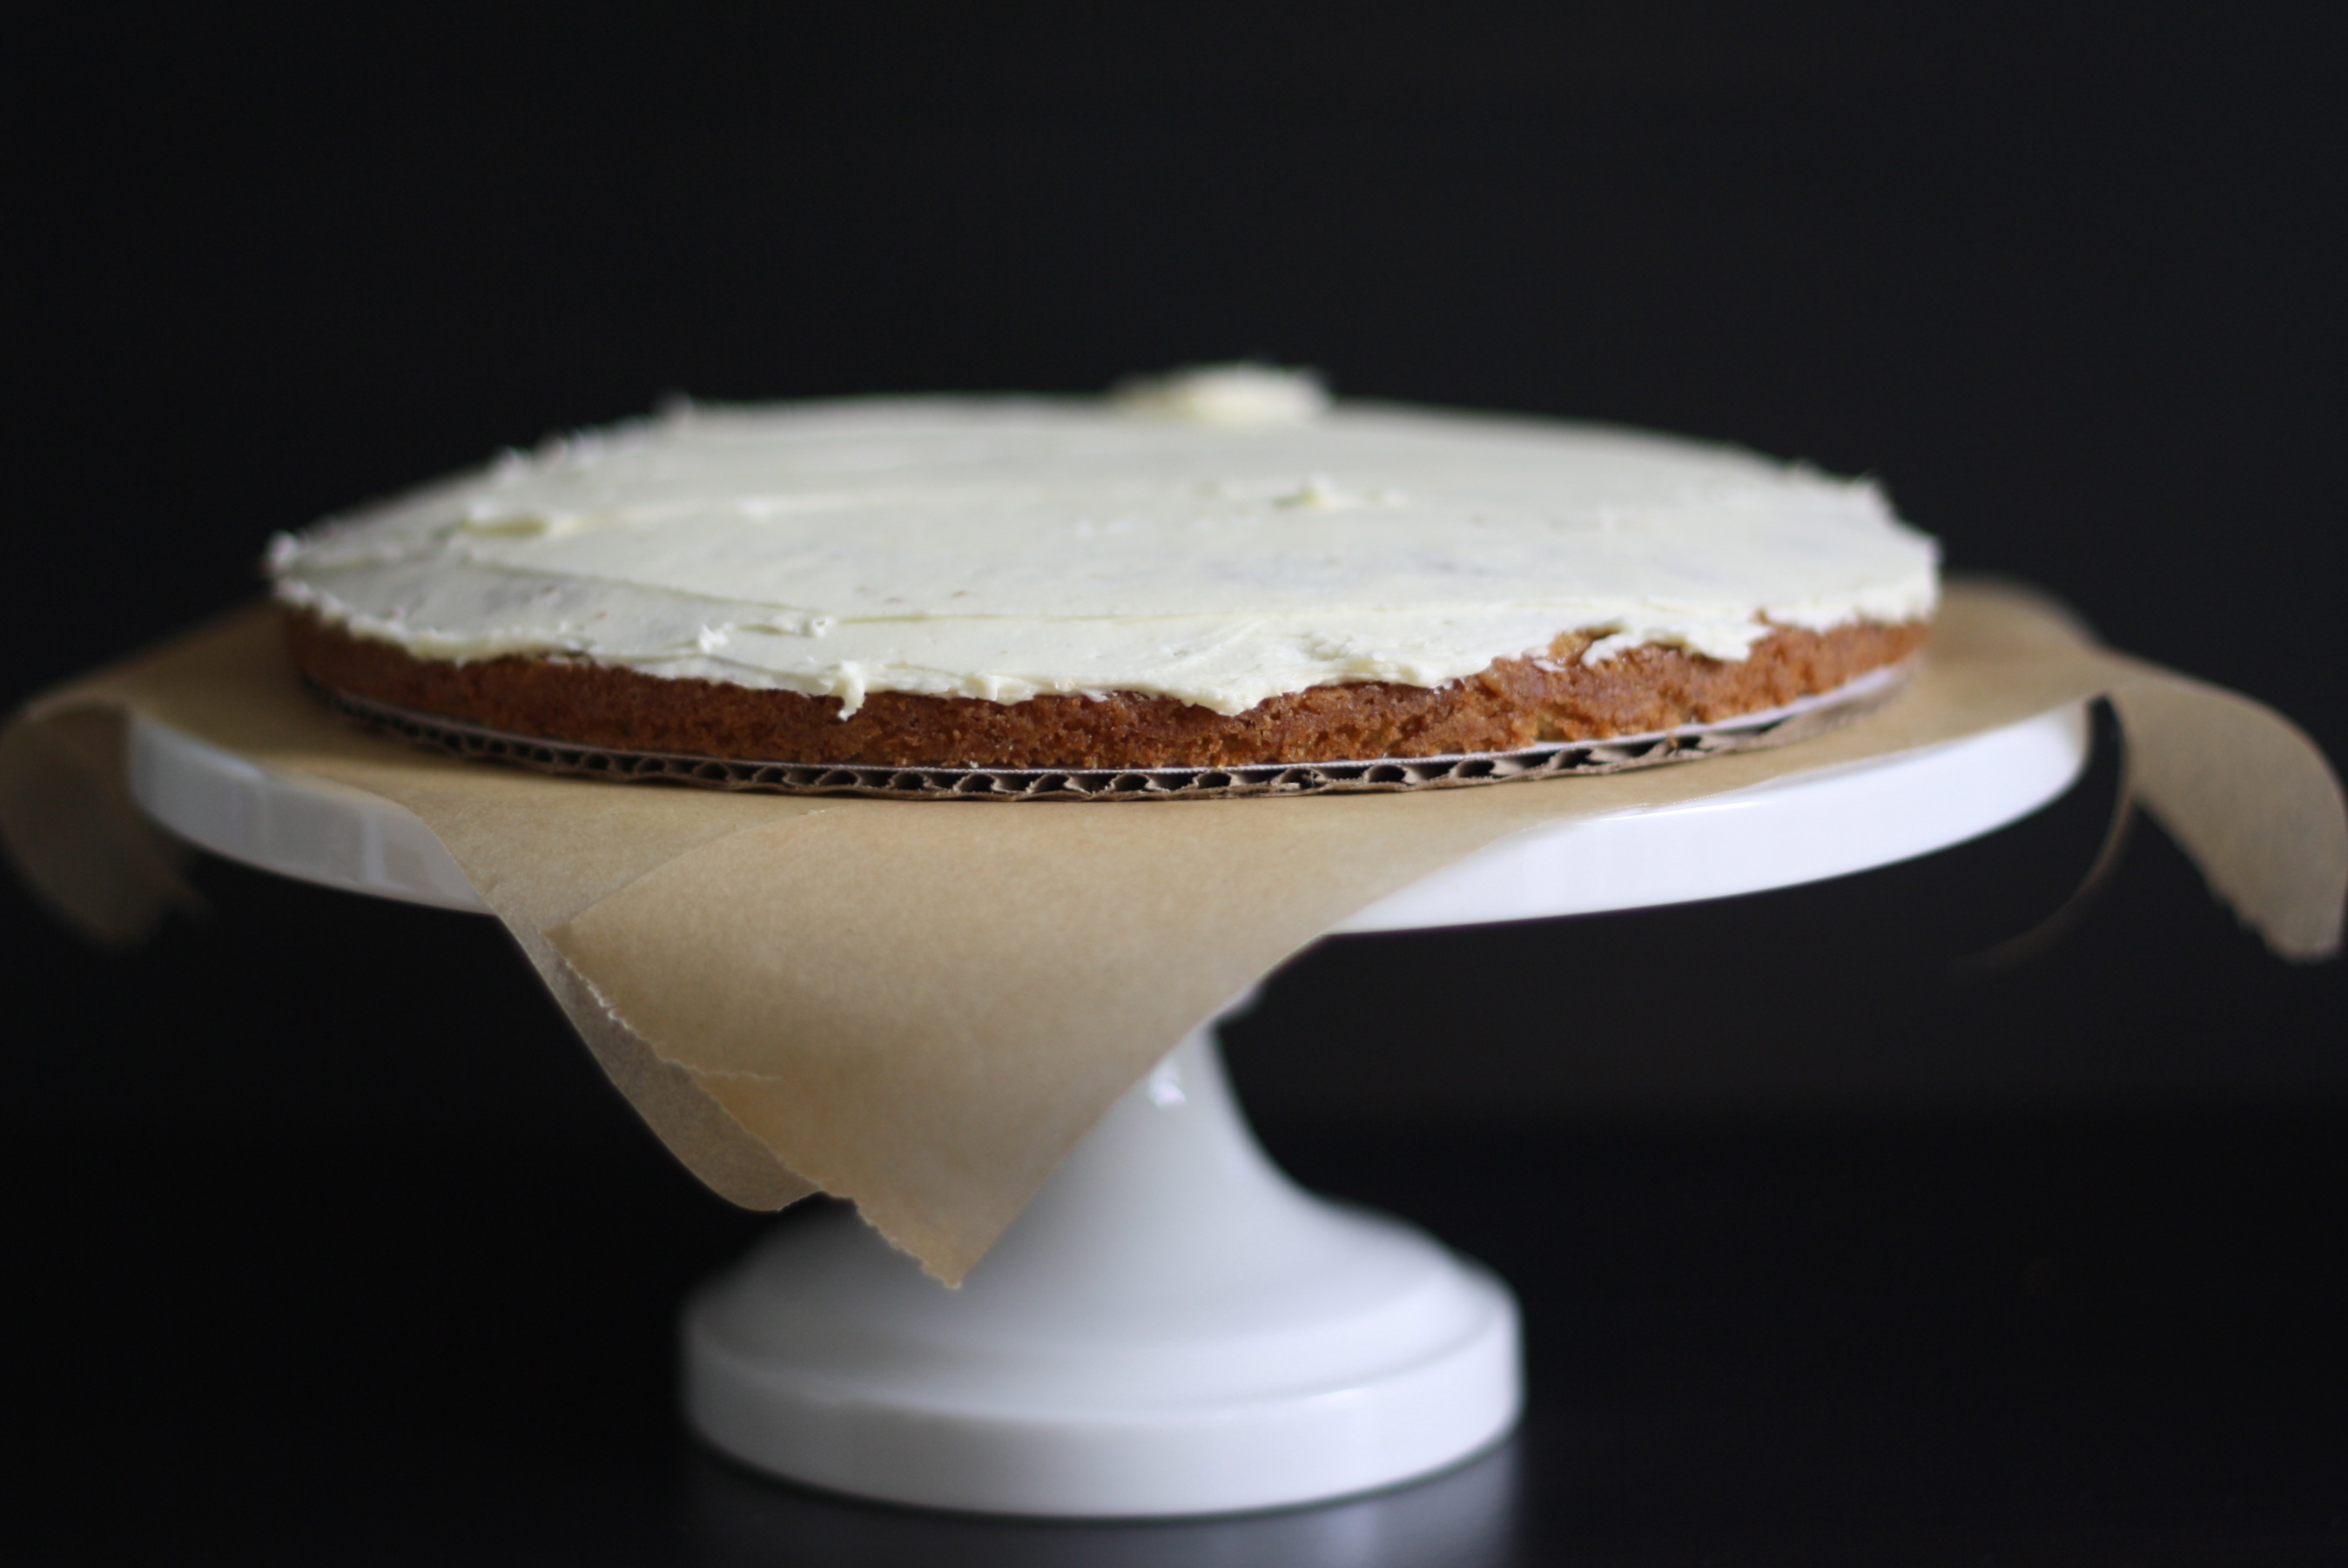
Apply the crumb coat. Apply a thin layer of frosting over the top and sides of your cake. It is okay for the cake to show through, you just want to seal in any crumbs so they won’t show in the final top coat.
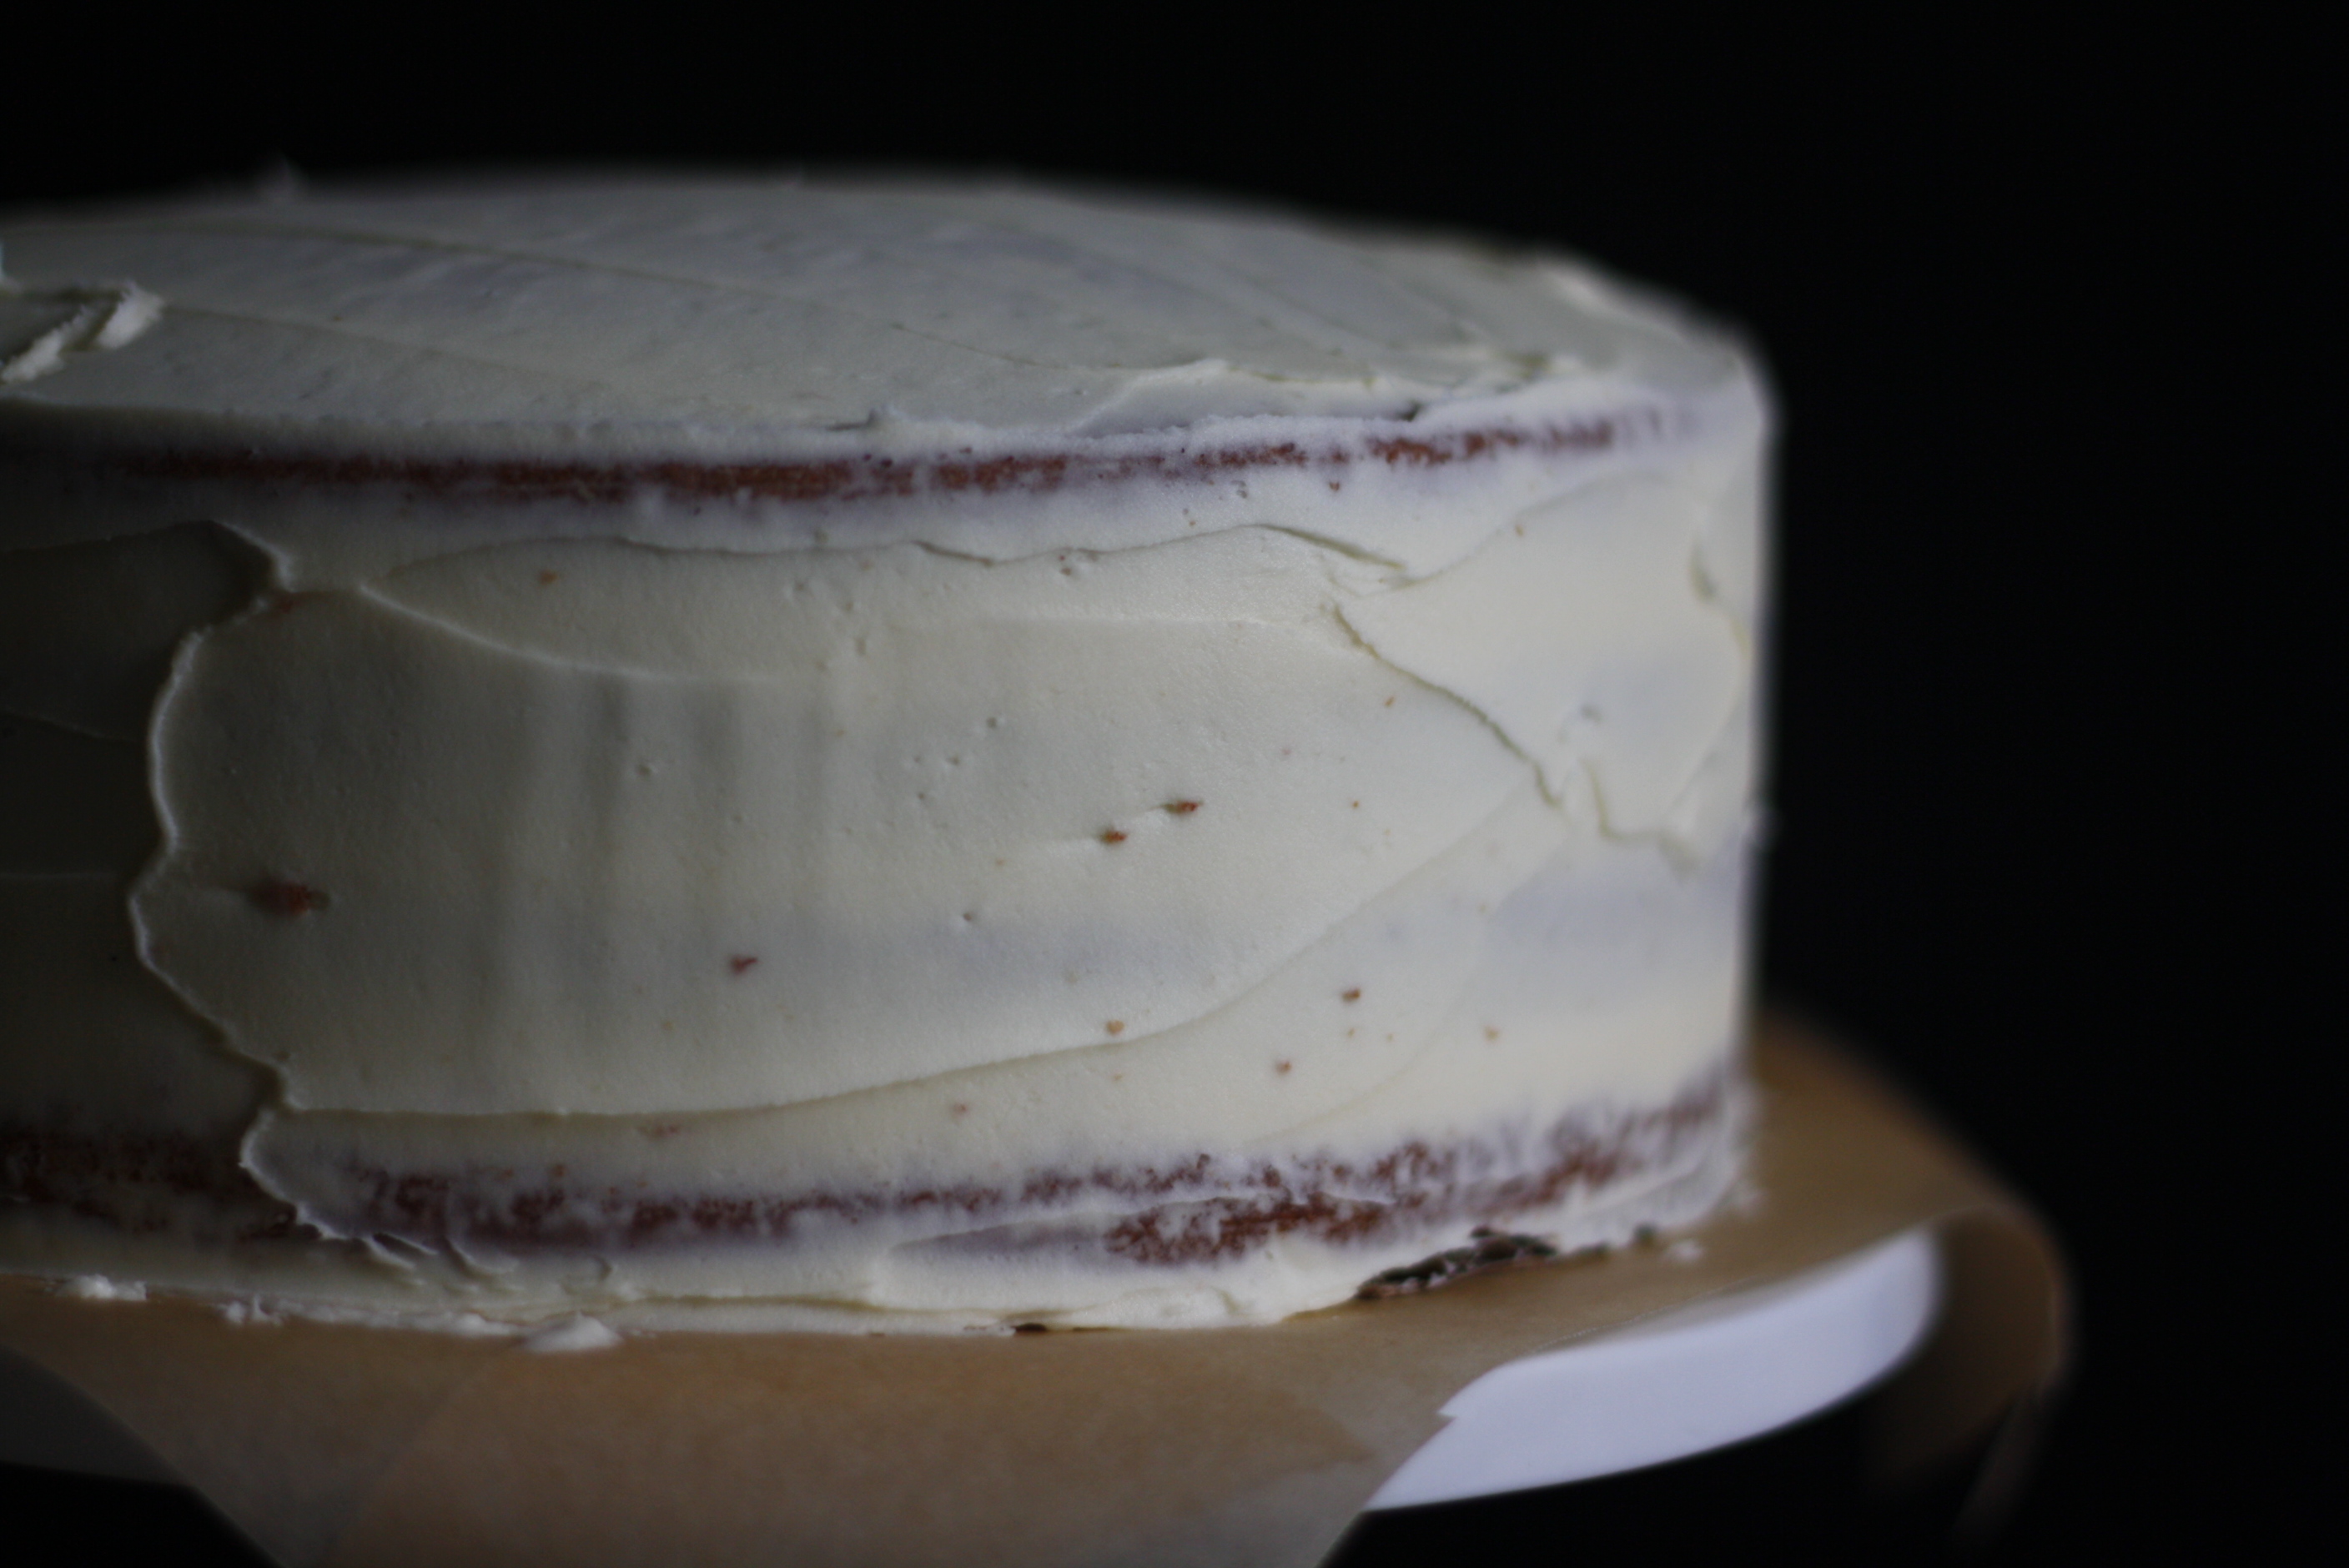
Chill for 30 minutes. This sets your crumb coat. Your cake is done chilling when a lightly-pressed finger comes away clean. If your frosting is still a little sticky – keep on chillin’.
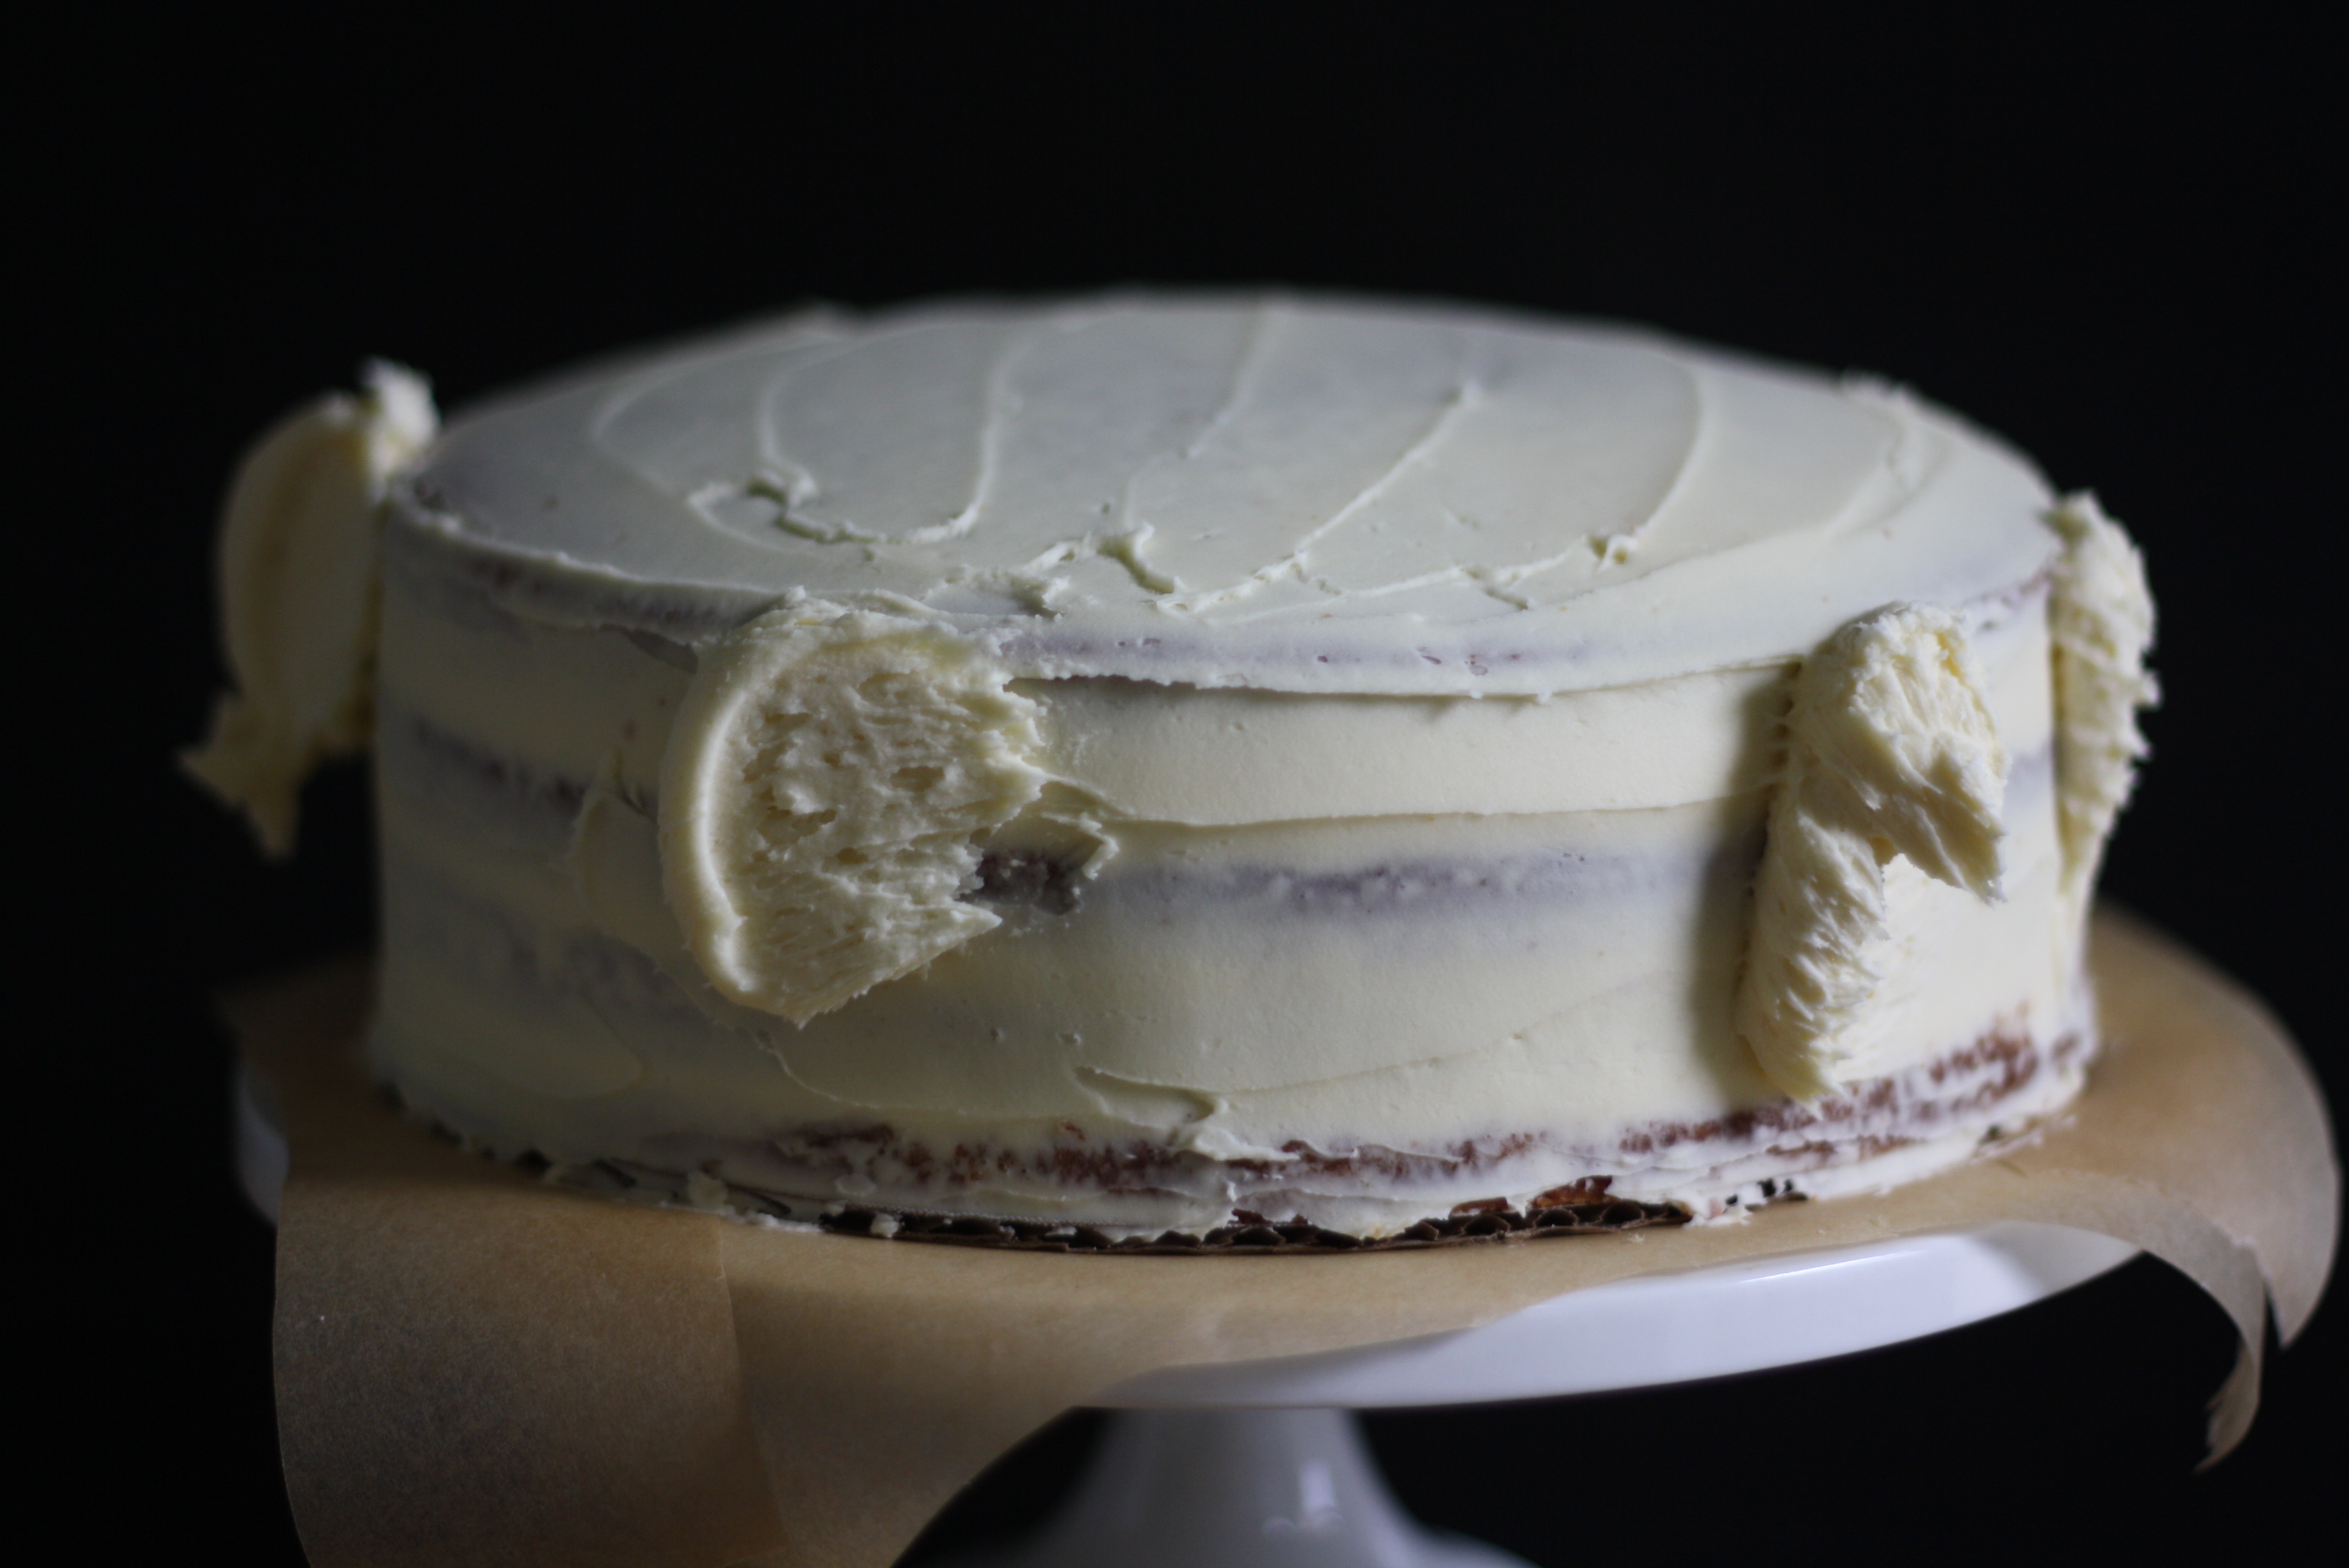
Apply outer layer of frosting. Everyone has their own way of doing cake frosting, and this is my technique to make sure my final layer is evenly applied. I spread frosting every few inches all the way around the cake and the top then use my offset spatula to smooth them all together. I find I must pace myself with the frosting applications otherwise I will end up with one side that is frosting heavy and another that looks a little wimpy and sad.
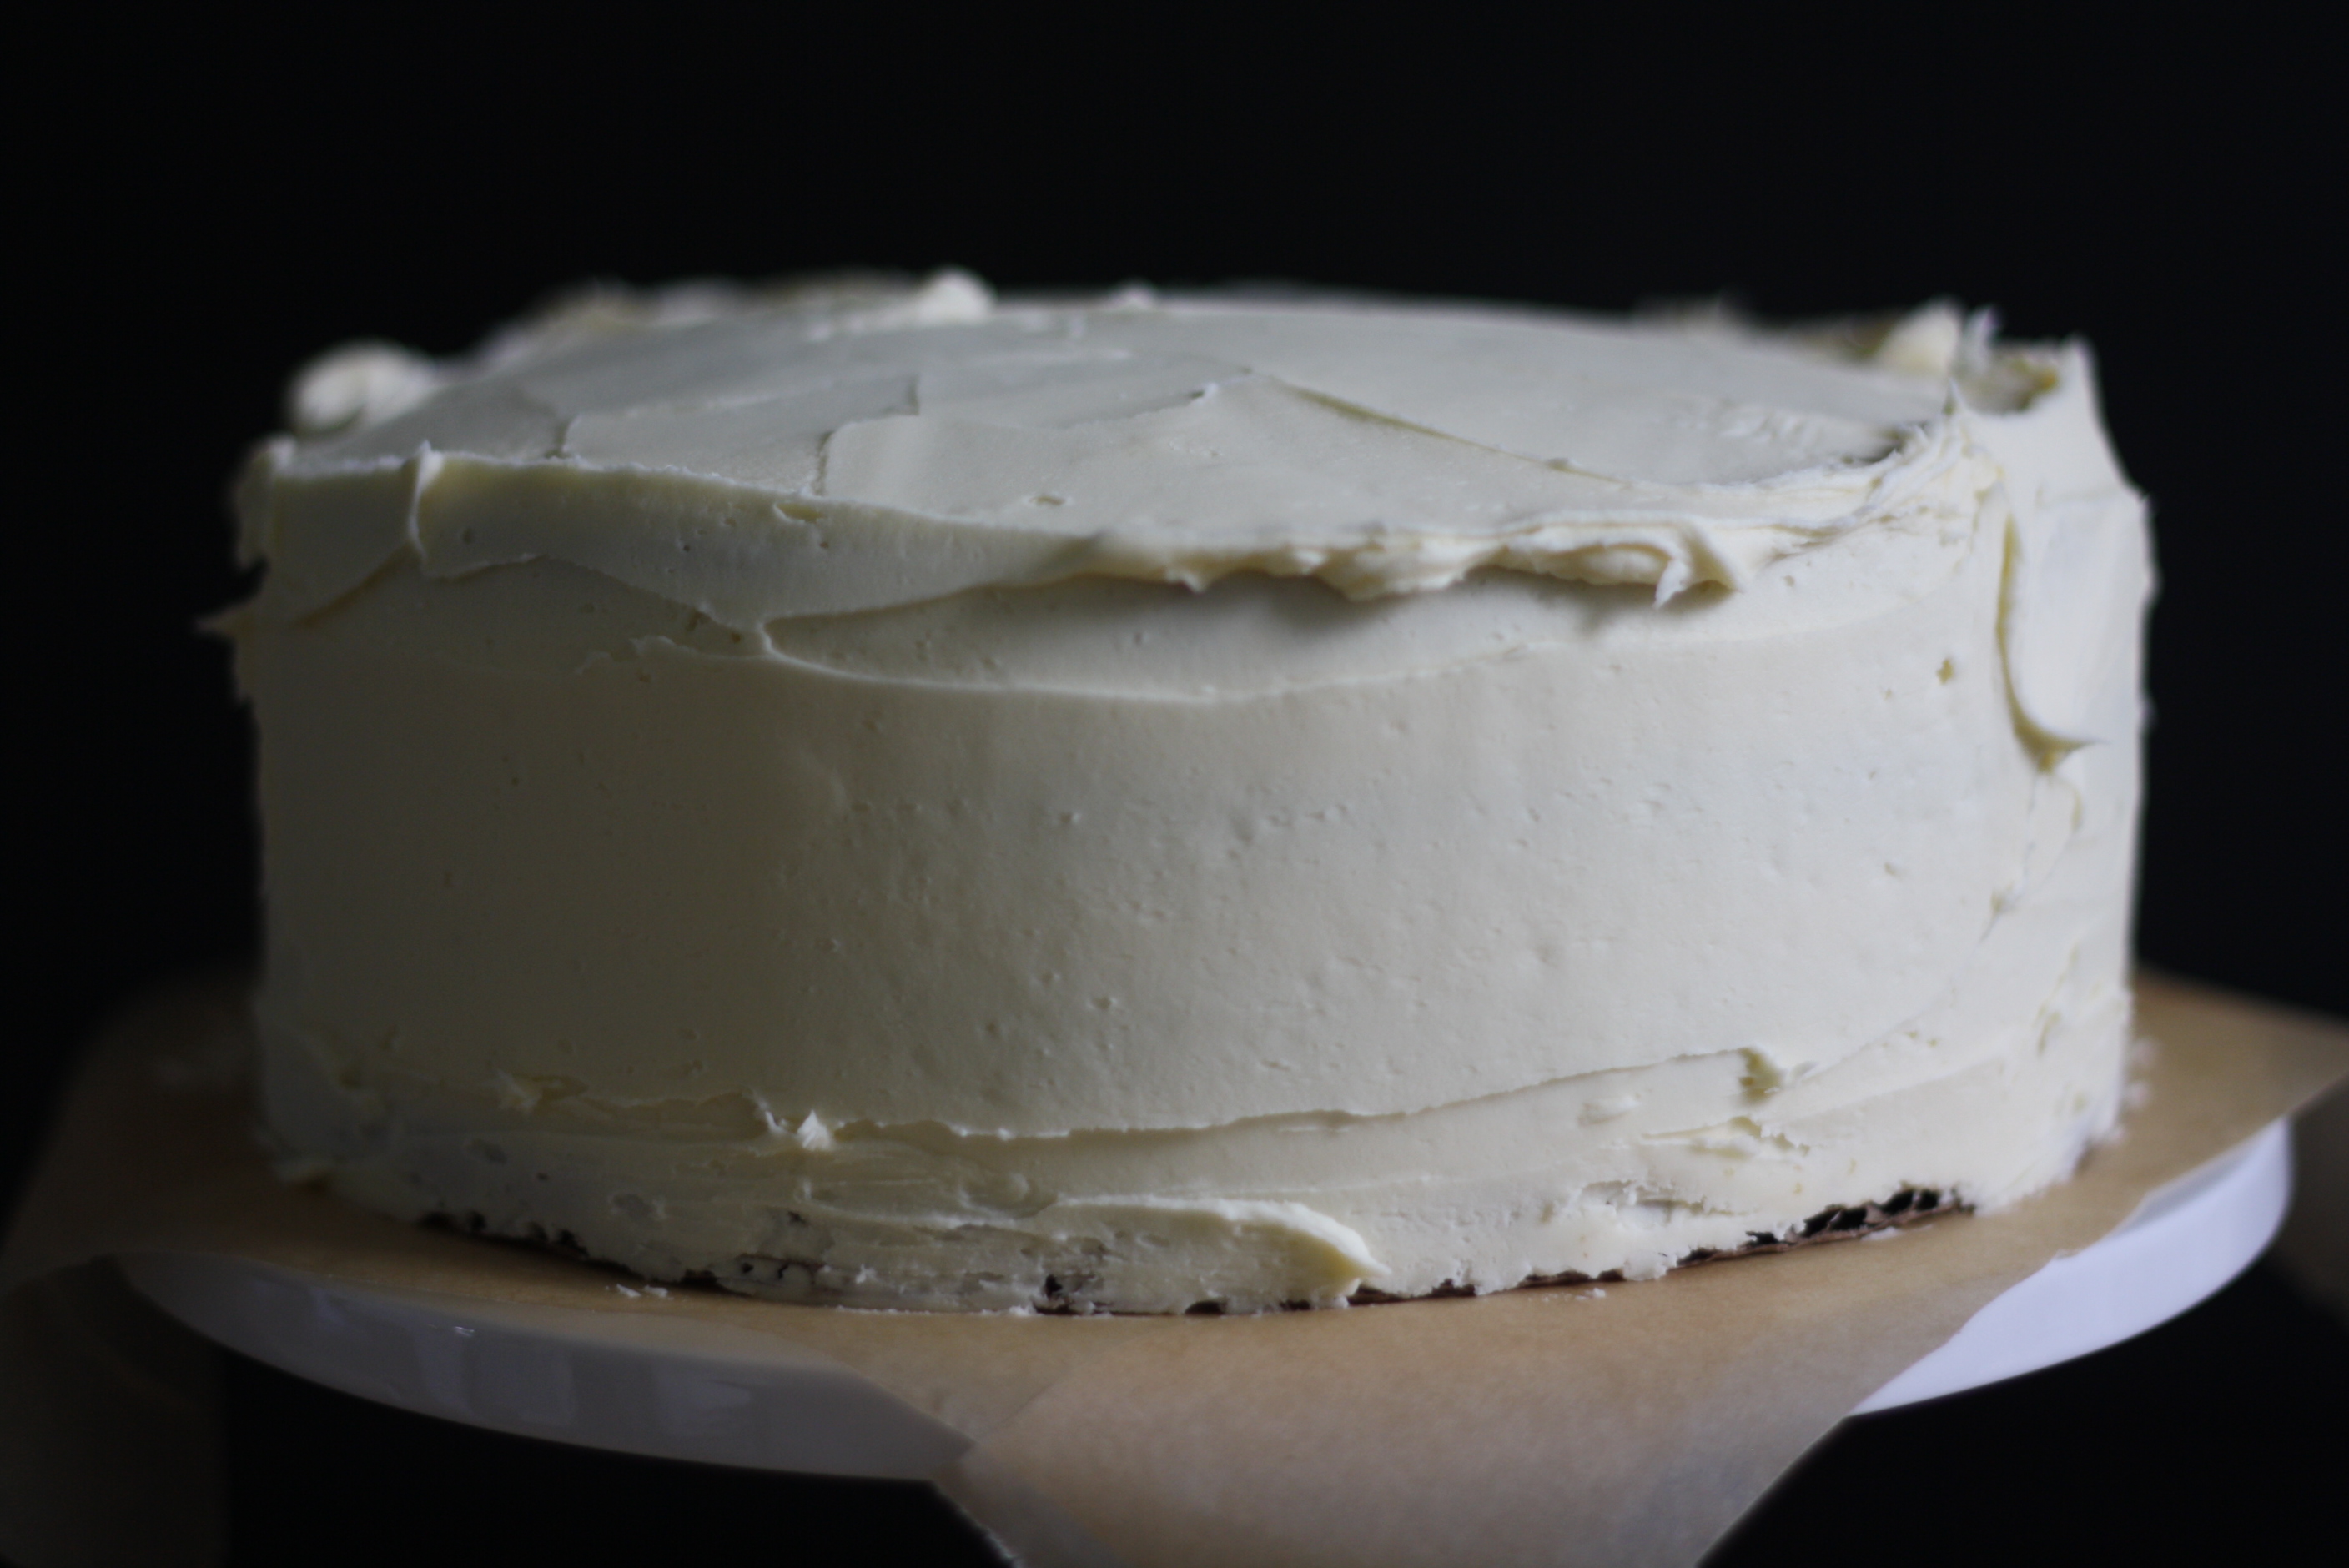
Generously frosted! Looking good. We are almost to the fun part – sprinkles. Be generous with this layer since you will scrape off a bit when you are doing the final smoothing.
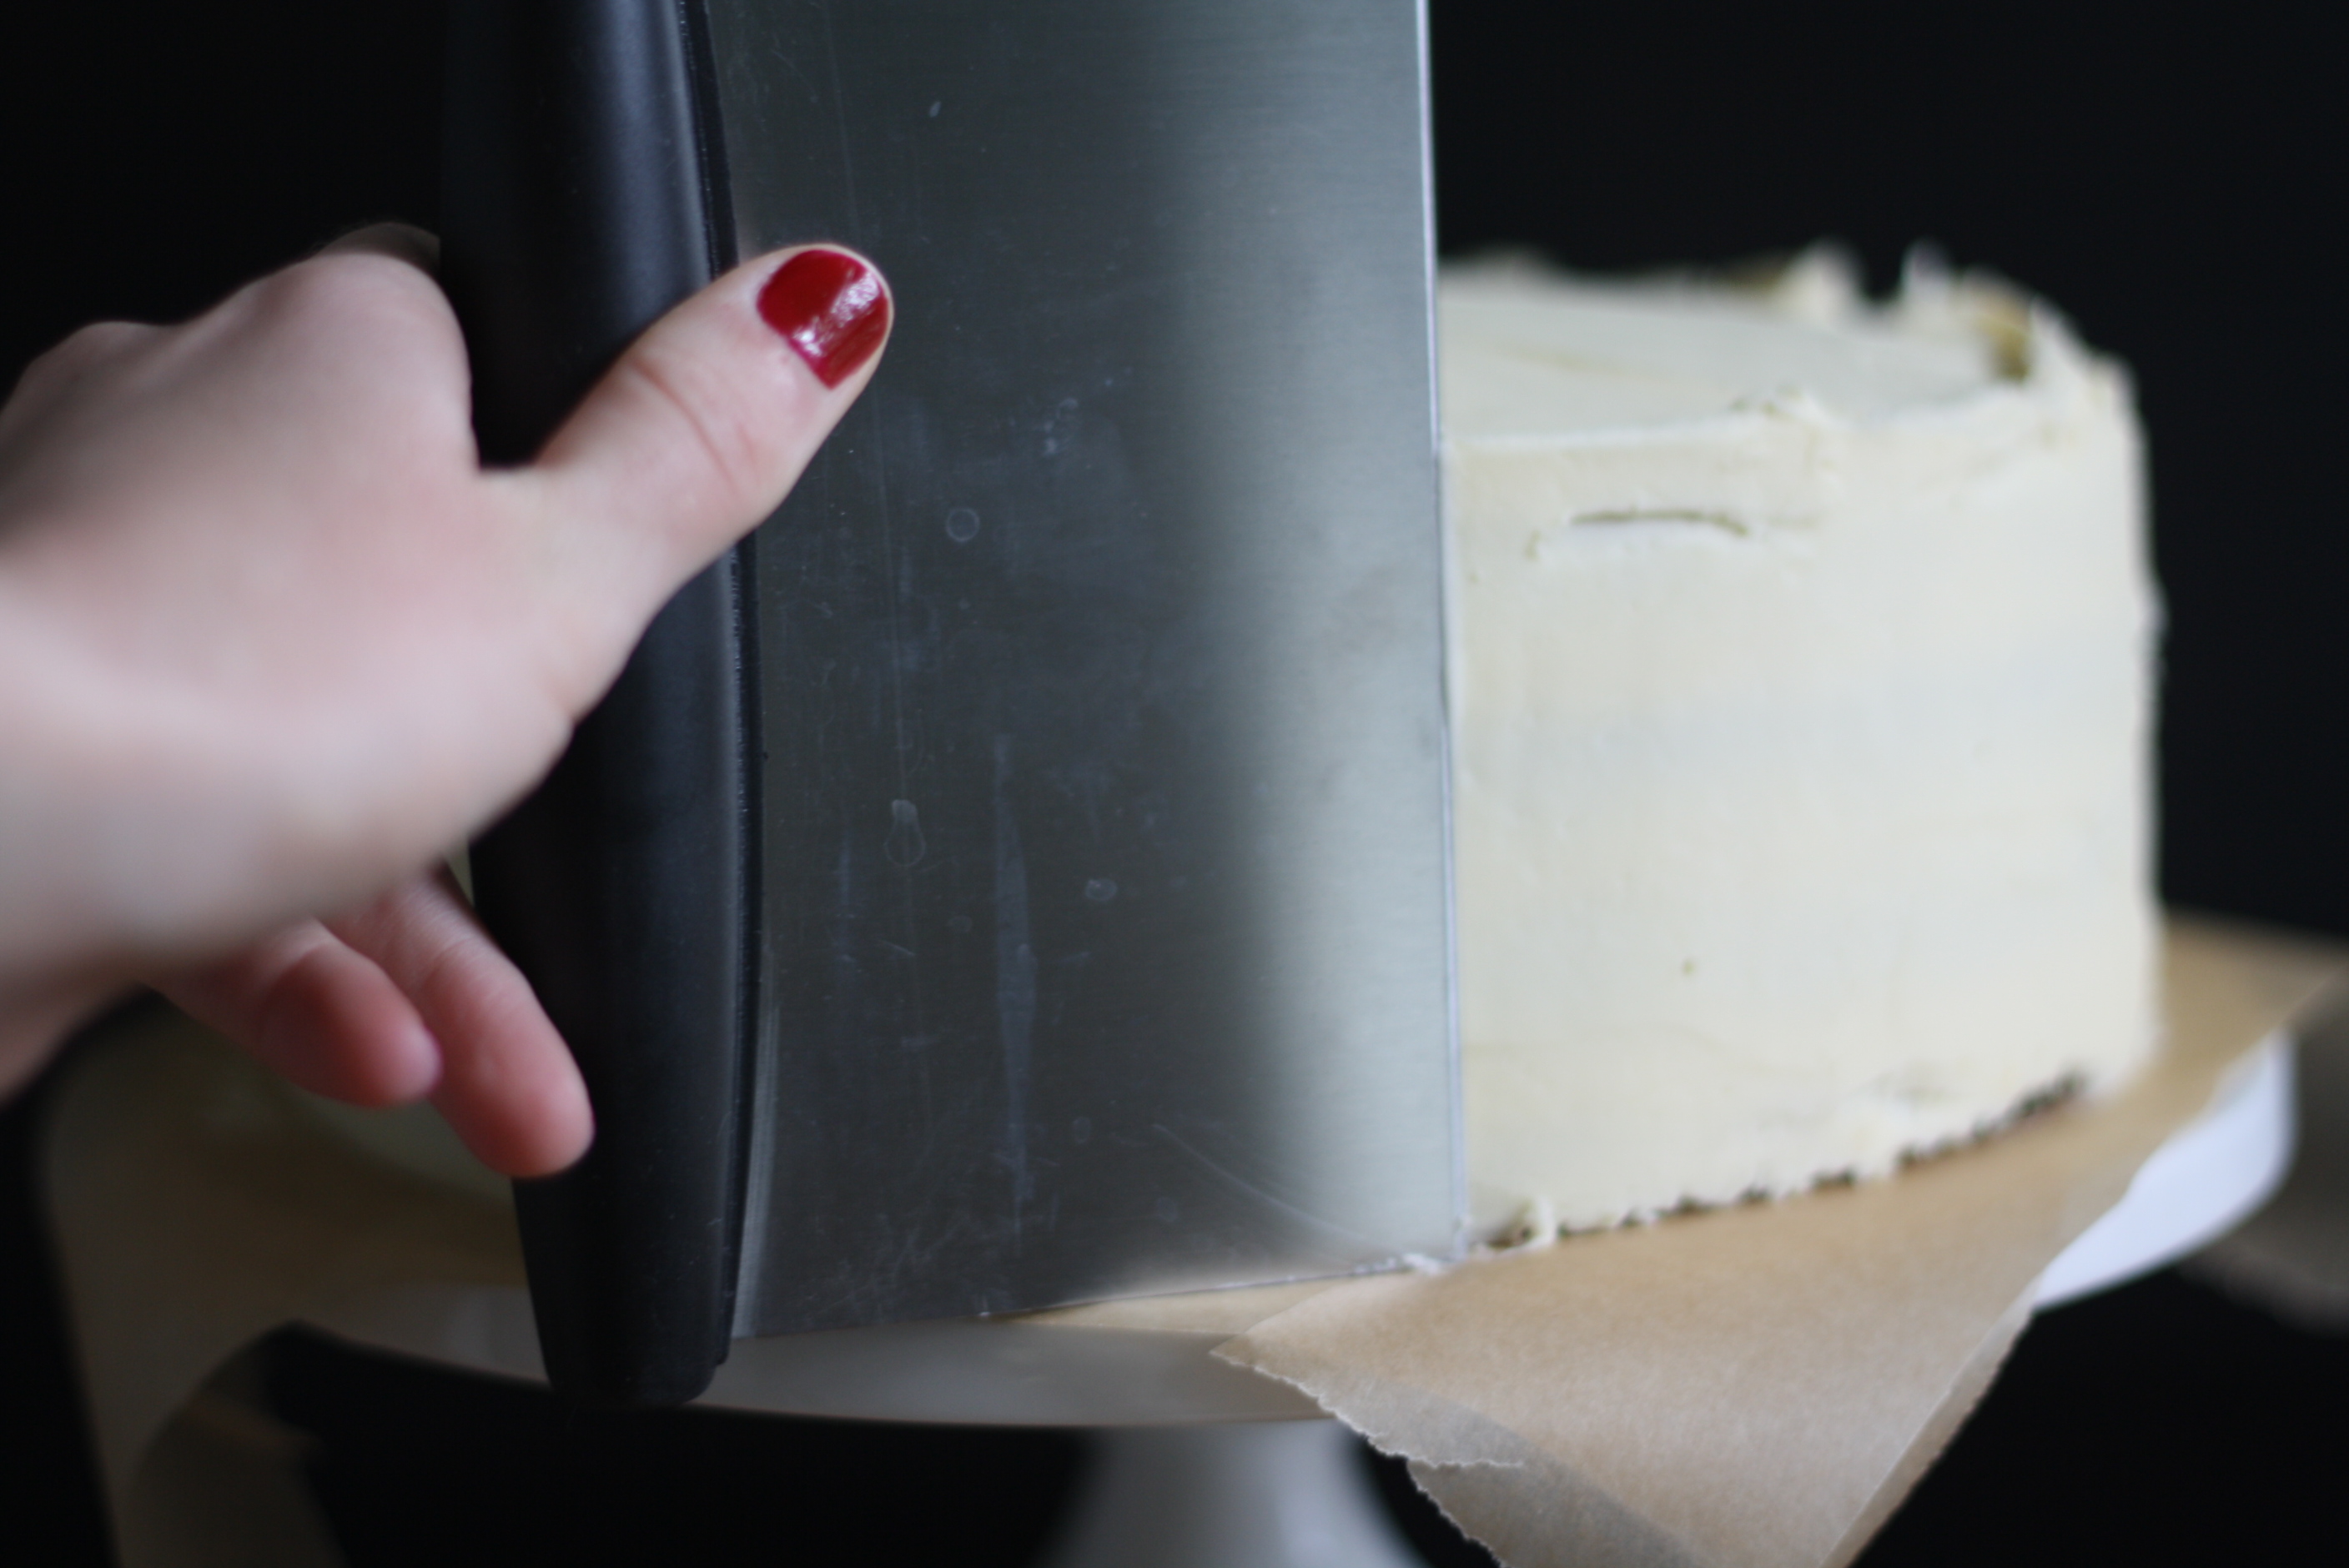
Smooth everything out. Holding the scraper with one hand and rotating the cake with the other, use the smooth edge of the scraper to evenly spread the outer layer of frosting all the way around the cake, scraping off any extra frosting as you go. When you are done with the sides, smooth the top of the cake. Repeat with a light hand until your desired level of smoothness is achieved.
Take a moment and admire your cake. You are almost there. And then get excited because you are going to get to actually consume this thing of beauty.
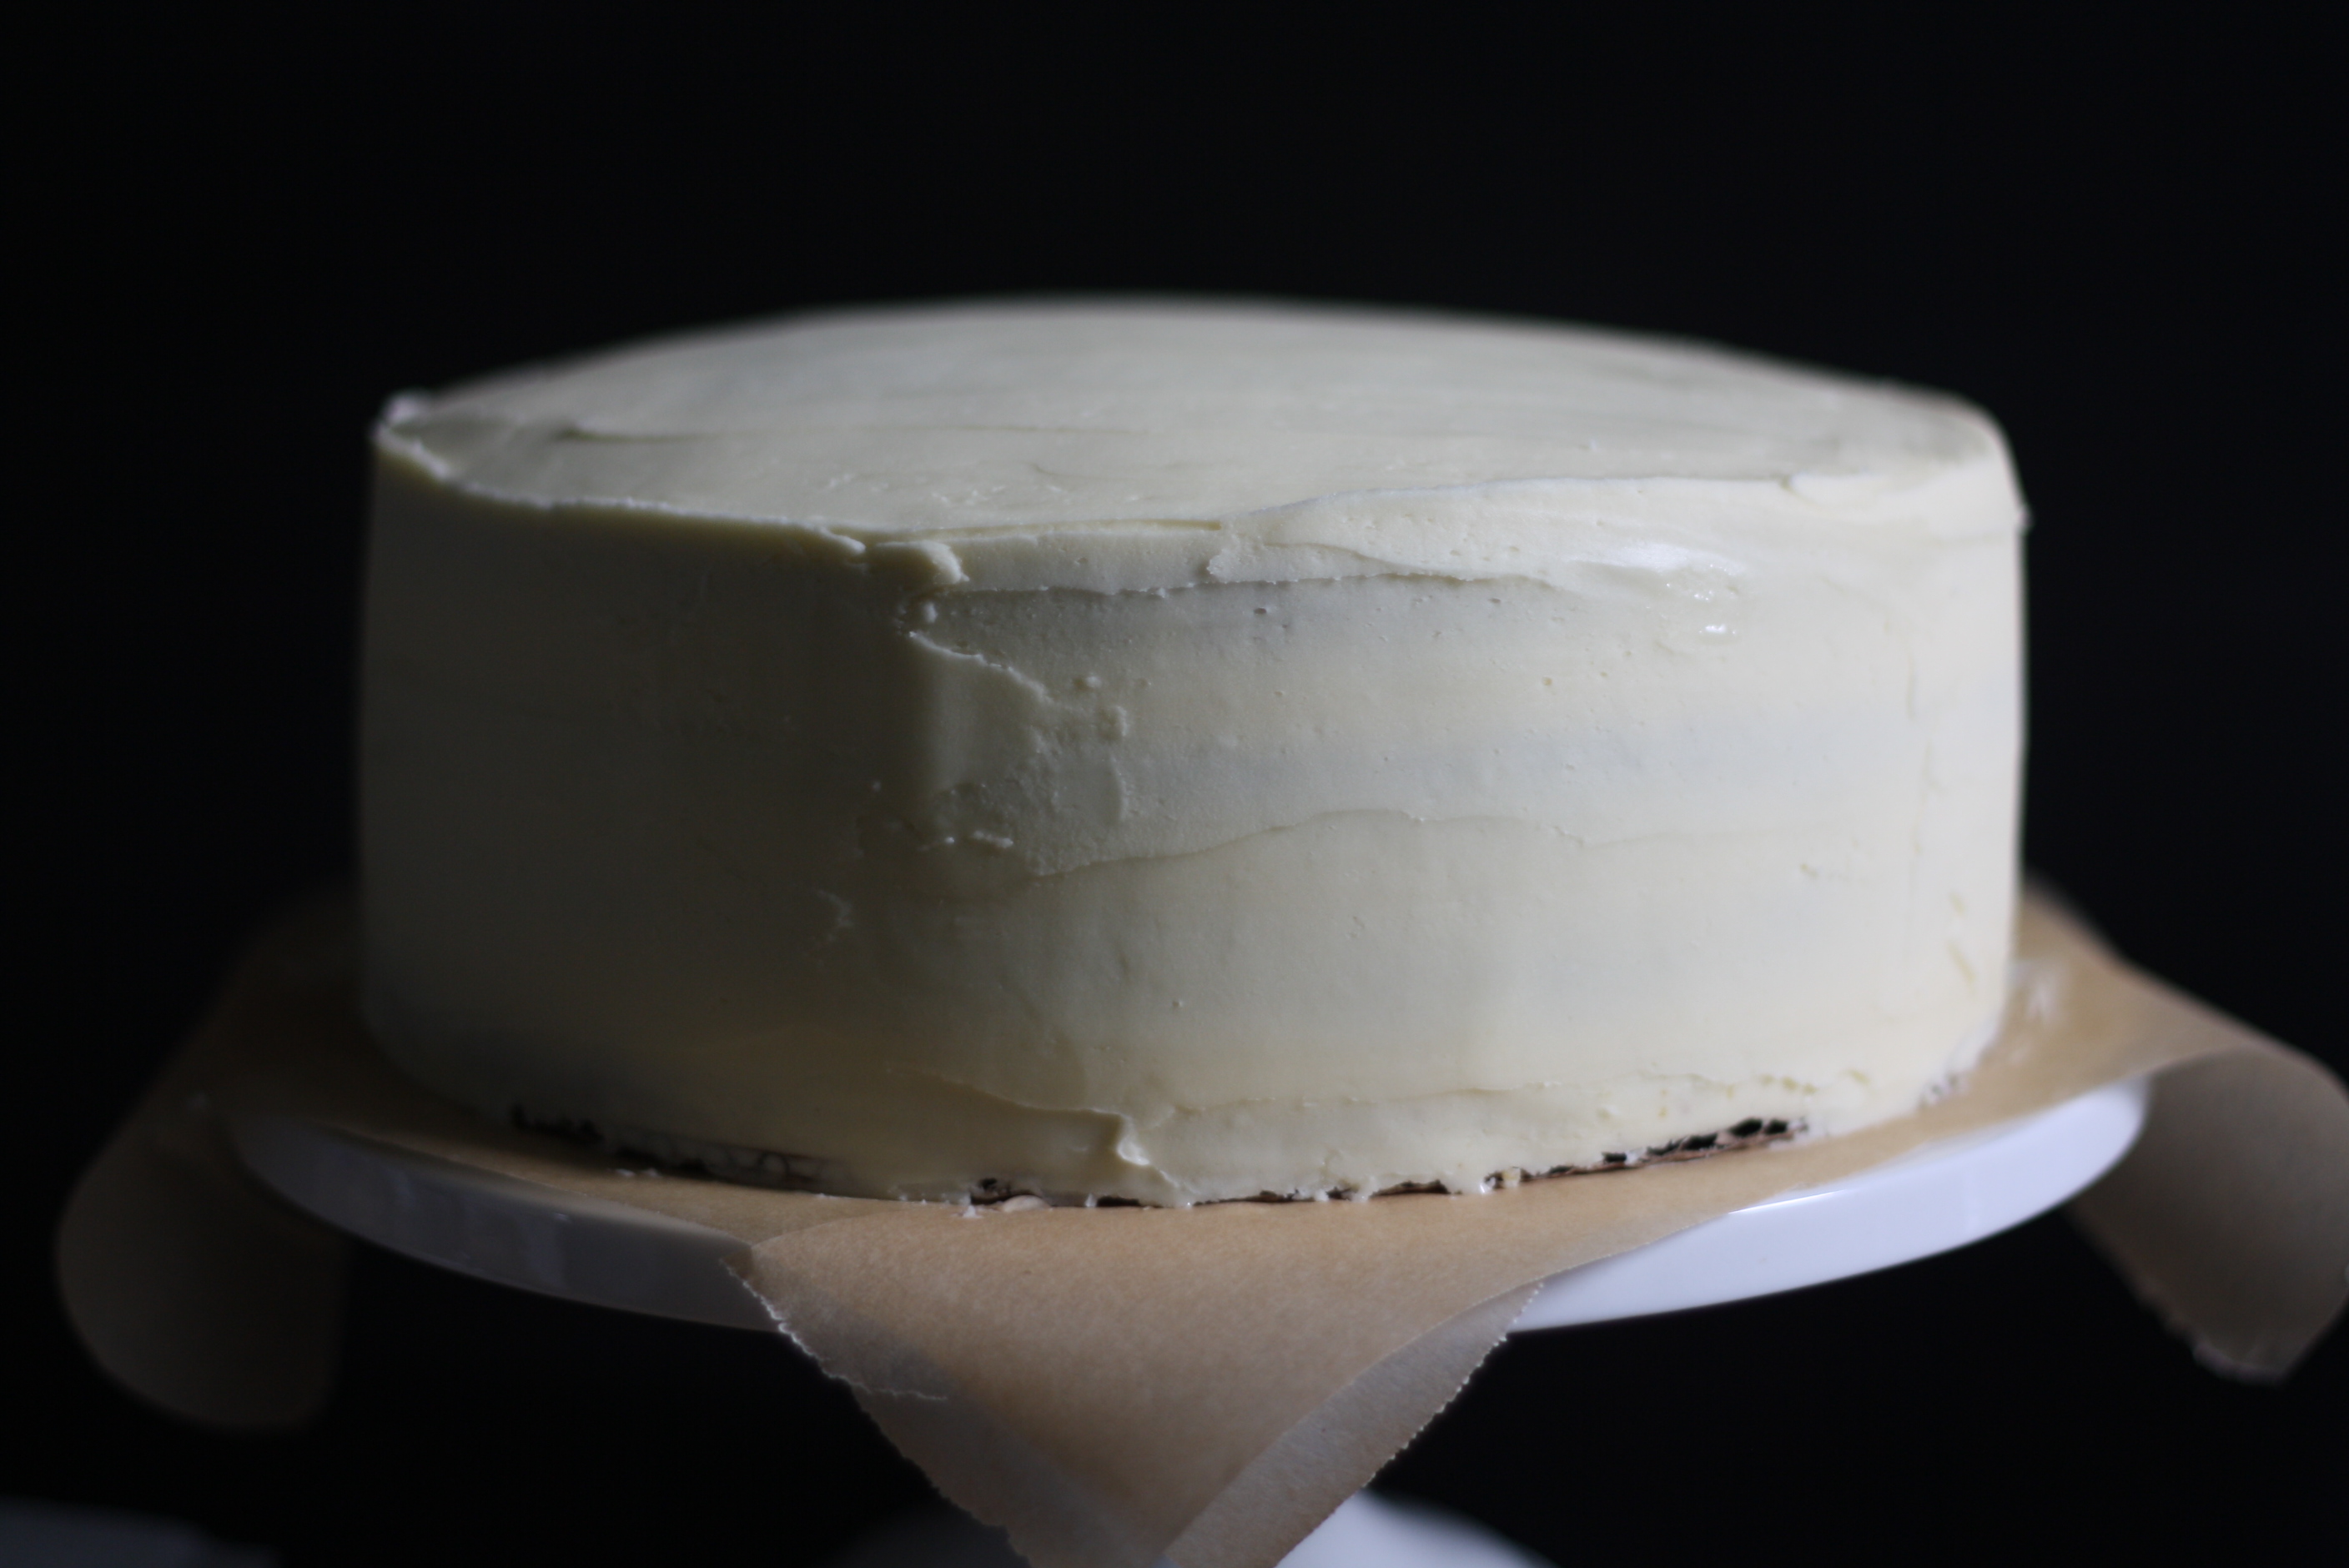
Smooth everything out. Round two. Fill a tall glass with warm water and have a few layers of paper towel nearby. Dip your spatula in the water, shake off the extra, and smooth the tops and sides of the cake, re-dipping as necessary. You do not want the spatula to be super wet but just a hint of water helps to smooth out the final outer layer of frosting.
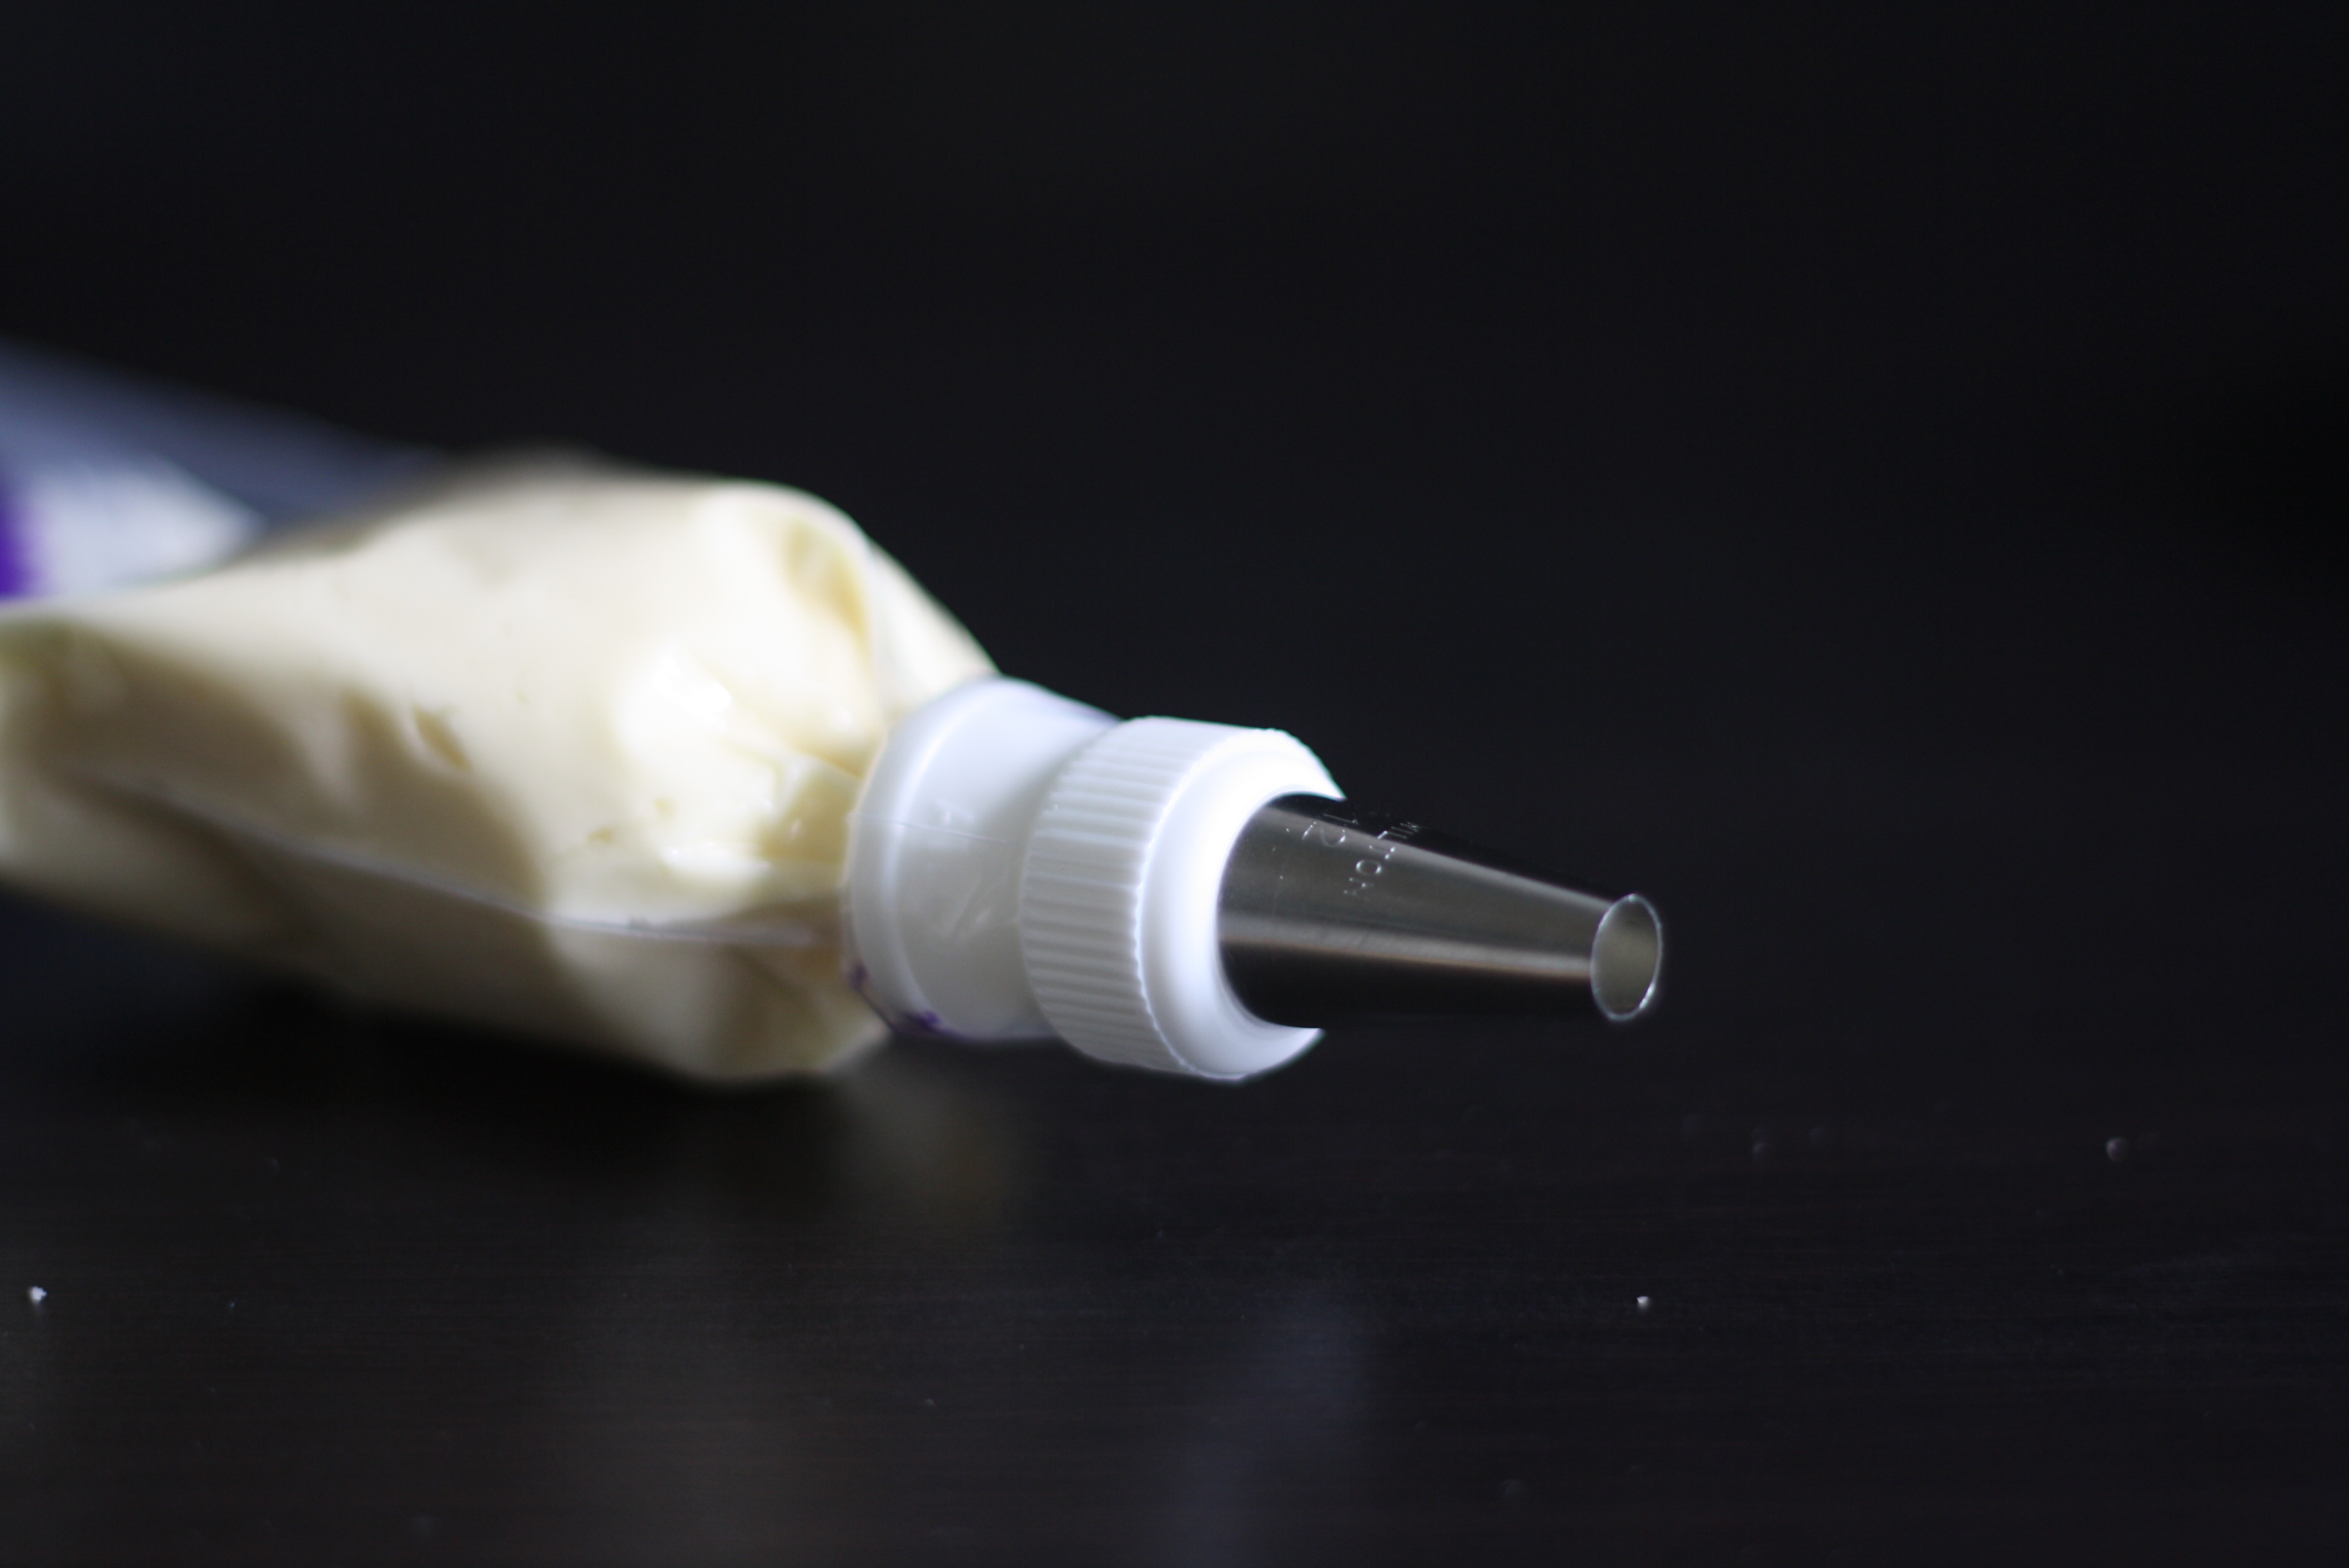
Fill a pastry bag. I reserved about 3/4 cup of frosting for extra decorating. For a tutorial in filling and using a pastry bag, check out this helpful video.
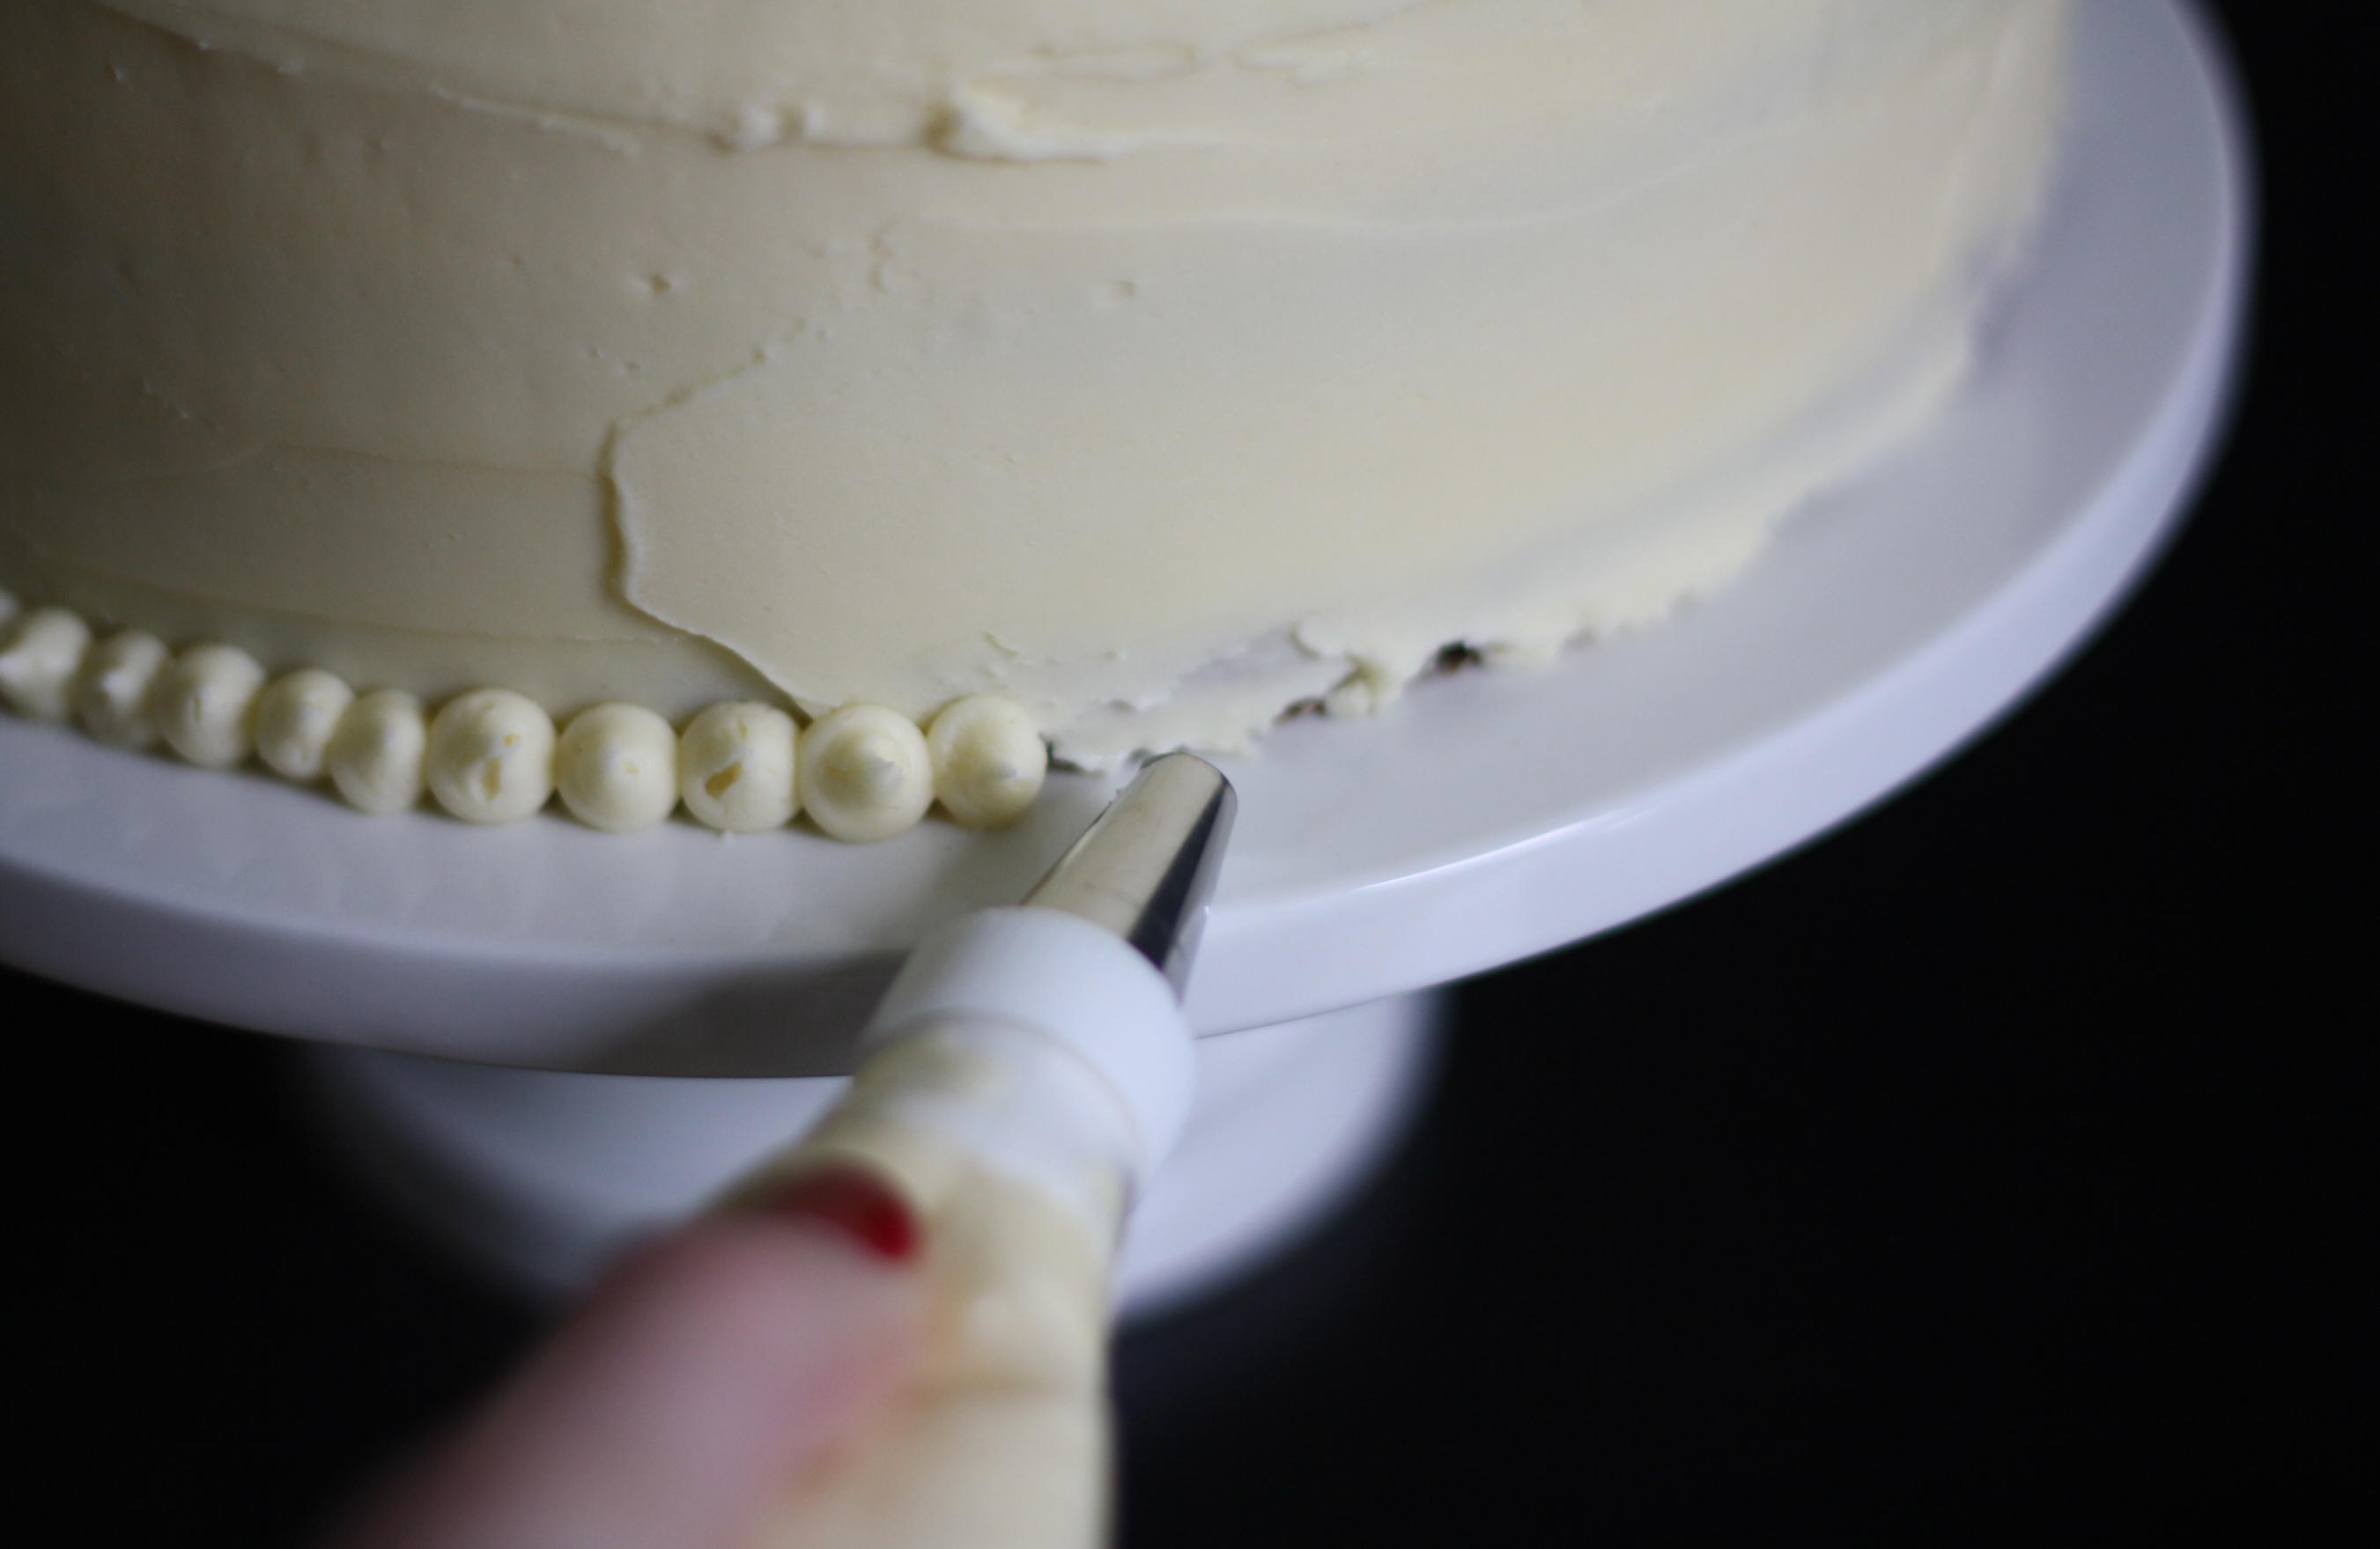
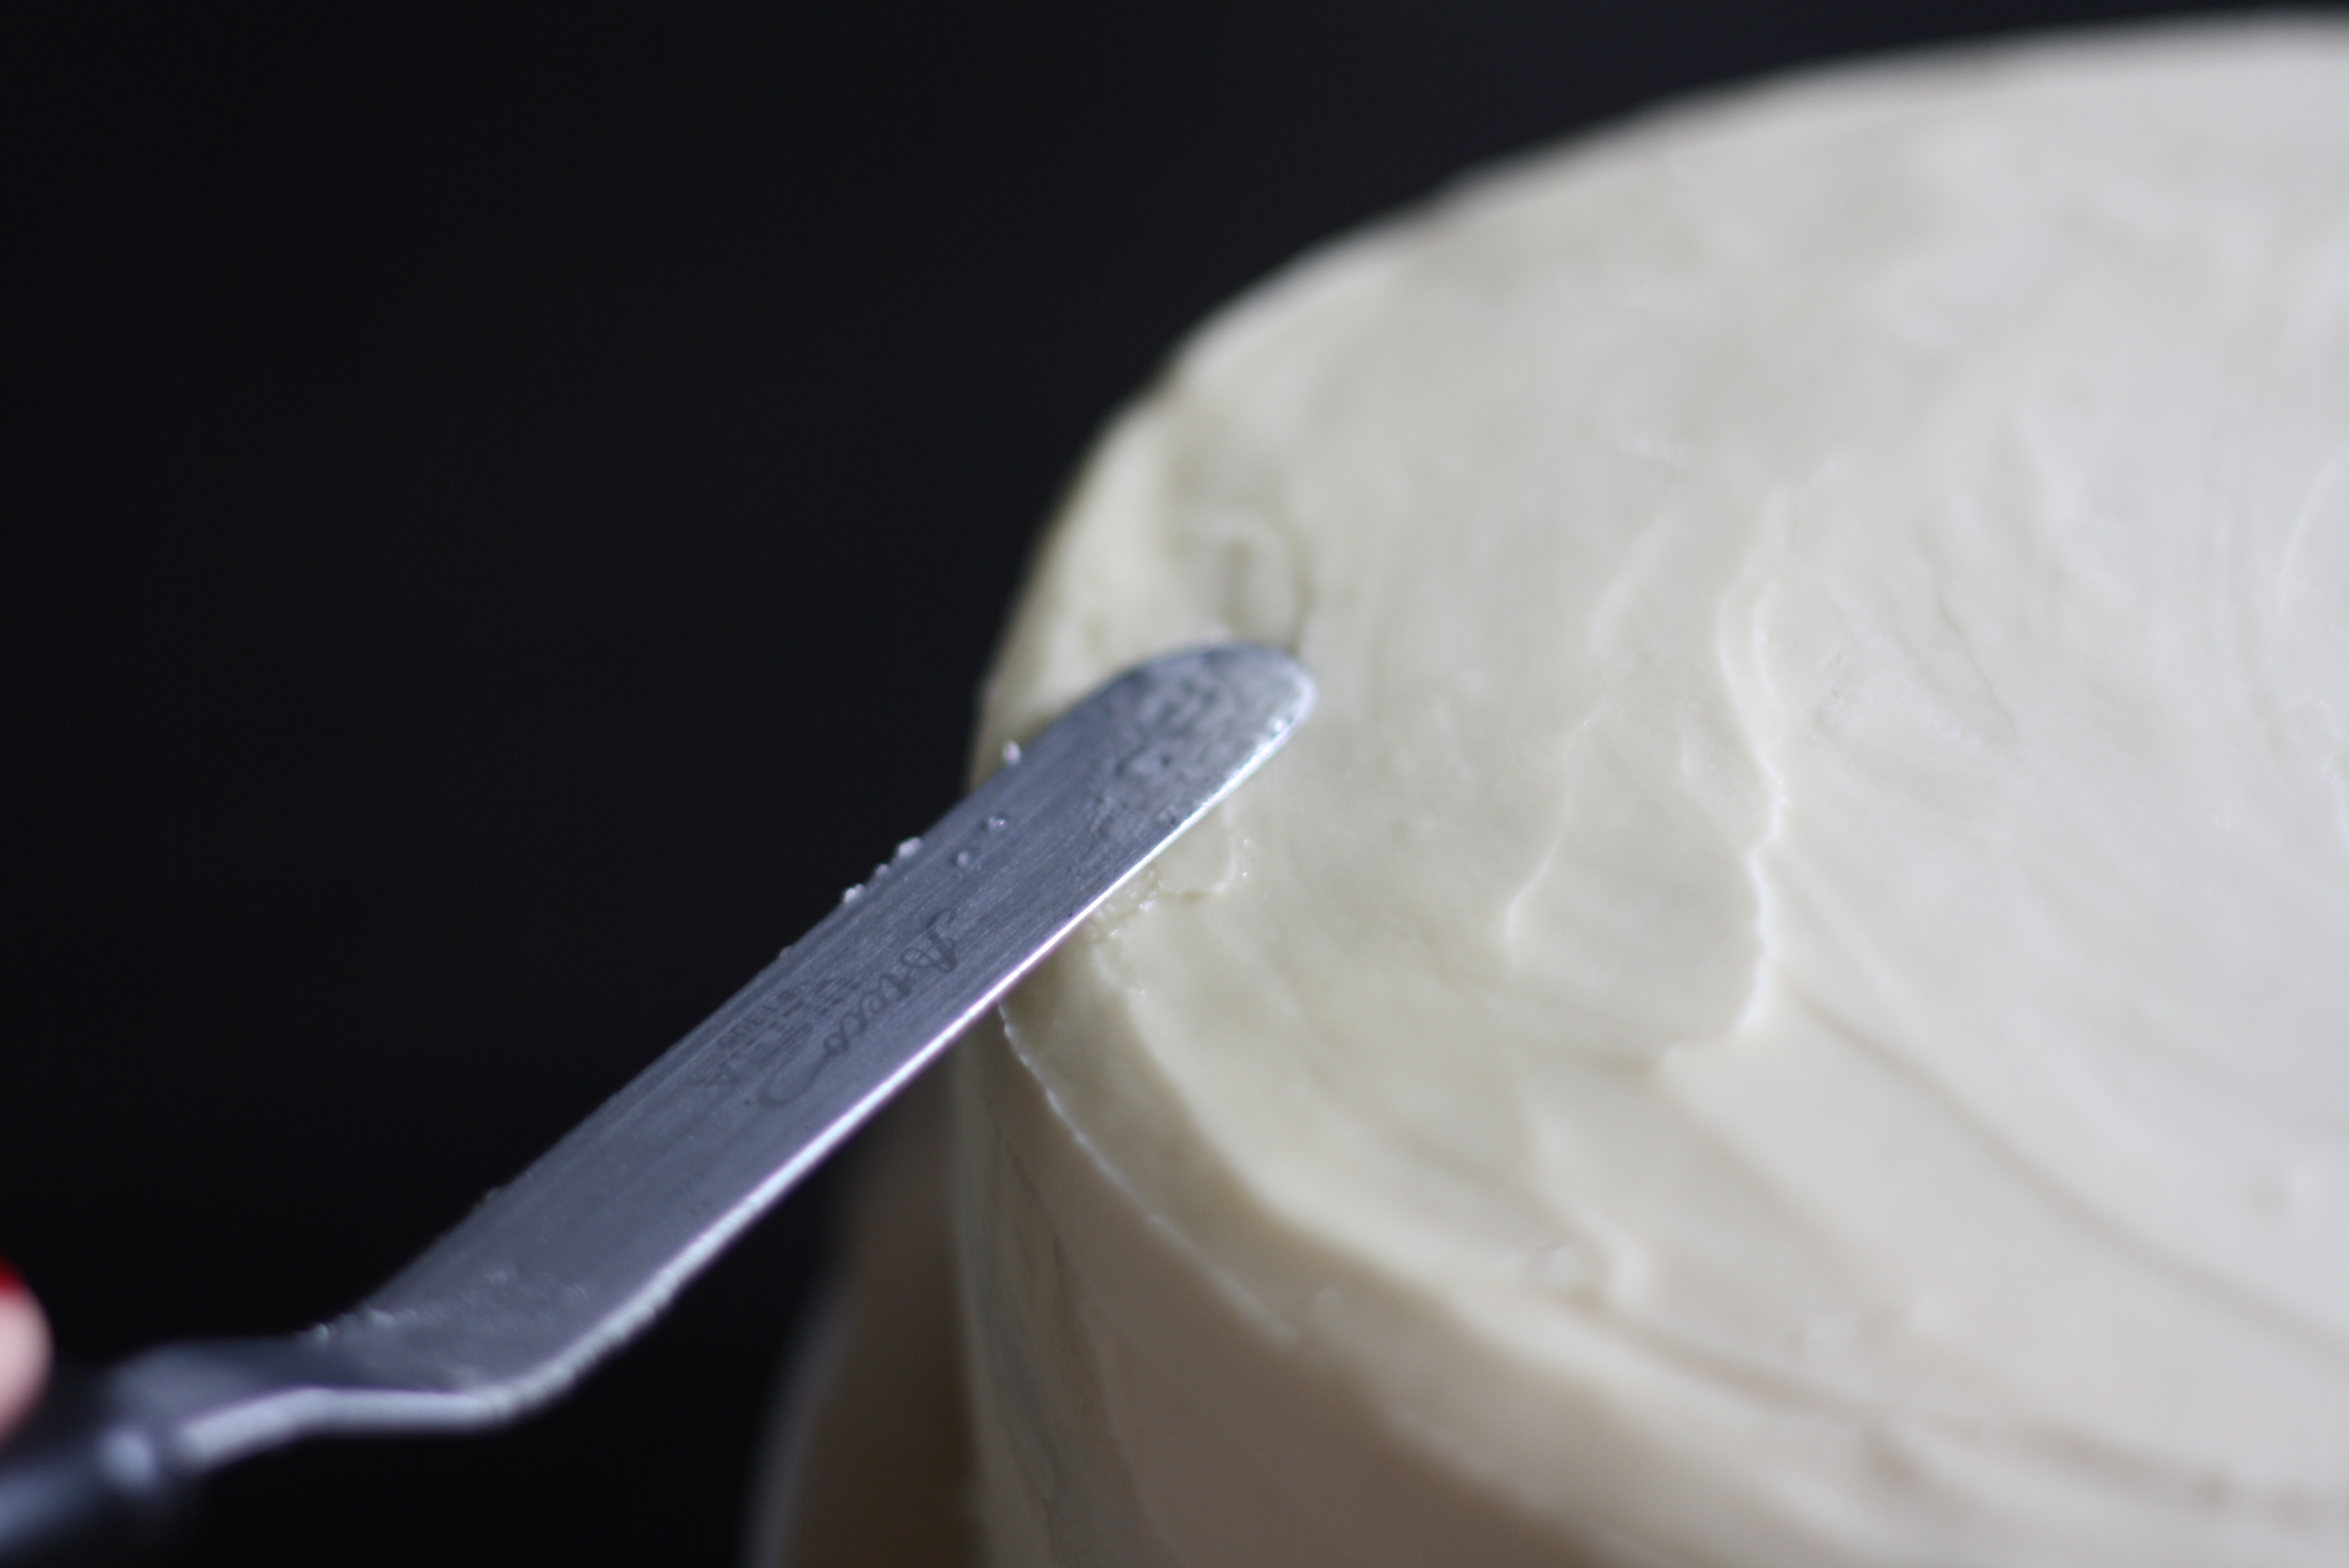
Decorate with frosting. Pipe small dots around the base and/or the top of the cake. This hides any imperfections and gives your cake that professional edge. I dipped my finger in water and lightly patted the pointy tops down so that they would be little rounds instead of having frosting hats.
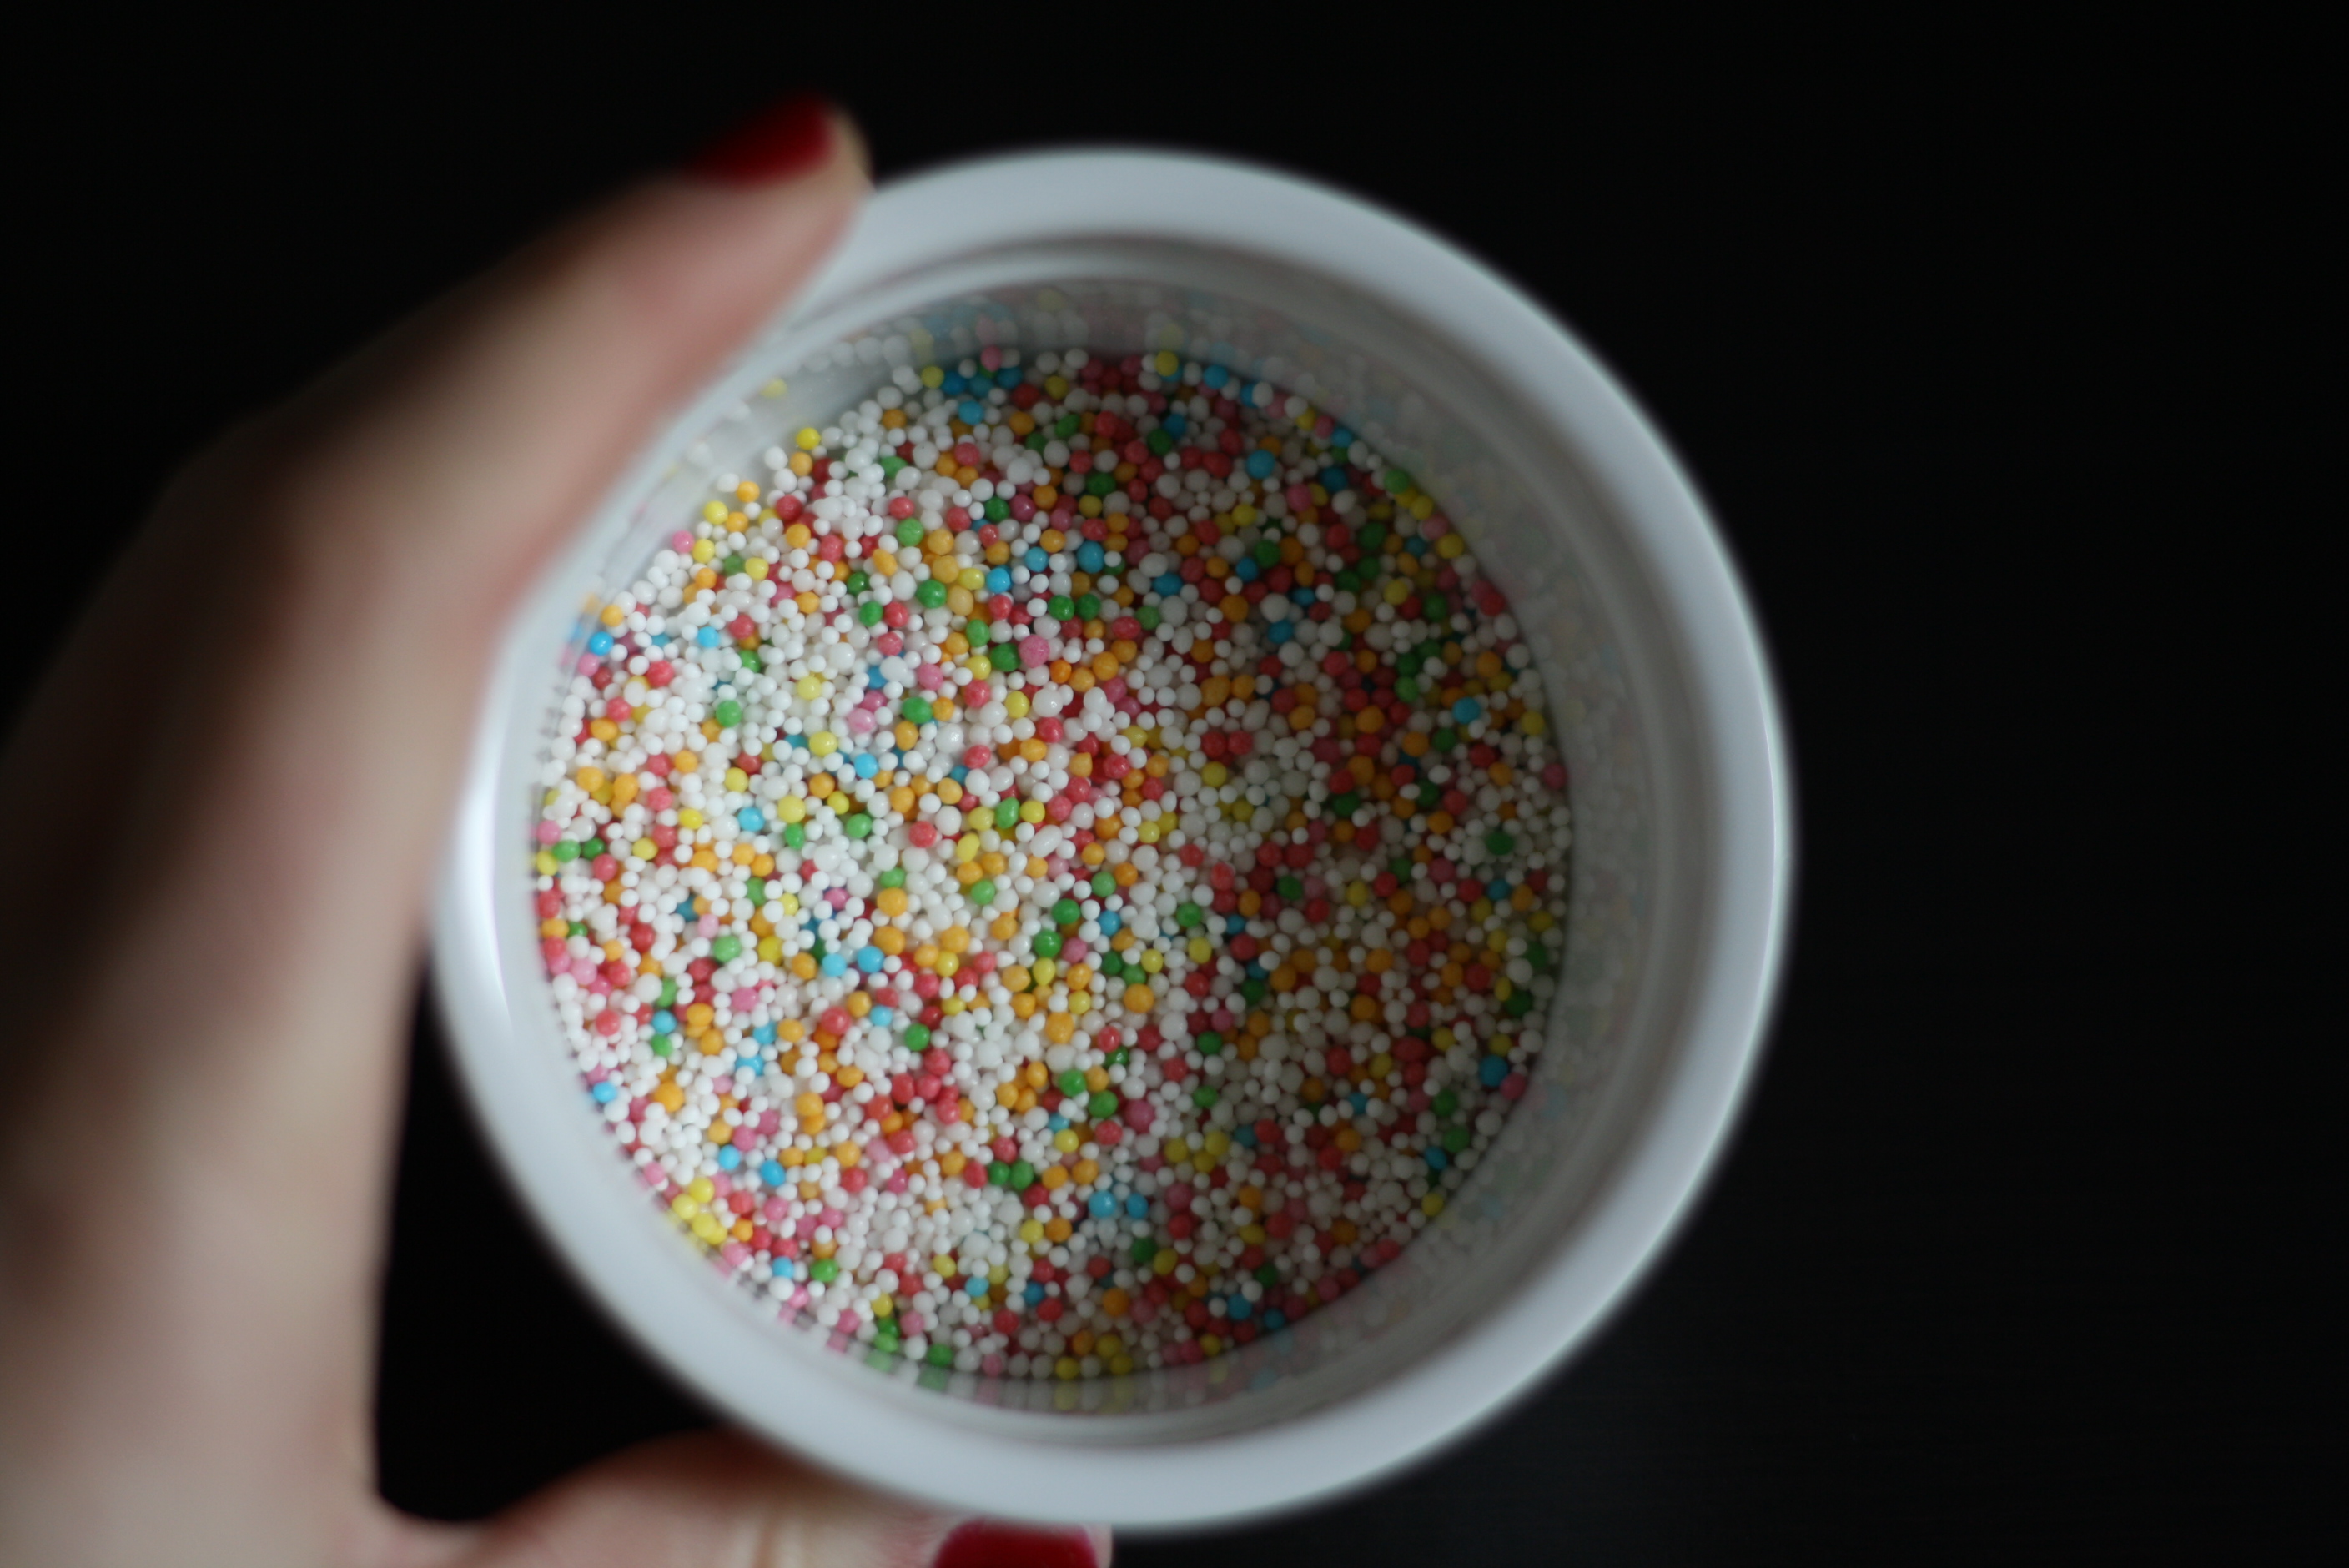
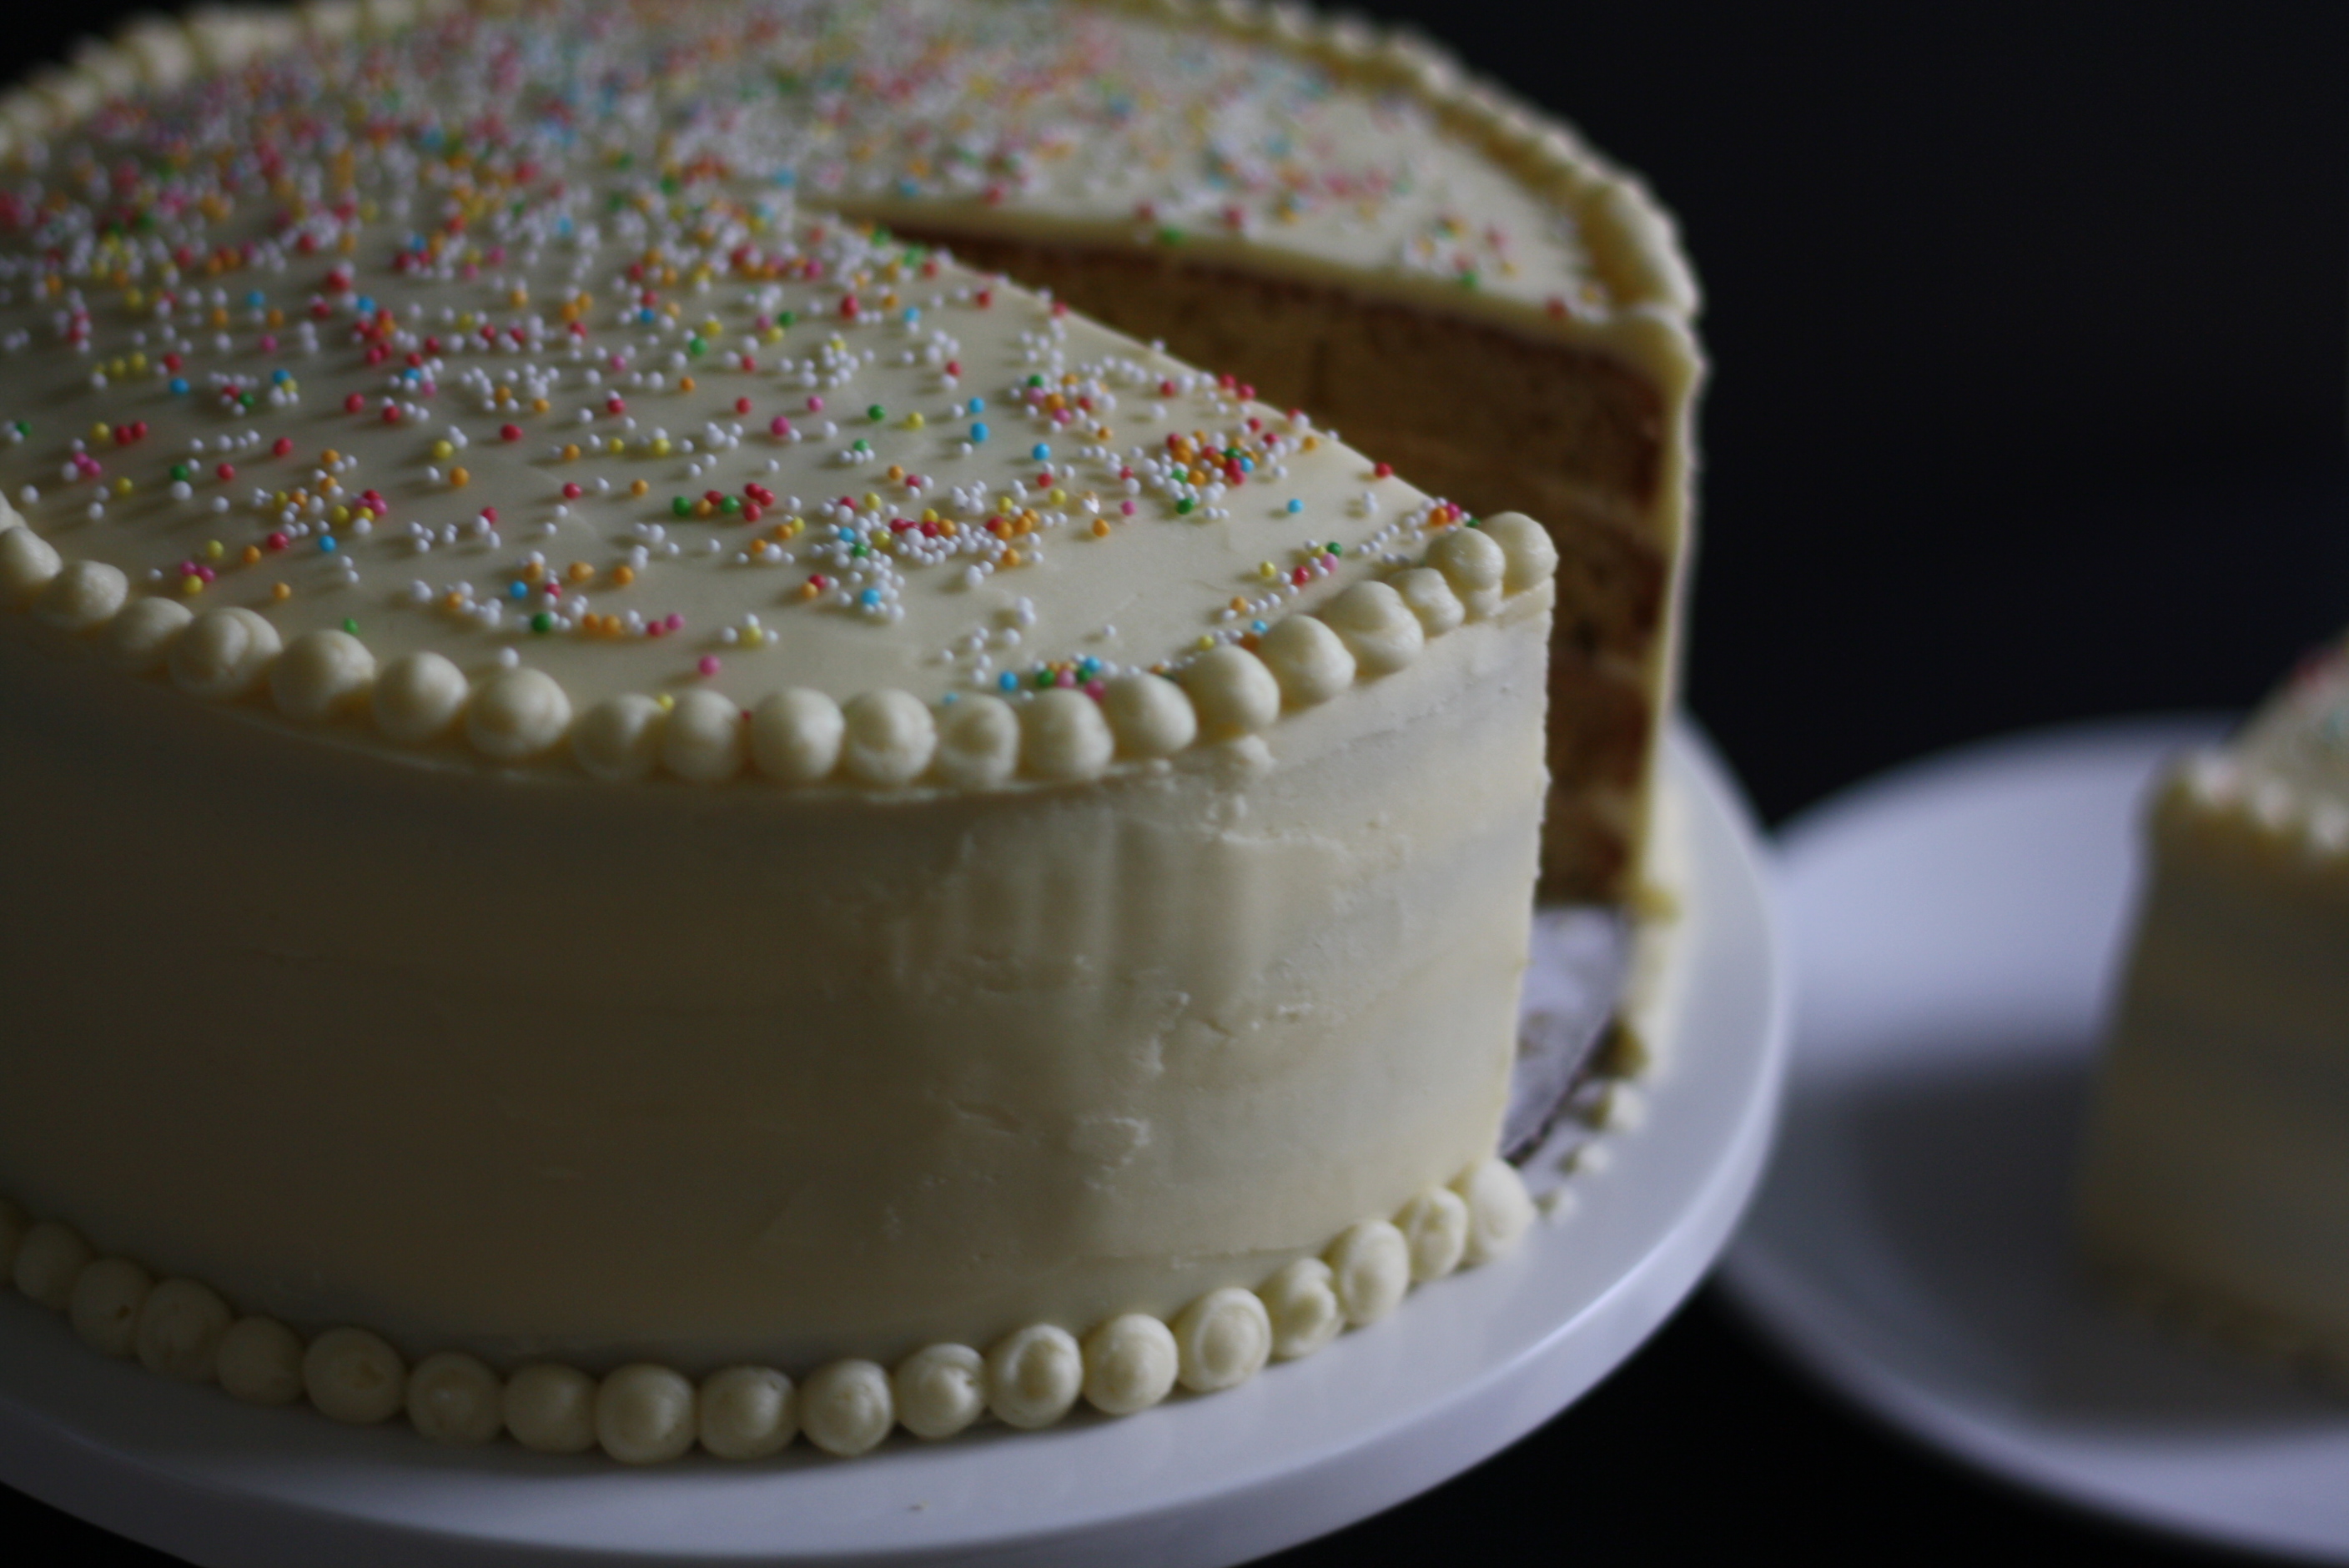
Sprinkles. For making everything better in a way that only sprinkles can. Sprinkle them over the top while the frosting is still slightly wet so they stay put.
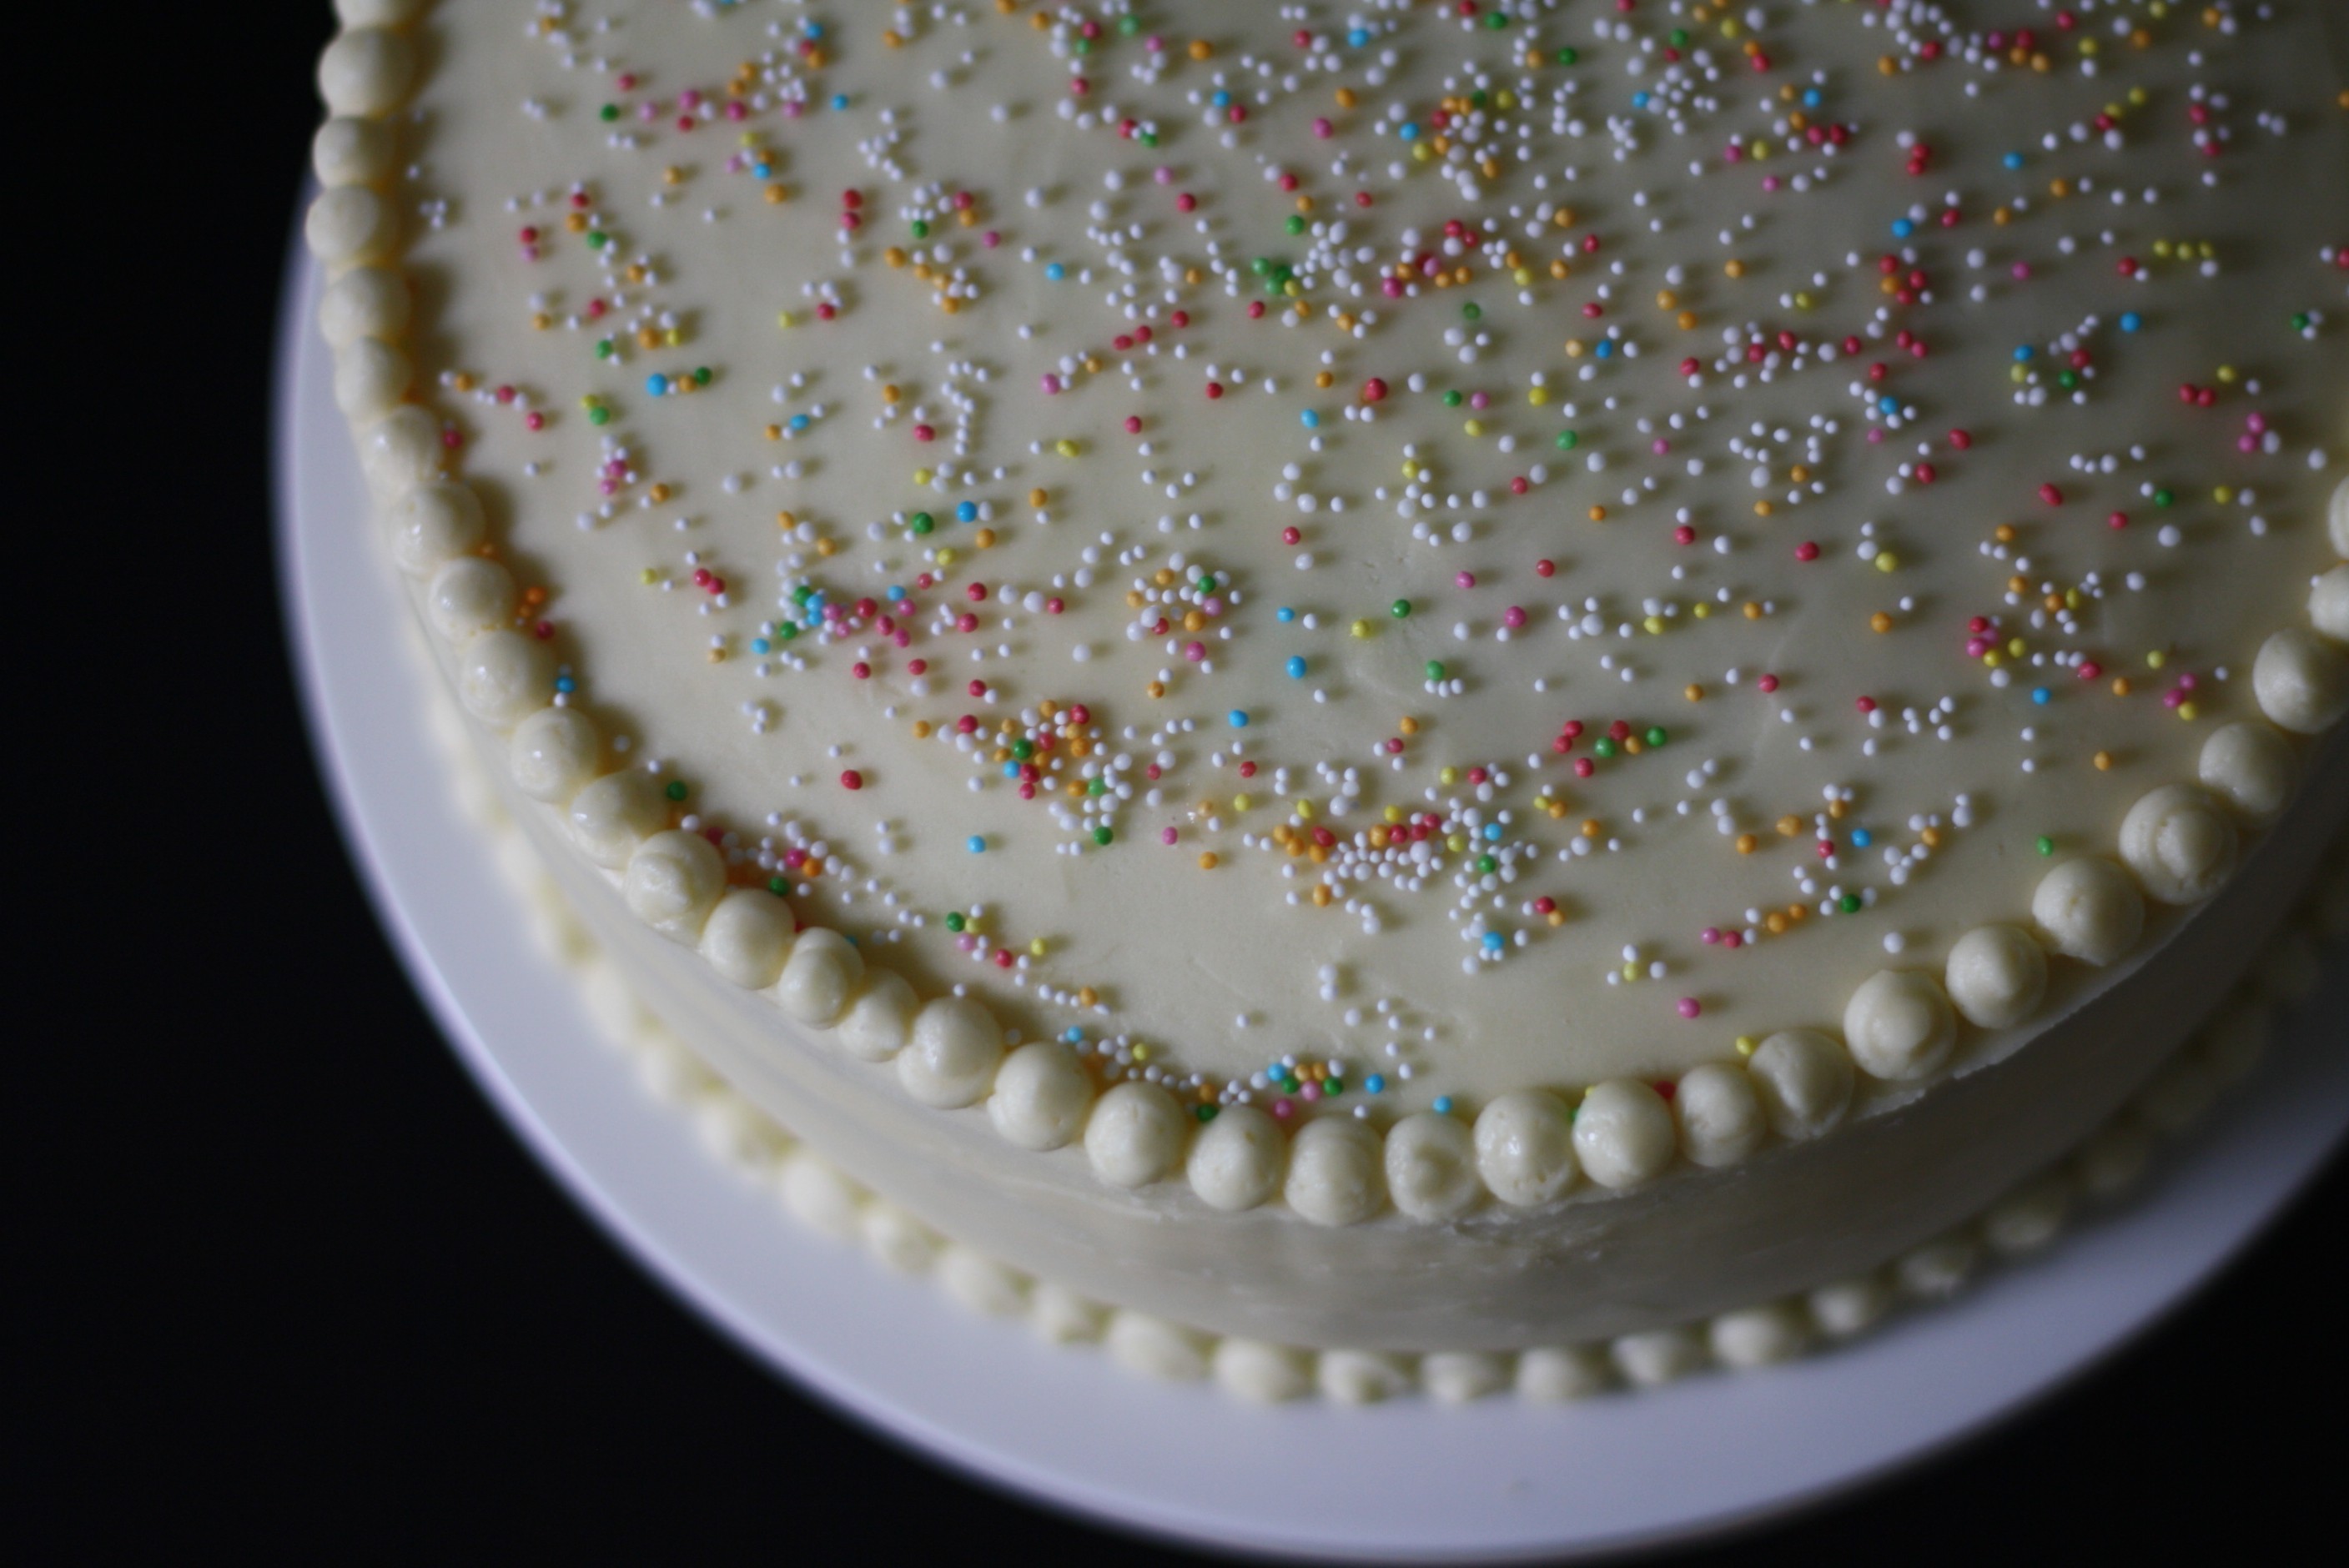
Ta-da! YOU DID IT! Behold your perfectly frosted layer cake. I don’t know about you, but this cake is definitely ready to get its party pants on.
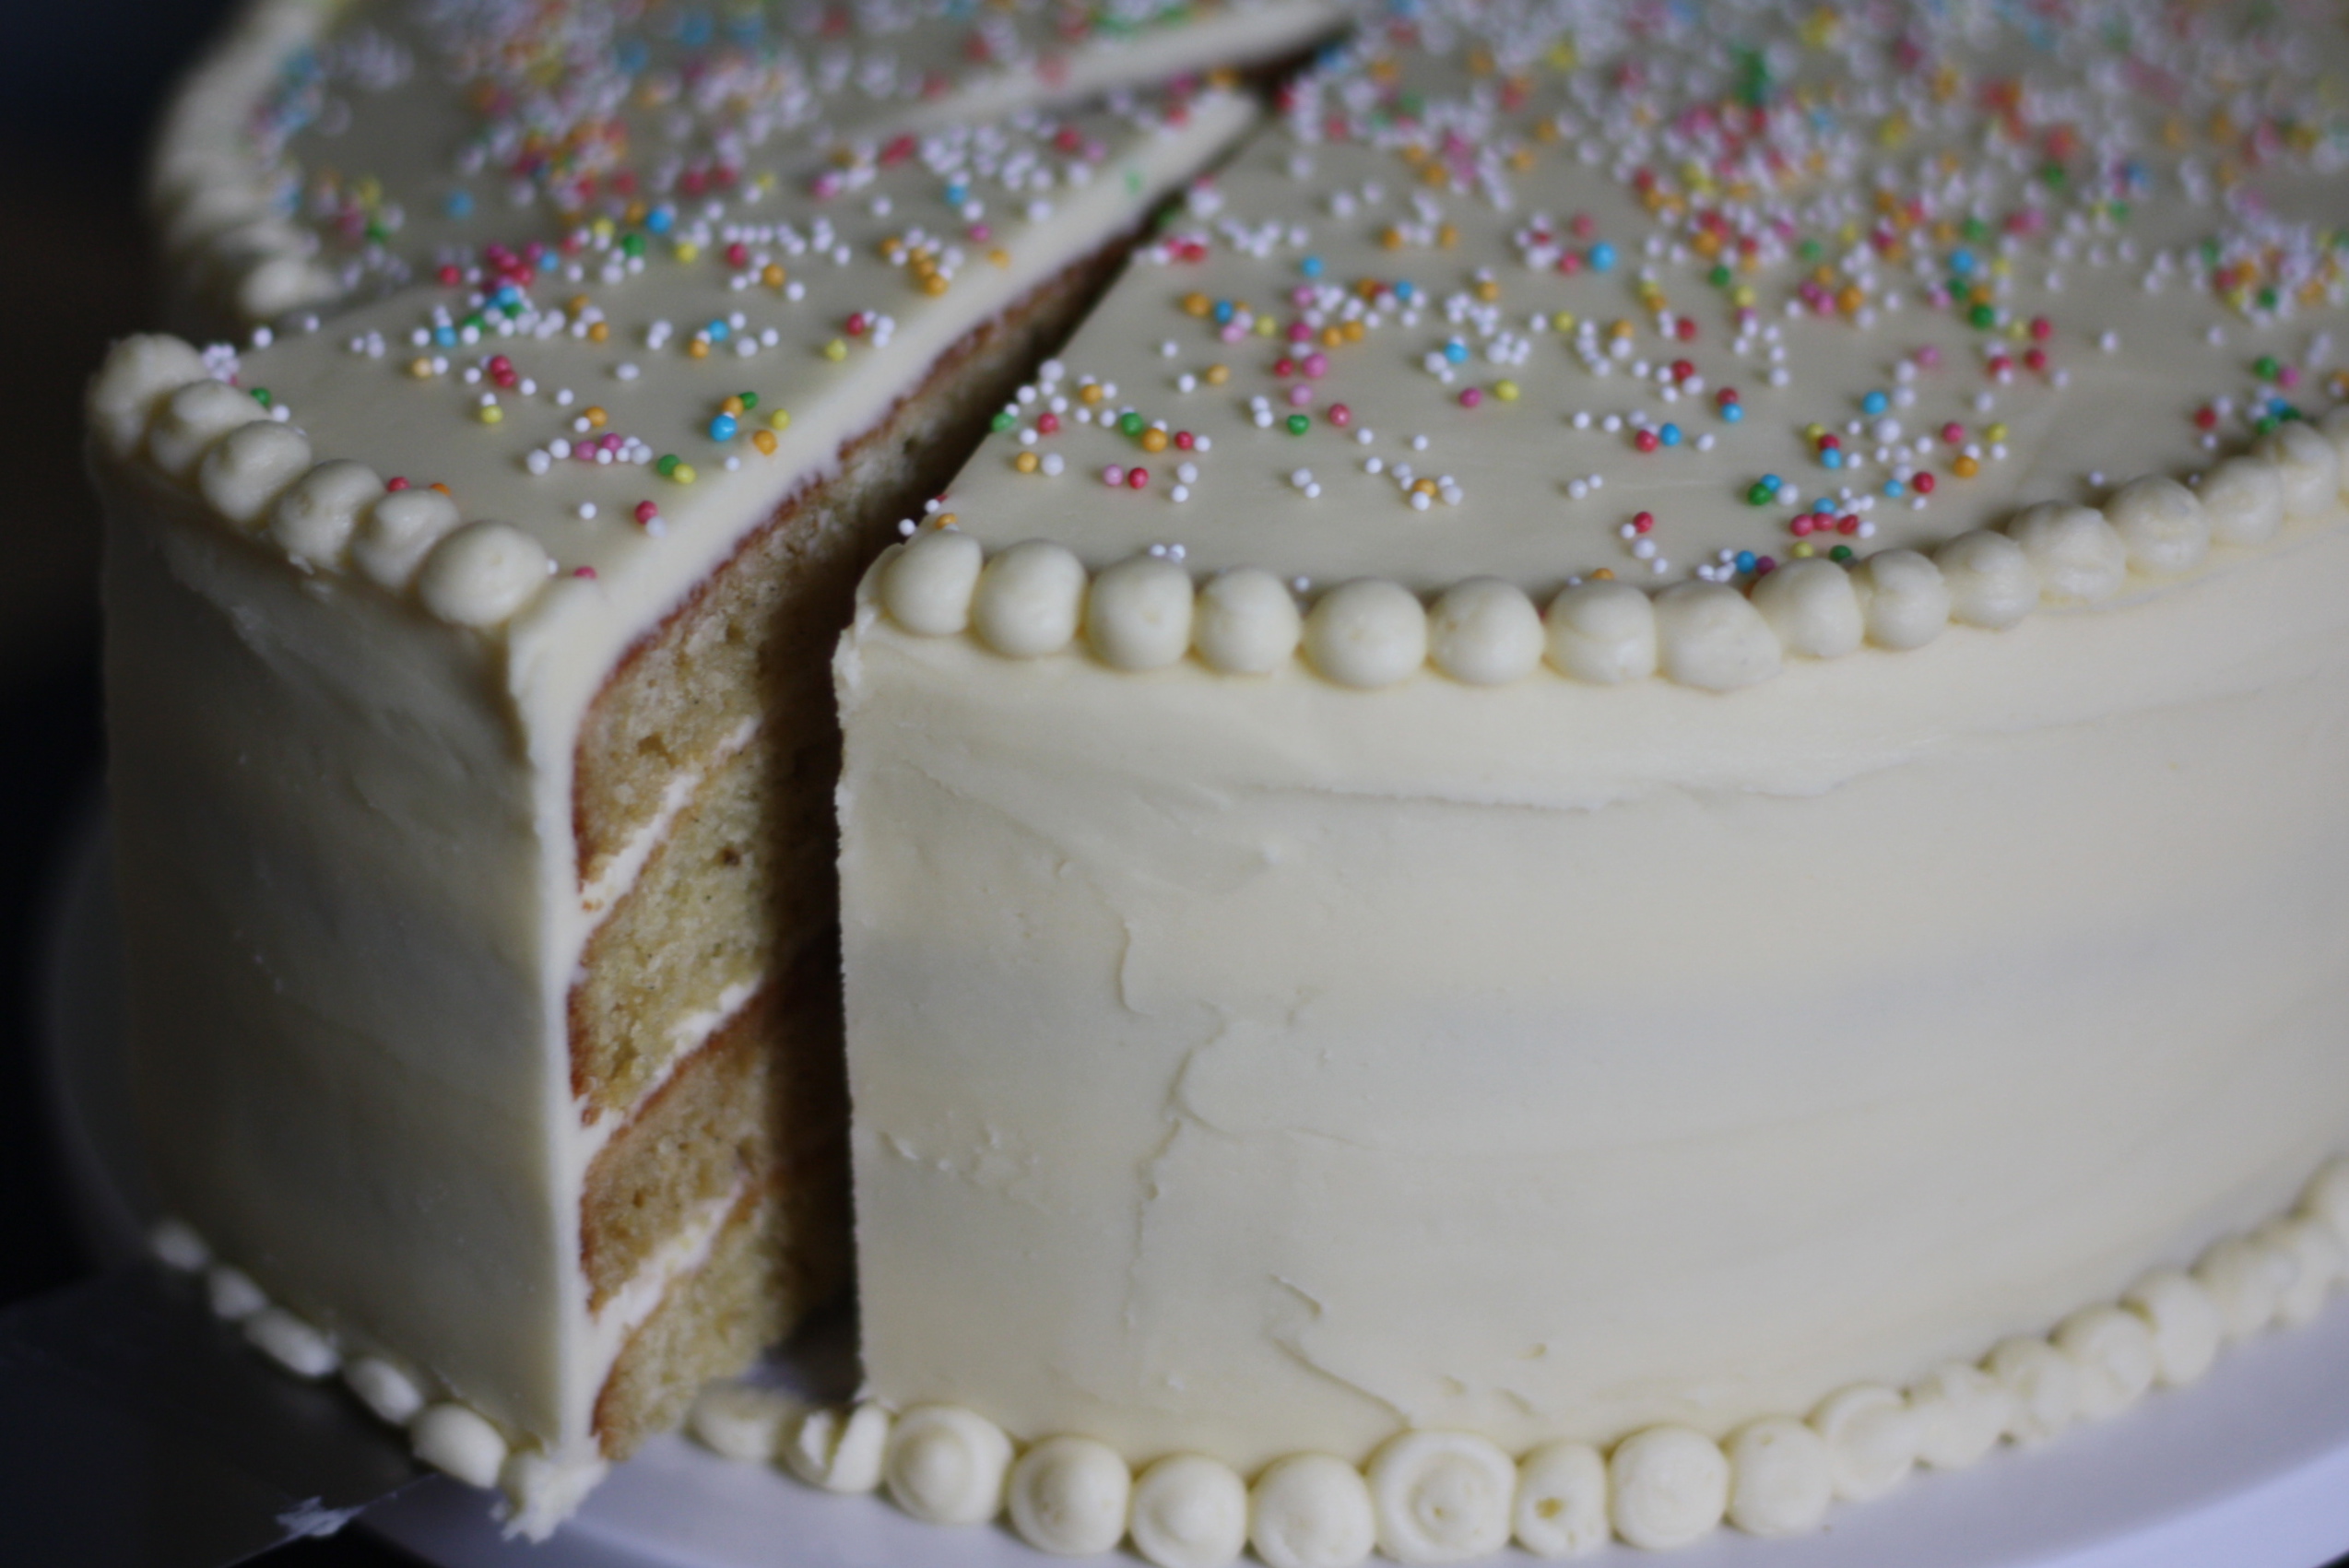
The moment of truth. Cutting into a layer cake is always an emotional mix of both thrill and terror. I am happy to report that there were only good vibes going on in this picture.
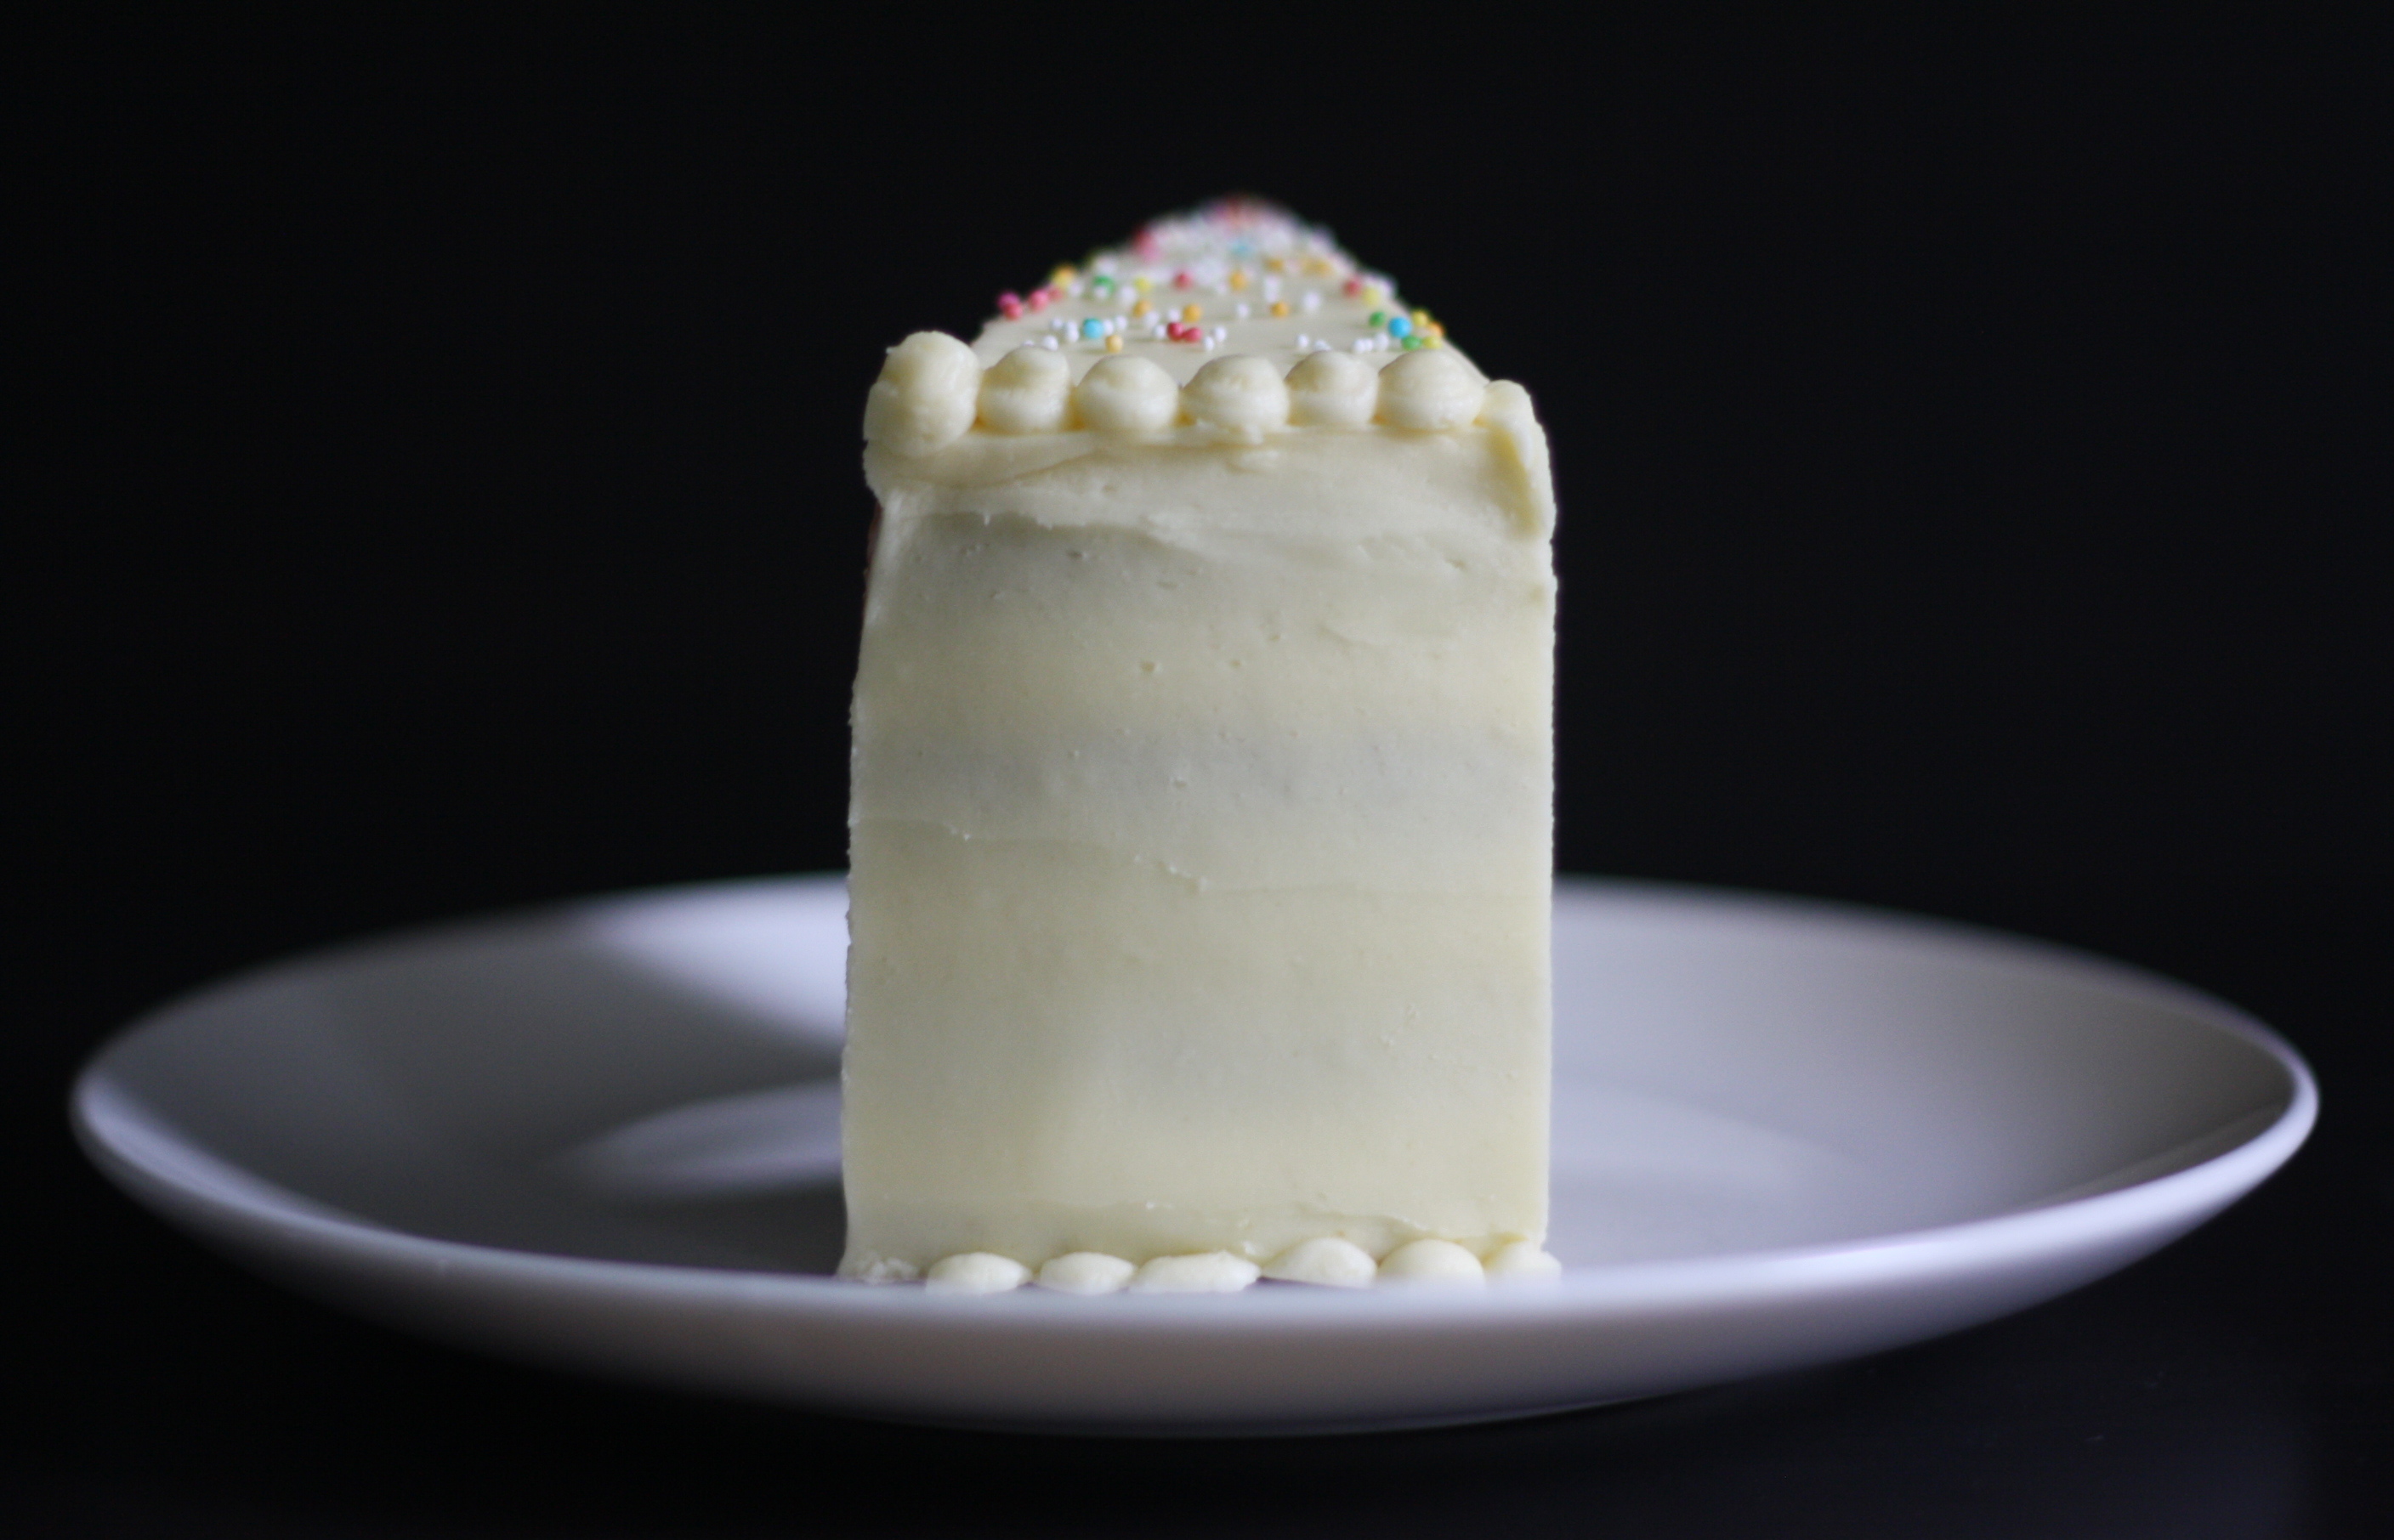
Baker’s reward. It is a known fact that the first slice goes to either the birthday person or the baker, whichever is applicable to the specific situation at hand. Congratulations! Now go forth and cake decorate!
A few helpful links:
- Answers the question: how much frosting do I need for my cake? Also another version but with baking times included.
- How to store your cake for maximum deliciousness.
- Pastry boxes. Worth the small investment because they make traveling with a cake about 179% more enjoyable, even if you have to take your cake on the subway or other mode of public transport. Whomever’s birthday party you are attending will appreciate your extreme dedication to cake travel. They may even buy you a beer for your efforts.
- Want to get super extra fancy-pants ? Learn how to make a frosting rose with this little video tutorial.
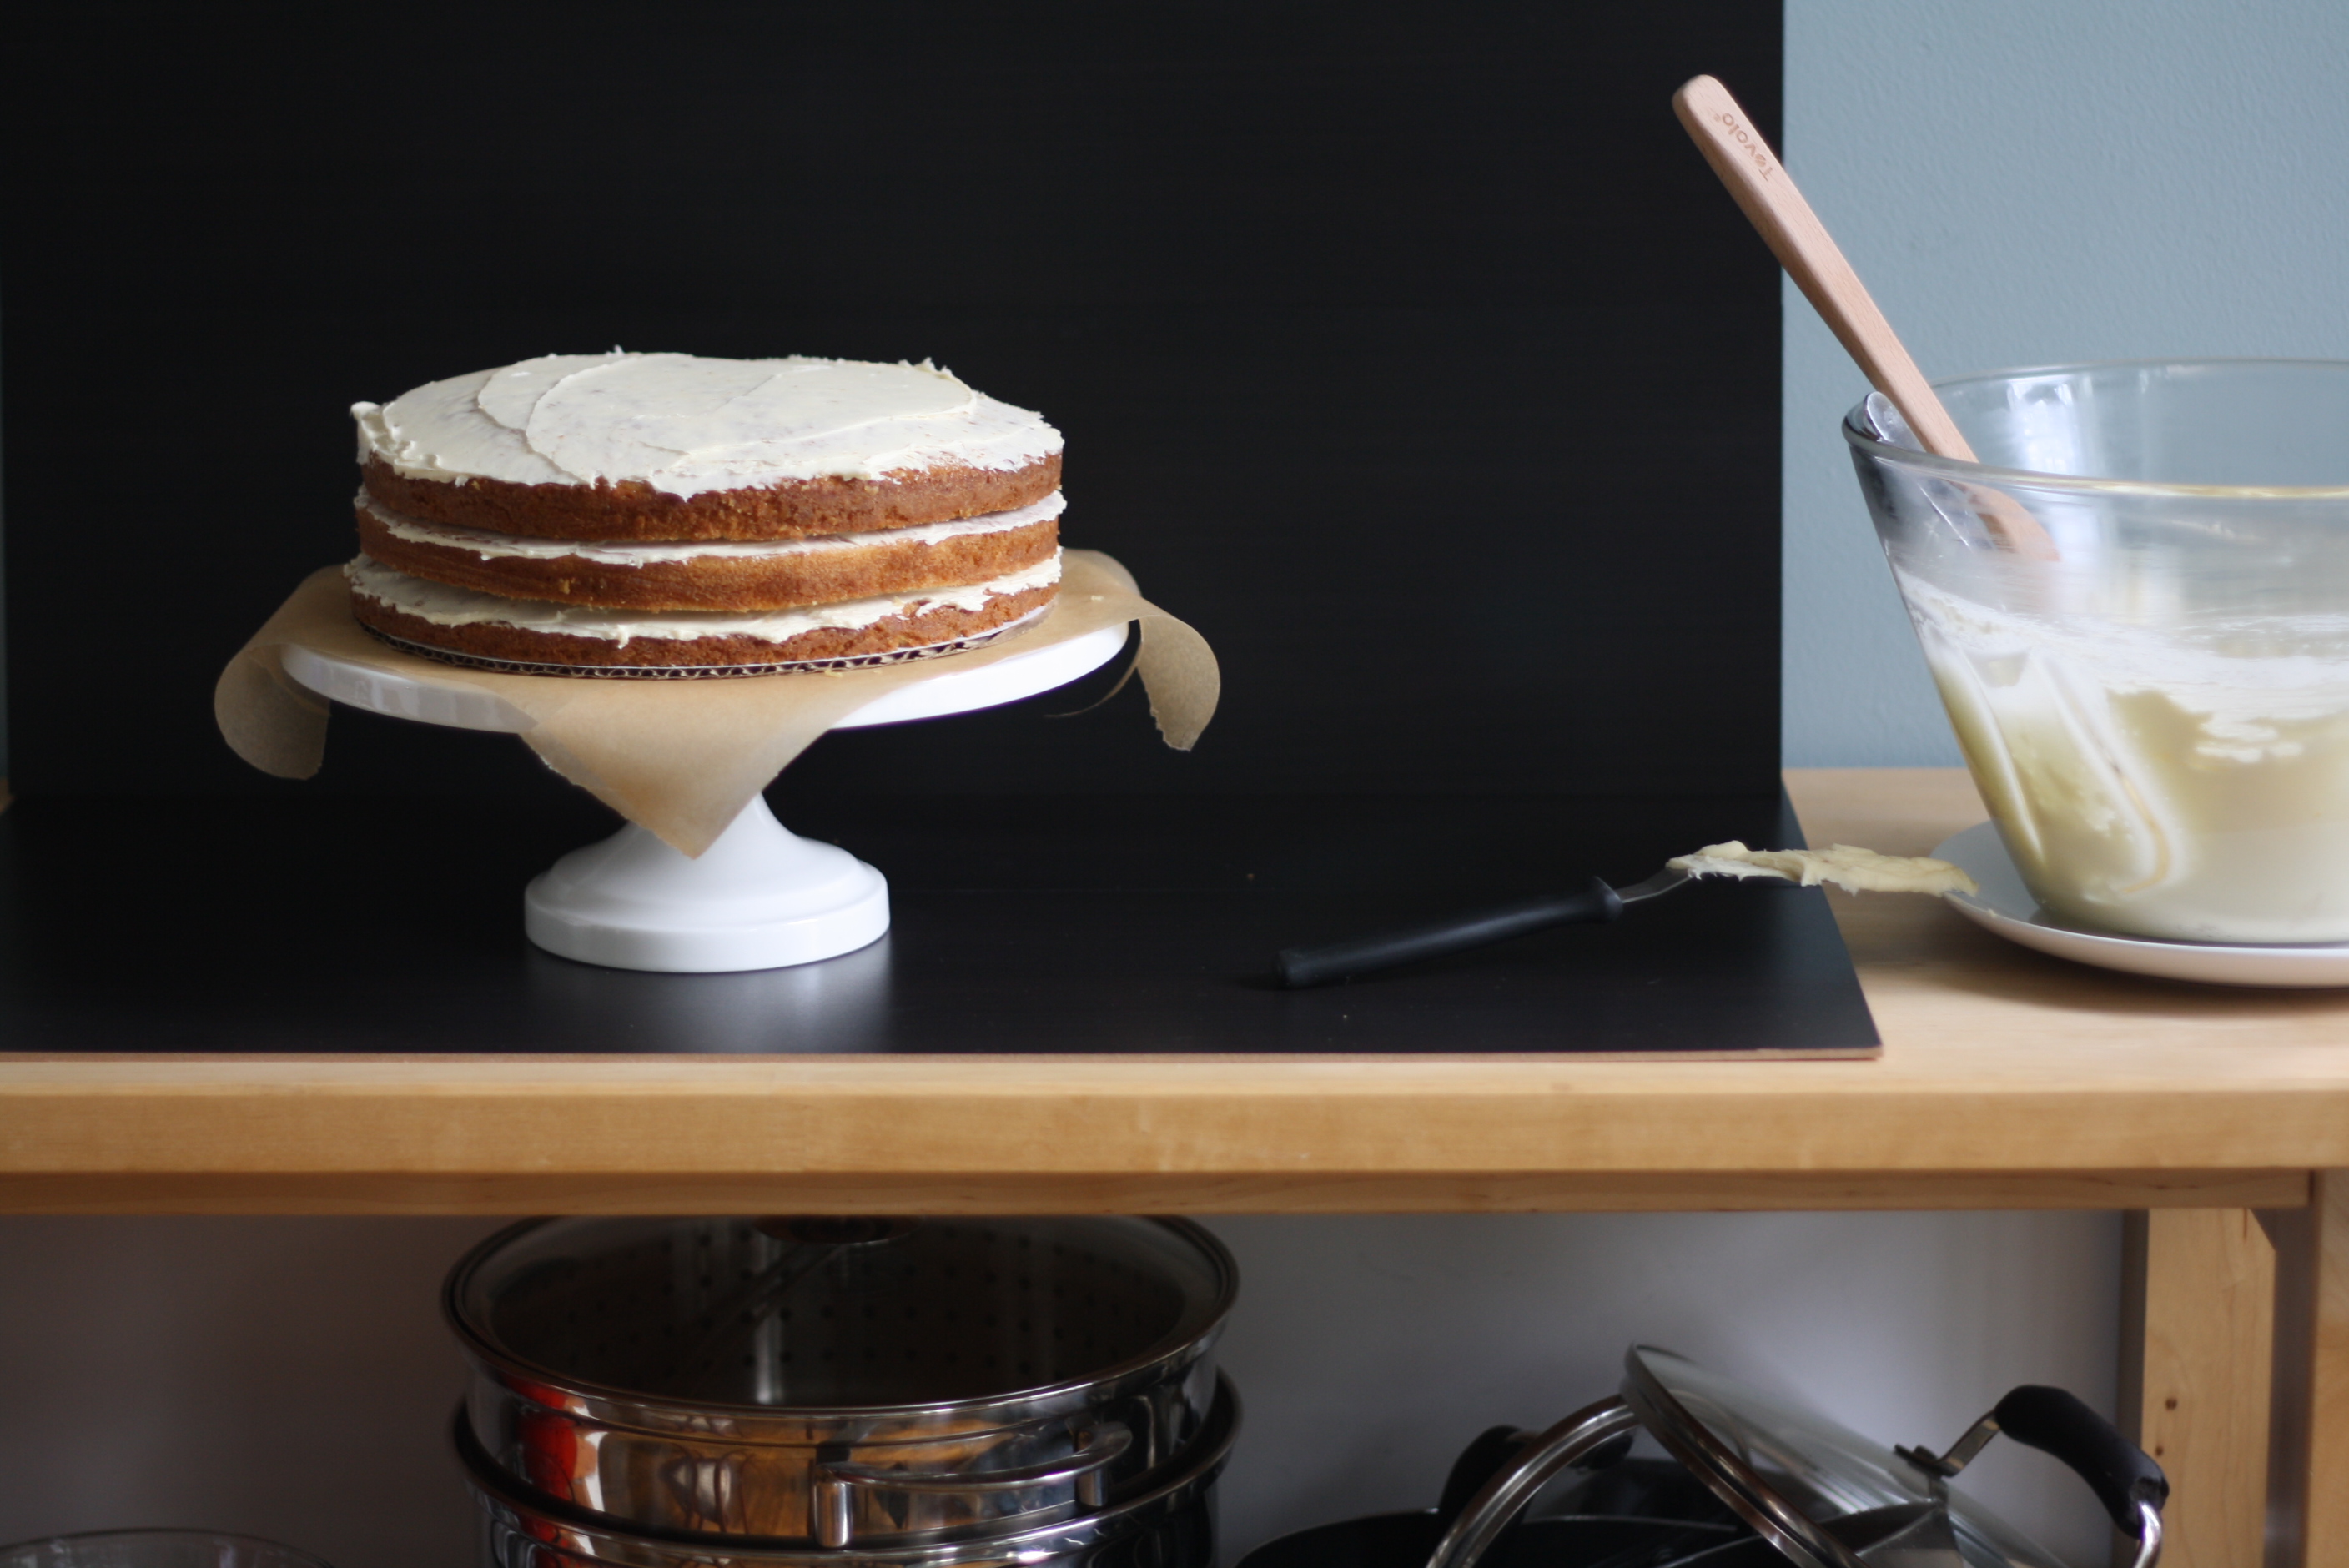
And lastly, a behind-the-scenes peek at my high-tech photography studio.
{ 29 comments… read them below or add one }
OK, how sweet is this cake? Is it the simplicity or the sprinkles? or both? And, my guess was banana ( with bourbon?)… No? Whatever it is I’d like a big ol’ piece right now.
You are so good at frosting! My cakes never turn out that good. : )
LOVED the last picture!
Natalie
i am SO inspired. project cake is definitely happening at some point… once i acquire all the equipment. thank you for this!
That looks so easy! Plus I like the simplicity of the decoration. Can’t wait to try it myself..
Your (?brown butter?) vanilla cake is beautiful in its simple elegance. Thank you for this tutorial. Some of your hints I knew, but several were “ah-ha” moments for me. Using the bottom of a tart pan is brilliant! I worry about sliding layers just moving my cakes from counter to table. I am awed that you can bravely take this beauty on the subway!
Gorgeous cake and awesome post! I usually avoid making layer cakes like the plague, but your sublime photos make me want to bust out my offset spatula and piping bag. Such a fantastic tutorial. Brown butter/bourbon are my guesses, too. : )
Gorgeous! I have always loved layer cakes and find that most anything with lots of layers is yummy! Great idea for an article Lil and that cake looks fabulous!
That is a top notch tutorial right there! My major question is, how do you transport them!
Thank you! I transport all my cakes in cake boxes (such as the ones that bakeries use) which makes cake-traveling a breeze. They are usually sold at baking supply stores or online (see link above) and are worth every penny if you have to travel with a cake!
I’ve always relied on the bundt pan so I didn’t have to under go the agony of trying this mulitlayer mystery. You’ve just inspired me to give it a try. Wonderful tutorial.
Is this photo set-up new or is it inspired by a recently viewed art still-life setup?
Thank you Jean! The set-up has been in use for a while now and is just two pieces of wood from the back of an IKEA bookcase that I didn’t end up really needing. Simple, cheap and effective. Ha!
Love this! I love how the final cake turned out, simple ,clean and super cute! Love!!
How beautiful the colours of your cake are ! I am wondering to whom this piece of art would be dedicated….? Anina
Amazing! Frosting cakes is my weak spot – thanks for the tips… I can’t wait to try them out!
I love your site! I will soon learn the art of baking and with additional insights and tips from your blog, I’ll be all set! Thank you!
Greetings from Philippines! 🙂
This is one of my favorite posts. Mostly because of the sprinkes, of course. Your cakes are so beautiful!
I actually just wept after reading this post. Your comment on the nostalgia of a layer cake, mixed with the discipline and craftsmanship of the decorating, brought to tears.
Brava!
Hi! First time visiting your site and having such a good time looking at the gorgeous treats. This cake looks so beautiful. I love the simple (and so pretty!) design and non-pareil sprinkles are my favorite! Hope you don’t mind if I take this idea very soon in the near future. : )
Project cake is underway as I type, its just chillin in the fridge. I think I may eat the rest of the buttercream before I’ve frosted the whole thing its so good! Thanks for a great recipe!
So lovely to hear Hope! Glad to hear the frosting was enjoyed as the baker’s reward. 🙂
I see that in the pictures the top layer is placed Top Up. The instructions say Bottom Up. Which really is the better way to avoid crumbs?
Hi Don! It may be a little difficult to see in the picture but the last layer was placed on the cake bottom up, as written, but the crumb coat is really the key to avoiding crumbs. Hope this helps! Happy cake decorating!
I adore this post. Well done – your cake looks gorgeous. I love the photos and I think frosting a layer cake is something that once you do it a few times you see it’s not that daunting a task at all.
Dear Butter Me Up Brooklyn: Thanks for the fab tutorial on how to frost a layer cake. I’m both the baker and the birthday girl, and I am trying this two-layer bit for the very first time! The suggestions for chilling the layers before frosting and after the first base layer are marvellous – I would never have thought of that. I went to the next level and added sprinkles to the vanilla cake batter for a “rainbow” style cake, and put themon top as well.
If I need any more cake decorating or baking tips I will choose Butter Me Up Brooklyn again!
Best wishes.
This may be a silly question…. How do you transport your cakes? Do you make tape loops on bottom of cake board and attach to bottom of Tupperware cake transfer? I want to serve my cake on a cake stand in a restaurant but not sure how to avert disaster. TIA!
I wish I had read this article before poorly frosting my cake… Oh well! Maybe next time! Great article!
How big is this cake? It looks like it is about 8 or 9 inches but I just wanted to be sure. Thanks!
wow! very great article and full of information about bakery products.
{ 3 trackbacks }