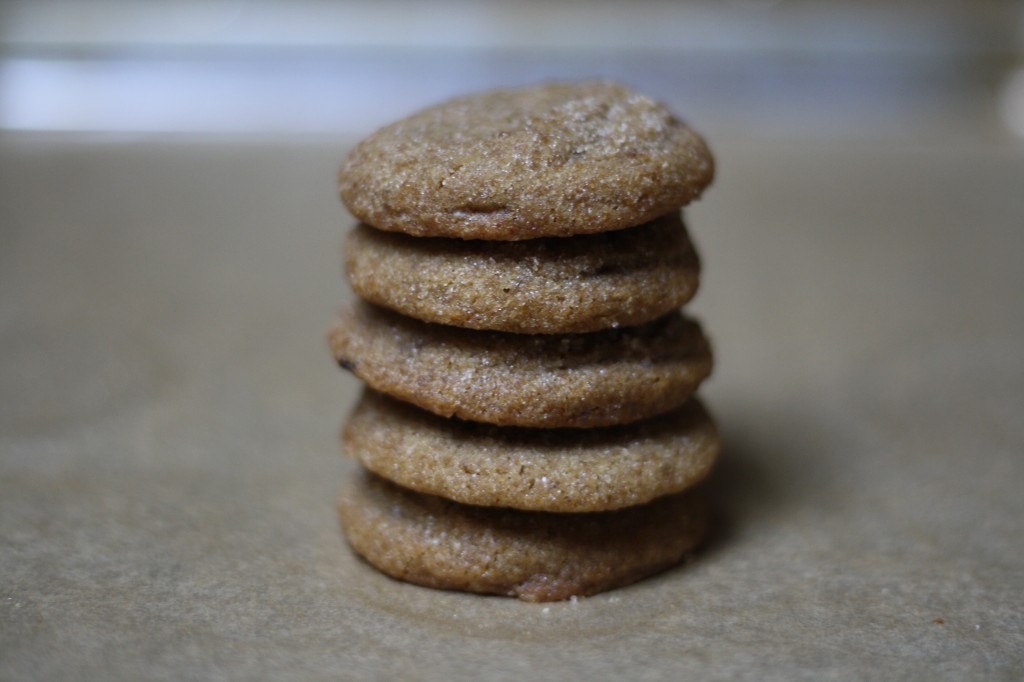
This humble cookie is one that I will admit doesn’t look like much from the get-go. There is no jazzy brightly colored hat with sparkles and bells and whistles to catch your attention. They could easily be passed up for a more exciting treat or something that has at least one single chocolate chip and/or a spicy pecan.
These cookies remind me of my first cat whom I rescued as a stray when I was seven years old because when she came into my life, she didn’t look like much at first glance. Side note: while we are on the subject and because I haven’t changed much since then, she was appropriately given the name Cupcake.
I found her behind an old beat-up van on a Saturday afternoon and she was tiny and scraggly and honestly not the nicest of cats. But to me, she was a gleaming, golden ray of feline sunshine. Miraculously – and by promising to clean my room for all of eternity – I convinced my mom to let me take her home and the love began.
Cupcake begrudgingly put up with a lot. Not every cat will let you take it for walks on a leash but for reasons unbeknownst to me, she tolerated it. At some point during these years she got the unfortunate nickname of “Cuppie” which is quite possibly the worst cat nickname of all time and perhaps due to this, she drew the line at wearing doll clothes.
Cuppie may have never gotten over her scraggly roots in the looks department but she had a heart of gold. And it is what is on the inside that counts, right?
At first glance, these cookies don’t seem like they are going to be the center of the dessert-platter-party. But one bite later and I guarantee the only thing you will be able to say is, “Wowza!”
Brown butter and brown sugar are a match made in cookie heaven. The simple act of browning butter turns these cookies into something special. Brown sugar and a kiss of espresso helps to coax out the coffee toffee flavor.
They are chewy and soft in the middle and slightly crispy at the edges and generally just plain awesome. These cookies will make a friend or two or ten, depending on how many batches you can whip up.
And isn’t it about time to get your holiday bake on!?
Espresso-Kissed Brown Butter Brown Sugar (Coffee Toffee) Cookies
Makes about 2 dozen small cookies
Adapted from Cook’s Illustrated via CHOW
For the cookies:
8 tablespoons (1 stick or 113 grams) unsalted butter
1 cup (200 grams) brown sugar, packed
1 1/2 teaspoons vanilla
1 teaspoon espresso powder (also called instant espresso; I use the Medaglia D’Oro brand)
1 egg yolk
1 cup + 1 tablespoon (135 grams) flour
1/4 teaspoon baking soda
1/4 teaspoon baking powder
1/4 teaspoon salt
For the final toss:
2 tablespoons (25 grams) brown sugar
2 tablespoons (25 grams) sugar
Preheat oven to 350. Line a baking sheet with parchment and set aside. In a small bowl whisk together the sugars for the final toss and set aside.
Cut 2 tablespoons (28 grams) of butter into small pieces and place in the bottom of a medium bowl. Set the bowl aside.
Next: brown that butter! Melt the remaining 6 tablespoons (85 grams) of butter in a medium skillet set over medium heat, stirring constantly, until it begins to foam. Continue to cook and stir until the foam subsides and milk solids begin to form on the bottom of the pan. Keep a close eye on the pan and turn down the heat if things start to get too toasty. When the butter has deepened in color and smells wonderfully nutty, turn off the heat and pour the butter (and all those tasty brown butter bits) into the bowl with the remaining butter.
Stir to combine until all the butter has melted, then add in the brown sugar and mix well. Add the vanilla, espresso powder and egg yolk and stir until smooth. In a small bowl briefly whisk together the flour, baking soda, baking powder and salt then add the dry ingredients to the brown butter mixture and stir to combine. The dough may seem a bit on the crumbly side.
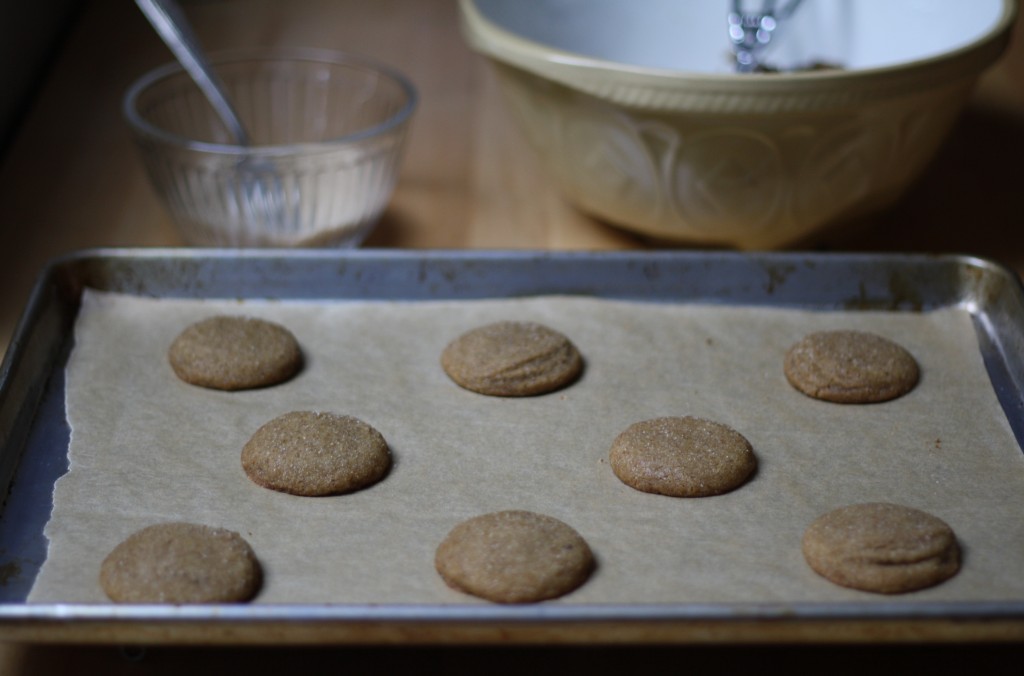
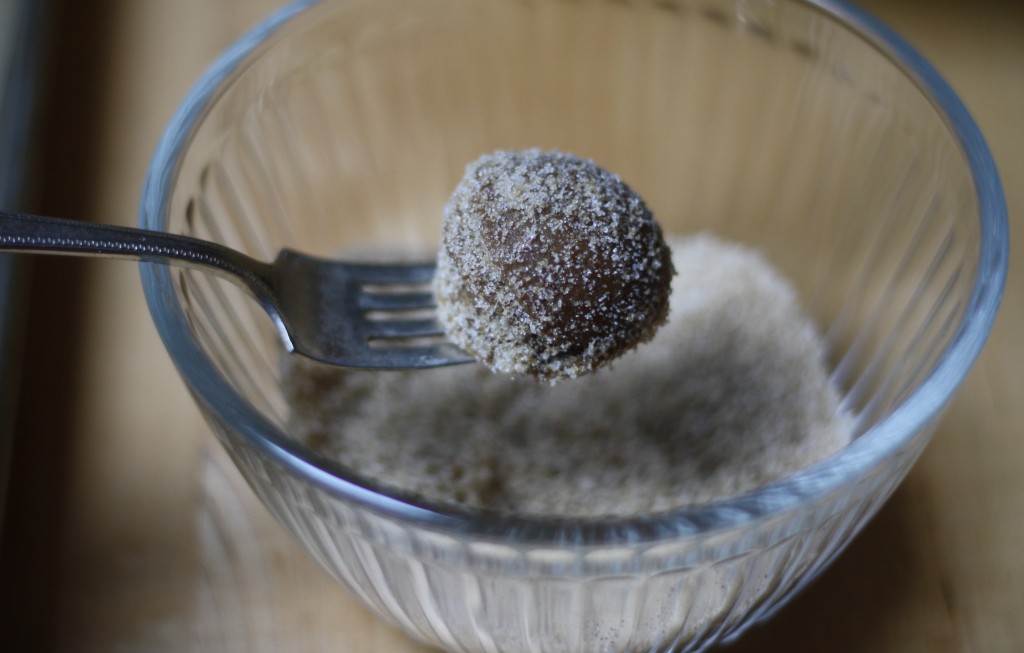
Use a scoop to drop one ball at a time into the small bowl of sugar for the final toss. Roll the ball around until covered and place on the prepared sheet. Bake for 8-9 minutes or until the edges of the cookies are lightly brown. Let cool on the sheet for several minutes then transfer to a wire rack to cool completely.


{ 54 comments… read them below or add one }
Delicious. Straight delicious. They’re the Pringles of the cookie world.
These look like gift worthy cookies, cute, different and delectable.
Love the simplicity to these. They’re so pretty!
Once, again! Looks great! ~ nerdwithtaste.wordpress.com
I love perfectly simple cookies like these; I don’t need all those fancy sprinkles really just something that tastes delicious. Excited to try these!
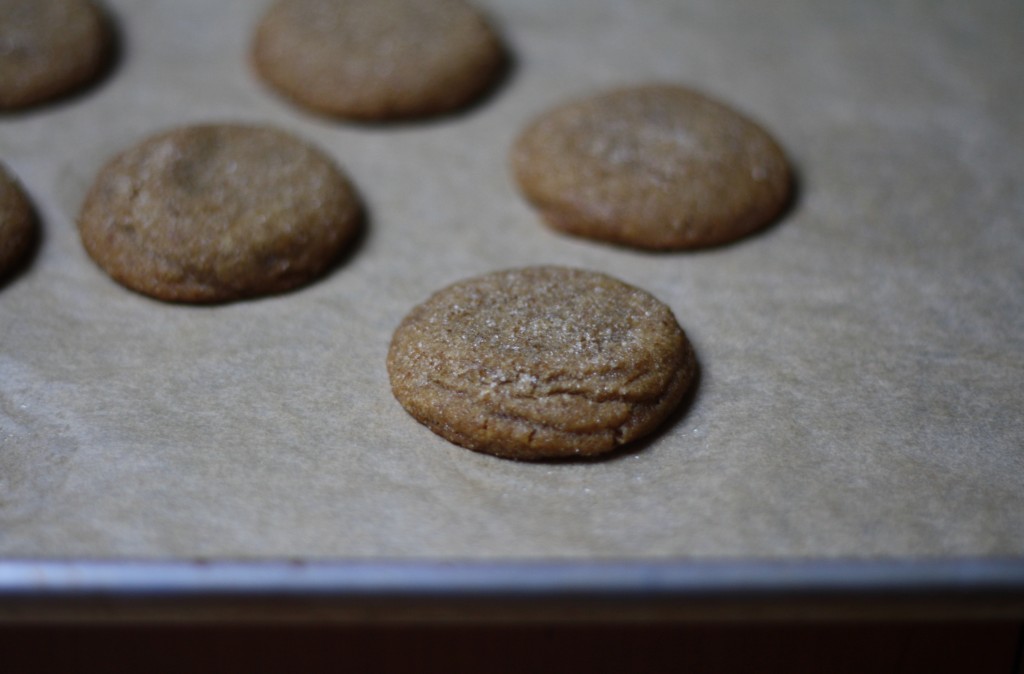
I wish I could walk my cat on a leash! These cookies are absolutely beautiful – no excuses necessary! The flavors sound amazing. Love the way you captured their craggy tops in these photos. 🙂
These sound wonderful, Lilly. How big is that scoop? I have a 1tbl size, but this one looks like it could be smaller.
Thanks Jean! The scoop shown above is a size #60 which is just about a tablespoon and when baked, a cookie should be about 3-inches in diameter.
Is it ok if I add a little cinnamon? I love cinnamon, in general. So, I am just asking. Thanks.
Cinnamon would be an excellent addition to these cookies! Happy baking!
Thanks for replying. I will definitely try baking and do two different versions! Have a lovely weekend!
I believe you! I’ll always take an unassuming cookie over an excessively decorated one, because you know it’s something special…
Plus, they’re less work!
I love the flavors in these cookies. As for the appearance, the understated simplicity is perfect to me. I love serving cookies as dessert at lunch and dinner parties because they keep the atmosphere fun, relaxed, and REAL.
Help! I tried these today and they didn’t spread. Where did I go wrong?
Oh no, that’s the worst and I’m sorry to hear! It could be a variety of things such as the oven temperature (an oven thermometer is fairly cheap and is much more accurate than your dial). It also could be too much flour. I use the scoop and sweep method as shown here but I love my kitchen scale for even more accuracy. Hope this helps for future batches! Happy baking!
I’ll try again today, and I’ll be more careful about my flour. I should probably mention that everyone absolutely loved them! (Even my Belgian friends, who think cookies are a silly American thing.) I was just being silly pouting because I wanted them to be as pretty as yours. I’d never tried to brown butter before and it was a very exciting experience. Thank you so much for your help, and your lovely recipe!
Oh good! I’m so glad they were enjoyed! And – welcome to the land of brown butter. It makes everything better! 🙂
How far in advance do you think you could make this dough? Would anything go wrong by storing it overnight?
You could make the dough about 2-3 days in advance, then cover with plastic and refrigerate. When you are ready to bake, let the dough come back to room-temperature, make the sugar for the final roll, and bake!
Simply delicious!
Oh my goodness these actually look right up my alley. Perhaps it is an European thing (I lived there for 10 years)= but I actually appreciate simple biscuits with loads of intense flavour. No frosting necessary.
Espresso kissed sounds so much better than espresso flavoured – almost sold on the title. Dark muscovado could be even better with this since the coffee will tame the molasses notes without killing the heady fragrance. My only criticism if I may is that real coffee will add so much more flavour than espresso powder – only trick is how do you get espresso strength coffee to deliver the strength of “essence” or espresso powder – with a lot of work in the kitchen I imagine…
I had the same issue as Lille! But the taste was so good I didn’t care one bit. Any chance that using a whole egg instead of just the yolk would help?
Oops! I meant the same issue as Rose, Lillie!
Hi Sharon! Oh no, I’m so sorry to hear that! Using only the yolk makes for a maximum chewy-factor but due to other variables (i.e. weather, etc.) perhaps the whole egg would provide just a bit of the extra moisture you may need in your kitchen! Hope the second batch is successful and I’m happy to know they were enjoyed! 🙂 I’d love to know how round two turns out.
In the interest of science (ahem!) I tried these again, and measured the brown butter to 1/3 cup, etc. Still no spreading. Maybe it’s my oven. :(. I will make a HUGE sacrifice and eat them anyway, but just wanted you to know. 🙂
These will be the perfect addition to a finals week care package! I may have to keep some in the freezer for my own use, however 🙂 Thanks!
Yes! Definitely save a few as your bakers reward! 🙂
Hey, I love this recipe but I use a tablespoon measuring scoop and it stays a lot rounder when they come out…yours look flat…why do mine stay so round?
Hi Seth! I’m a bit stumped on why this is happening since a few other people have had the same problem of the cookies not spreading. I have made them multiple times and my testers haven’t reported any problems. My only guess is that a bit too much flour is being added. I use this method of measuring when I don’t have my kitchen scale (but I love my scale for always providing the most accuracy). It could be due to other factors (i.e. weather, etc.) in your kitchen and as suggested above, I would try adding a whole egg instead of the yolk next time. Hope this helps! I’d love to hear if these changes work for you in the next batch. Happy baking and thanks for reading!
I had the same problem of the cookies not spreading at all and I always use the scoop-and-sweep method to measure when I’m baking. The cookies still tasted fabulous though. What do you think about after browning the butter and then mixing it with the remaining butter, once it’s all melted together, putting the butter back in the fridge or leaving it on the counter to solidify. I think if the butter was once again a solid it would allow the cookies to spread once they are baked. Just a thought, not sure how browned butter would do reversing back to it’s solid state?
If anyone has tried using a whole egg I’d be curious to hear how those results are. I plan on baking a second batch of these this weekend and I’m wondering how (if at all) I should make the adjustments. GREAT cookie though, the flavor is fantastic.
Hi Kathy! I’m so sorry to hear that you are having problems with this recipe and I’m going to get to the bottom of this! I know how frustrating it is when baked goods do not come out as expected but I am a bit stumped on why this keeps happening. I think that adding a whole egg and not adding the extra tablespoon of flour could be the proper adjustments. I am going to try a few batches this weekend as well to see if I can figure out what is causing the cookies to not spread. Thank you for reading! And I’m happy to hear the cookies were enjoyed despite not spreading!! 🙂
Thanks for the reply Lillie, please post your findings if you do make more, but if you weren’t having the problem in the 1st place….hmm….I don’t know why it’s only happening to some of us.
I will try your suggestions and let you know the outcome, although the taste of the cookie is SO good, I hate to change anything just to get a flatter cookie!
It really doesn’t matter that the cookies are rounded, actually they look fine, they’re cute, and the taste is unbelievable!
Happy Baking!
Thank you Kathy! I hope to get to the bottom of this issue soon and I’ll let you know what I find! 🙂
I haven’t tried this recipe, but I’m a baking nerd, and I have a hypothesis re: cookies not spreading. Some butters have a higher fat content than others (European-style butters like plugra and strauss). When the butter cooks during the browning process, it’s possible that some moisture is lost through evaporation (steam). I’m wondering if butter with a higher water content loses more moisture, thus leaving less butter, which would cause a drier dough that spreads less?
A second theory is that organic brown sugar contains more molasses, and that could affect the moisture content of the dough.
Love your site, Lillie, and hope to try these soon!
Hi!! Thank you so much Alanna! I am a fellow baking nerd and have been thinking along your same lines. 🙂 What has me stumped is that I myself have made these cookies four times without fail, and two friends have made them without a problem so I’m stumped on why so many readers have had the exact same problem! Perhaps together we can all get to the bottom of the brown butter brown sugar cookie mystery because the flavor is out of this world amazing and worth every test batch!! 🙂
It did take my butter a while to brown, I used plugra brand butter but I used a small saucepan and not a skillet. I wonder if there wasn’t enough room in the saucepan for the butter to brown quickly so perhaps it did lose too much moisture while it continued to boil. I was stirring very often, but it boiled for a while before it even started to turn. I’ll try a skillet this time to see if I can shorten the time the butter is cooking. Thanks for the insight.
I had the same problem with no spreading and on the second batch did the whole egg and cookies still did not spread. Someone asked me if I used organic brown sugar which I did. They told me it is not the same as conventional brown sugar. Did you use conventional or organic?
Also how many minutes do you brown the butter in the pan? Maybe I left it in too long and like the person above said it evaporated too much moisture? I never smelled the nutty smell but did see the solids form.
I used conventional dark brown sugar (specifically, C&H brand). The butter should take about 5-7 minutes to brown, depending on the pan used and the specific type of range. After the solids form they will begin to deepen in color and smell nutty. I will hopefully be trying these today and will measure the final amount of brown butter as to provide more specifics for the process. I am so sorry to hear that there have been so many issues with this recipe and I hope to find out how to get everyone’s cookies to spread as they should! Thank you!
I used Domino’s dark brown sugar and the 2nd batch with a whole egg did not spread either. Lillie, did you use light brown sugar? Could this be the difference?
Hi Kathy. I used C&H dark brown sugar which is the west coast equivalent to Domino’s. Dark brown sugar has more molasses and therefore more moisture but I have a feeling that what is causing the lack of spreading is the butter browning at different rates which therefore affects the final outcome of the cookie. I hope to get the measurement of the final amount of brown butter which may be able to help standardize this recipe. Thank you!!
Cookie Update: I made these cookies last night and have a few clarifications that I hope will help anyone who is having the problem of their cookies not spreading. The final amount of butter when it was finished browning was 1/3 cup. I used Whole Foods brand unsalted butter, just the egg yolk and C&H brand dark brown sugar and the cookies spread as they should. I hope this helps and happy baking! 🙂
Lillie ,I am awed by your dedication to this recipe. Giving your all for delicious 🙂 Now that you have worked so hard on it, I am making it tomorrow morning.
Thank you Wendy! I hope they turned out well for you! Happy holidays!
I too am awed by your dedication. Thus is good blog karma! I wish you all the best!
Thank you Debbie! I hope this helps for all!
These were DELICIOUS and a huge hit at Christmas! Thanks for the great recipe!
Yay!! So happy to hear they were a hit!
Yes I am baking for Valentines Day for my grown up kids
These were so easy to make and SO GOOD! It made 24 and within minutes there were only 11 left…and only three of us live in my apartment! They are crunchy on the outside and soft on the inside. The smell also reminded me of Disney at Christmas time (I’m from Orlando) which was an added bonus 🙂
Yes! So happy to hear they were a hit. They don’t last long in my house either! xo
Holy toffee goodness! This is one delicious cookie! So quick and easy to make. I actually had the opposite problem of what people seemed to have here… my cookies got wafer-thin, but oh my, the were still slightly gooey in the middle, yet crunchy and firm. After I had a slight desaster with the ginger maple snaps, I rolled the dough in two logs, refridgerated them and cut little slices (about a cm thick). It was actually fun watching them in the oven as they got bloated up like little balloons and then just gave up and flattened on the cookie sheet. Love your recipes, Lillie! Especially because your recipes never require fancy equipment or lots of space, yet everything is simple and delicious (and never boring!).
For anybody wondering about baking these at high altitude (5,000 ft. where I’m at)….
30 T Butter
1 c Brown Sugar
1 T + 1.5 t Vanilla
4 T Instant Espresso <—– the flavor really hasn't come out for me, even with this much. Would love to know if there's an easier way to get a LOT of coffee flavor…
12 Egg Yolks
3c AP Flour
3/4 t BS
3/4 t BP
3/4 t Salt
I also refrigerated the dough for around 30 minutes before baking to help keep them chewy and soft on the inside.
The cookies looks very crunchy! 🙂 I love it all.
And super thanks for sharing that recipe, will definitely try it.. I love cooking! <3 Hihi.
{ 1 trackback }